A step-by-step guide to e-Invoice integration
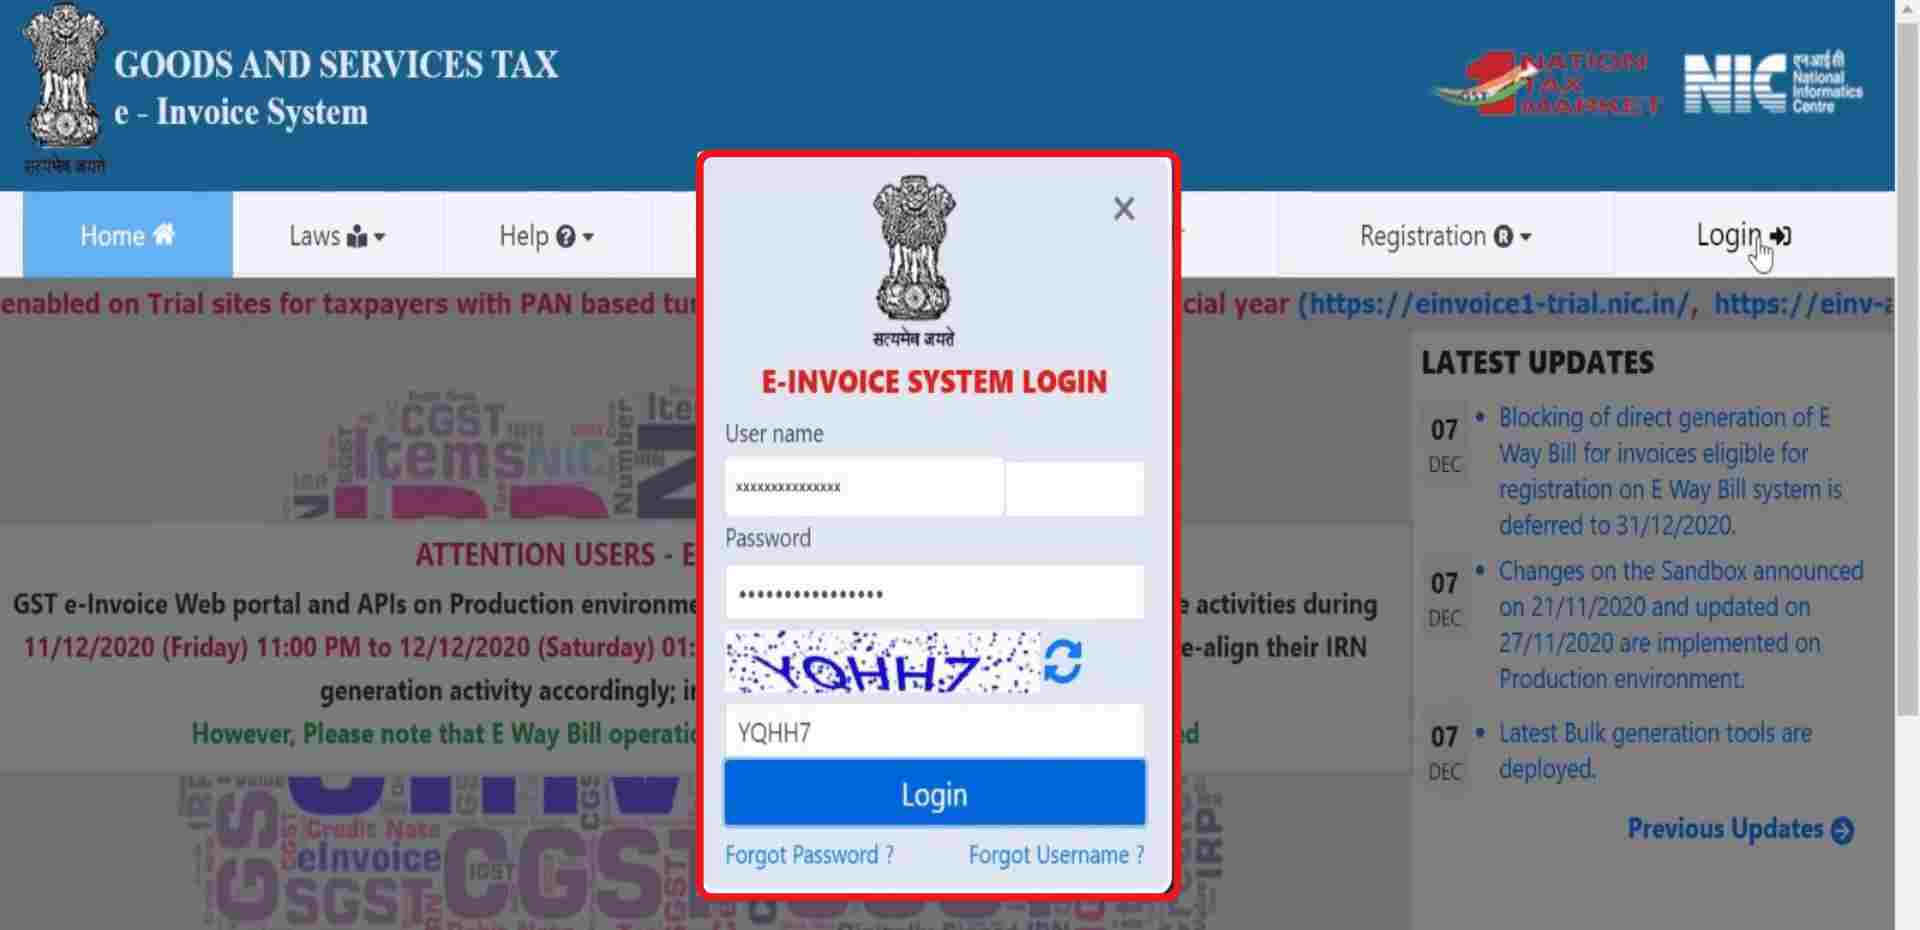
Step 1: Go to e-Invoice Portal
Login to E-Invoice Portal with your credentials
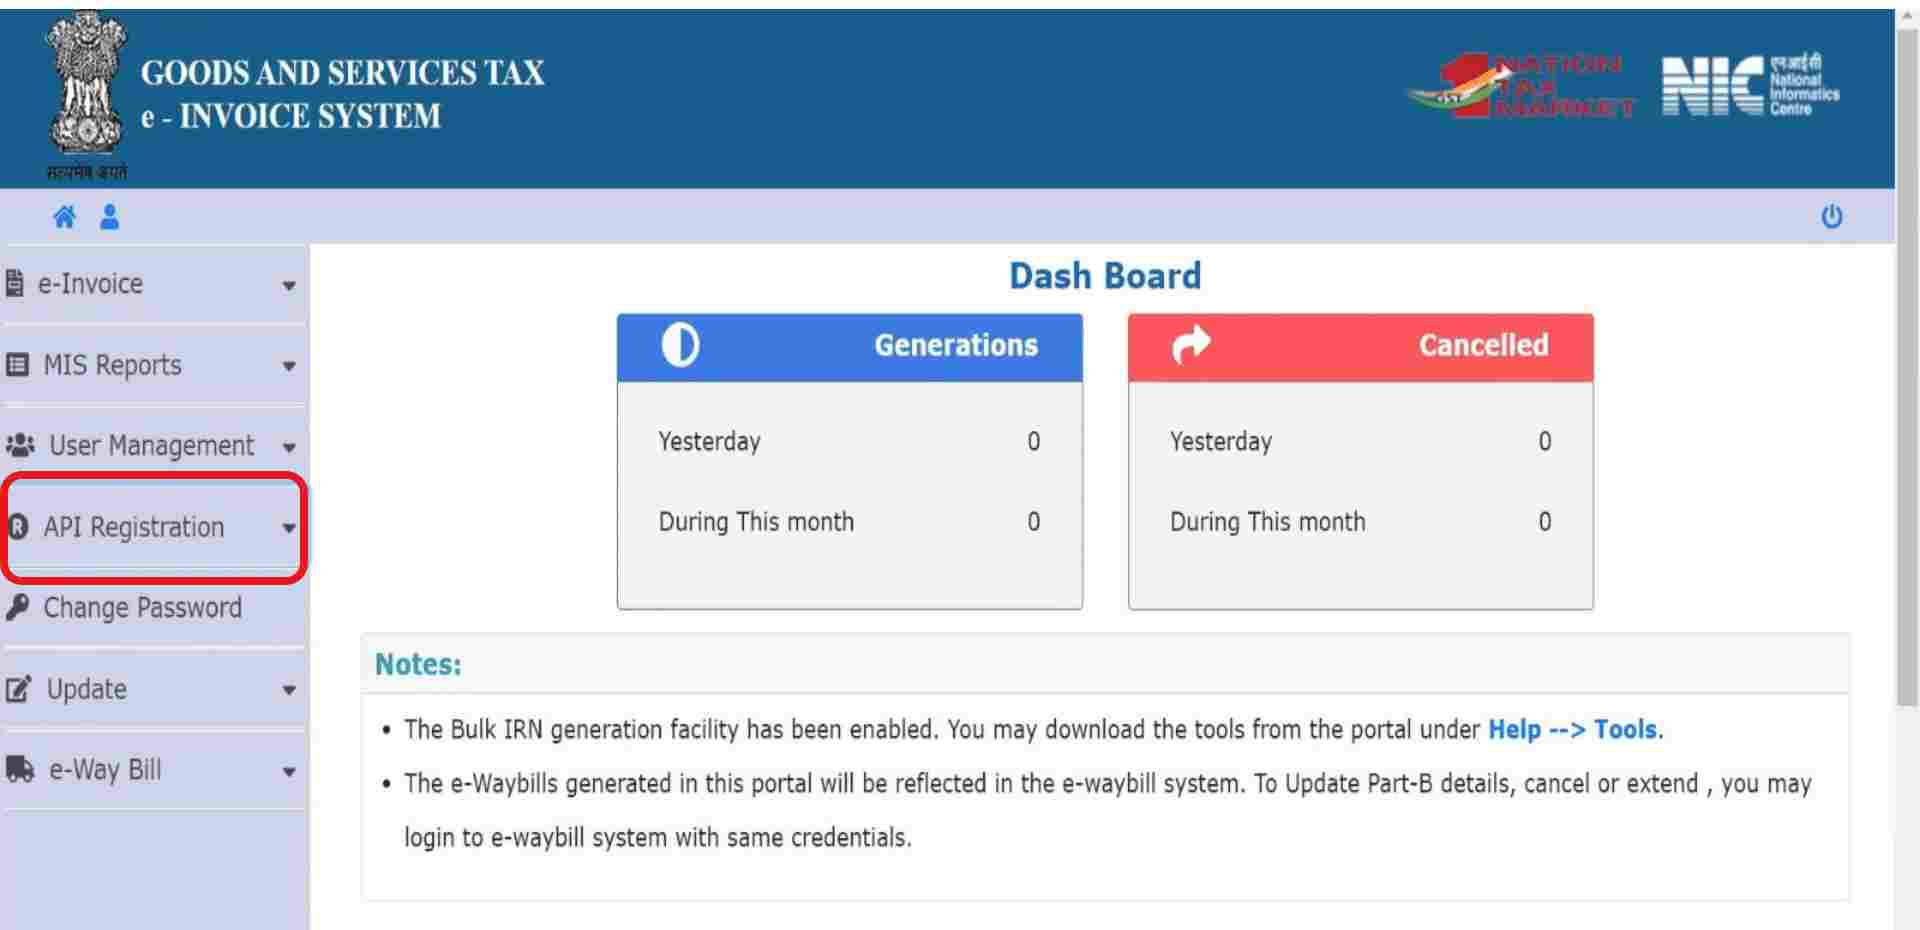
Step 2: API Registration
Select ‘API registration’ from the main menu on the left side.
Now, click on ‘Create API User’ under User Credentials in the API registration menu.
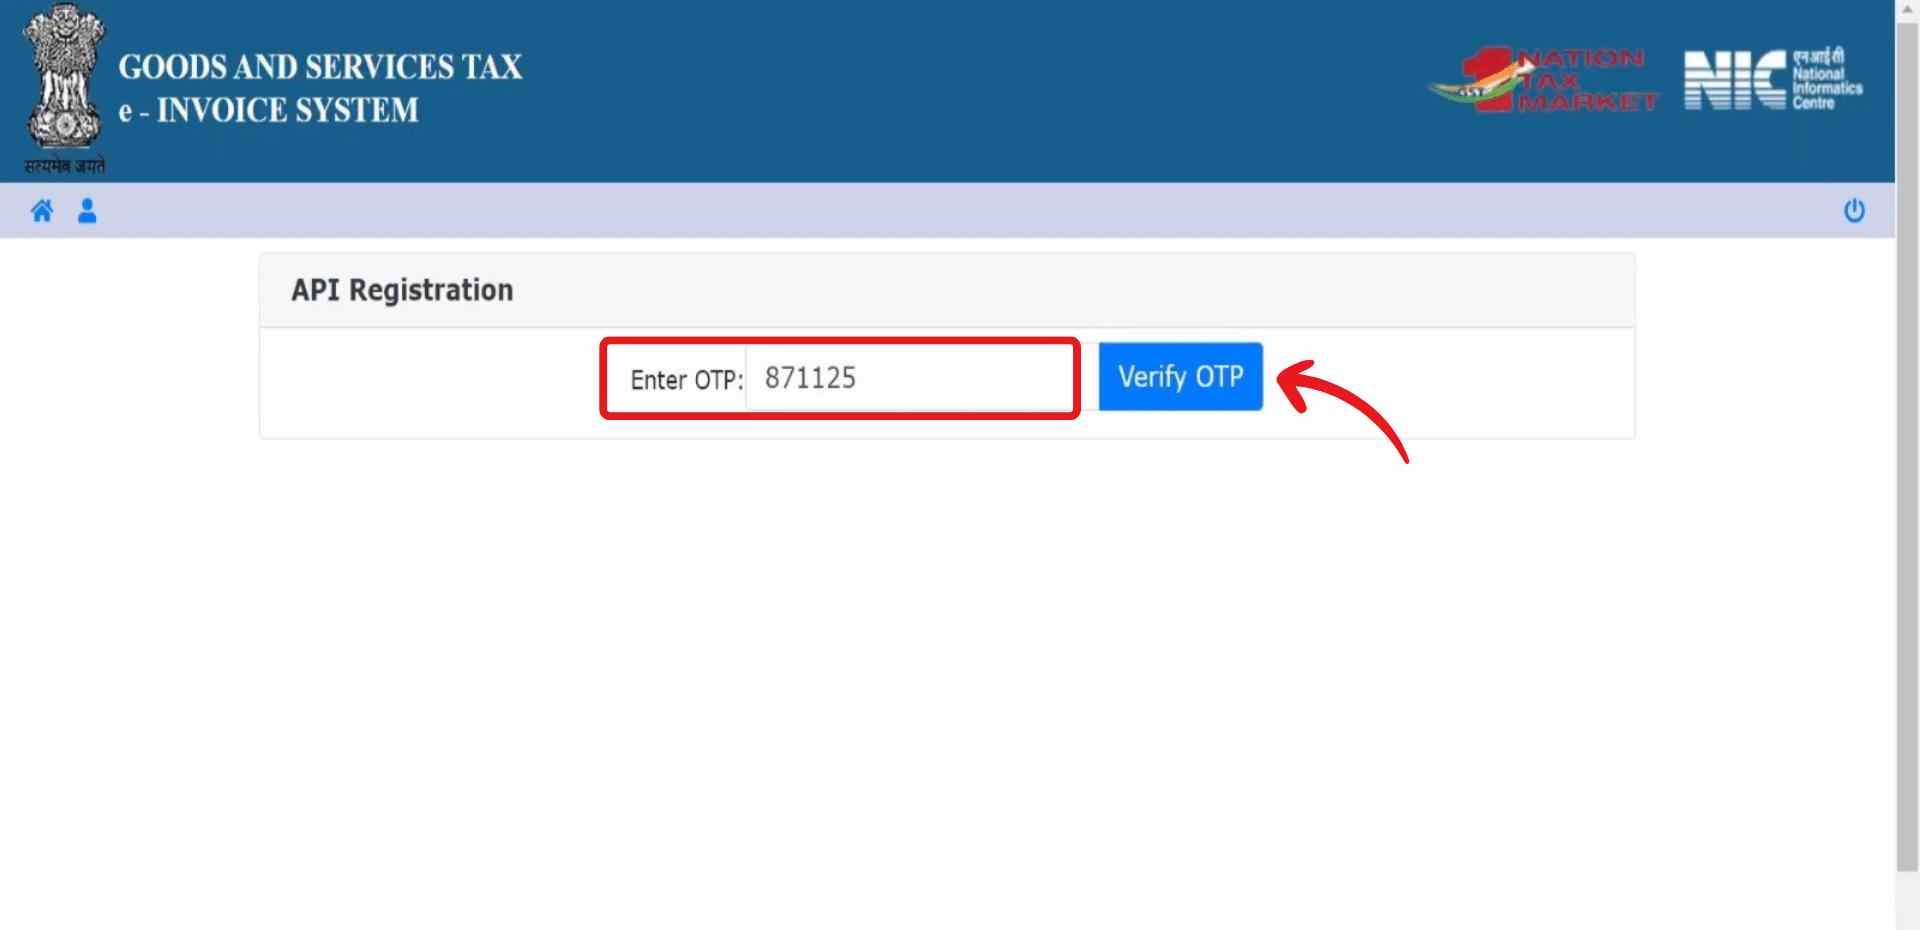
Step 3: Verify OTP
Click on Send OTP to Verify yourself.
Now, you will receive an OTP on the registered mobile number. On entering the OTP, an API registration form will open.
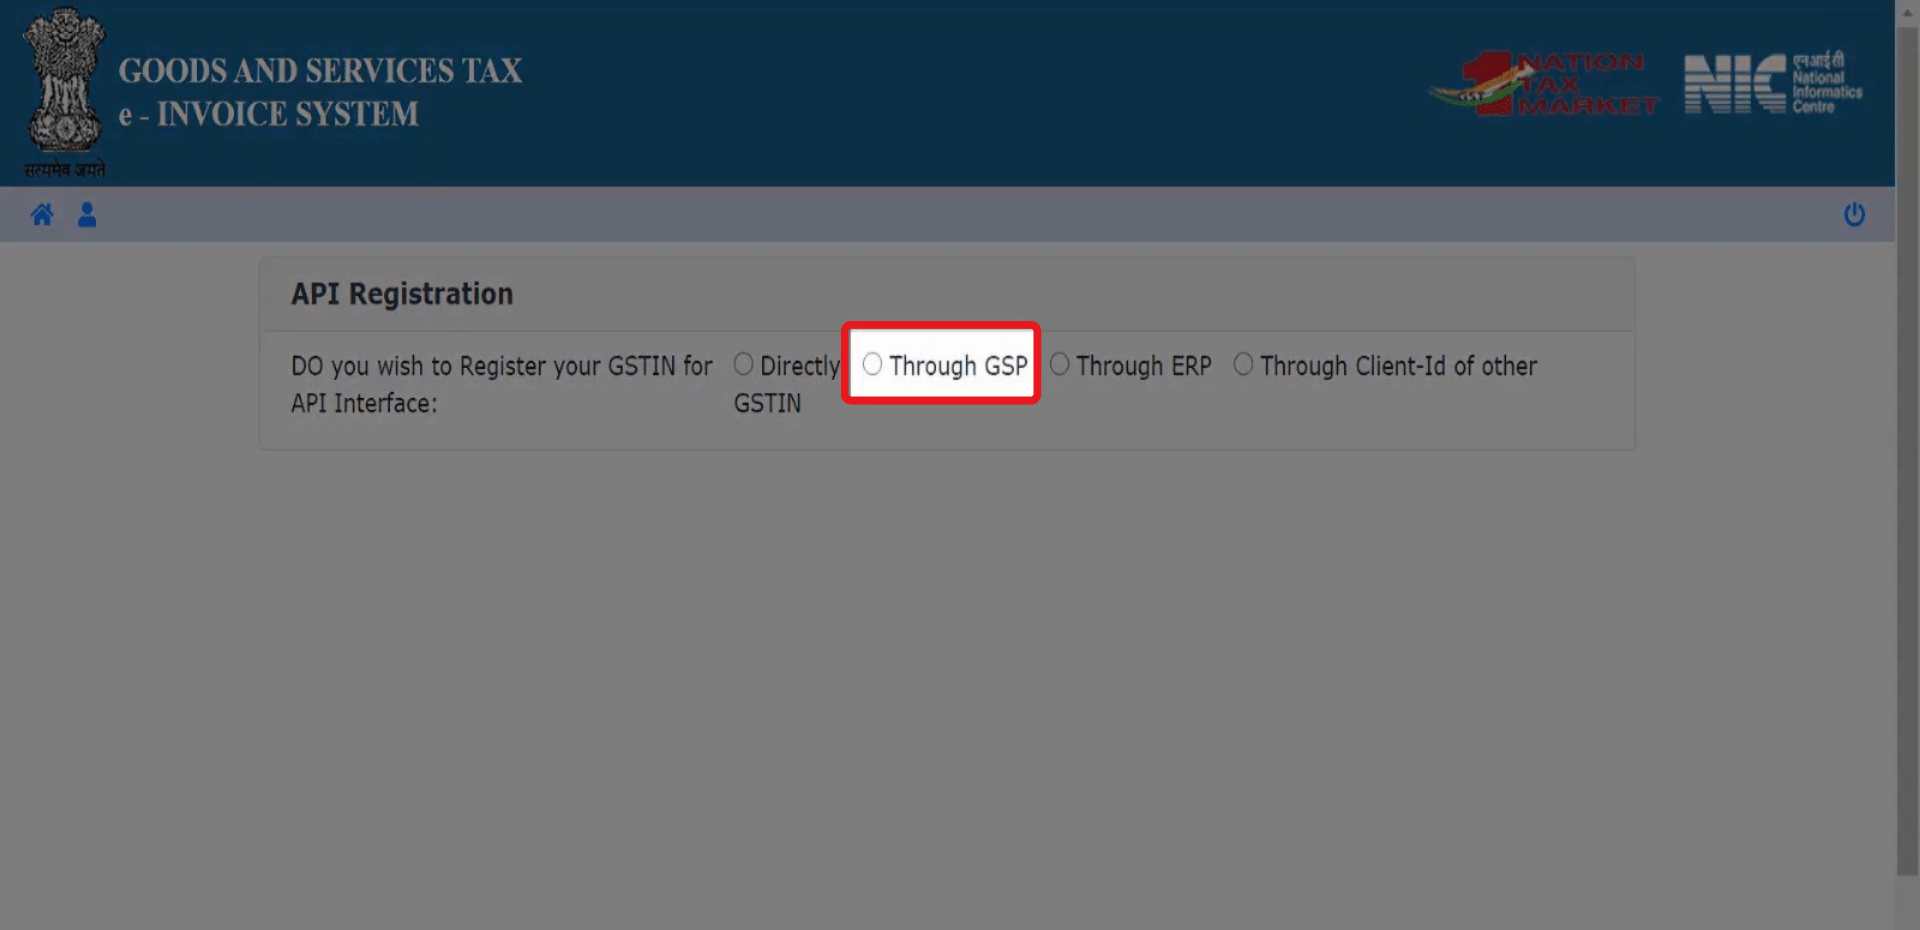
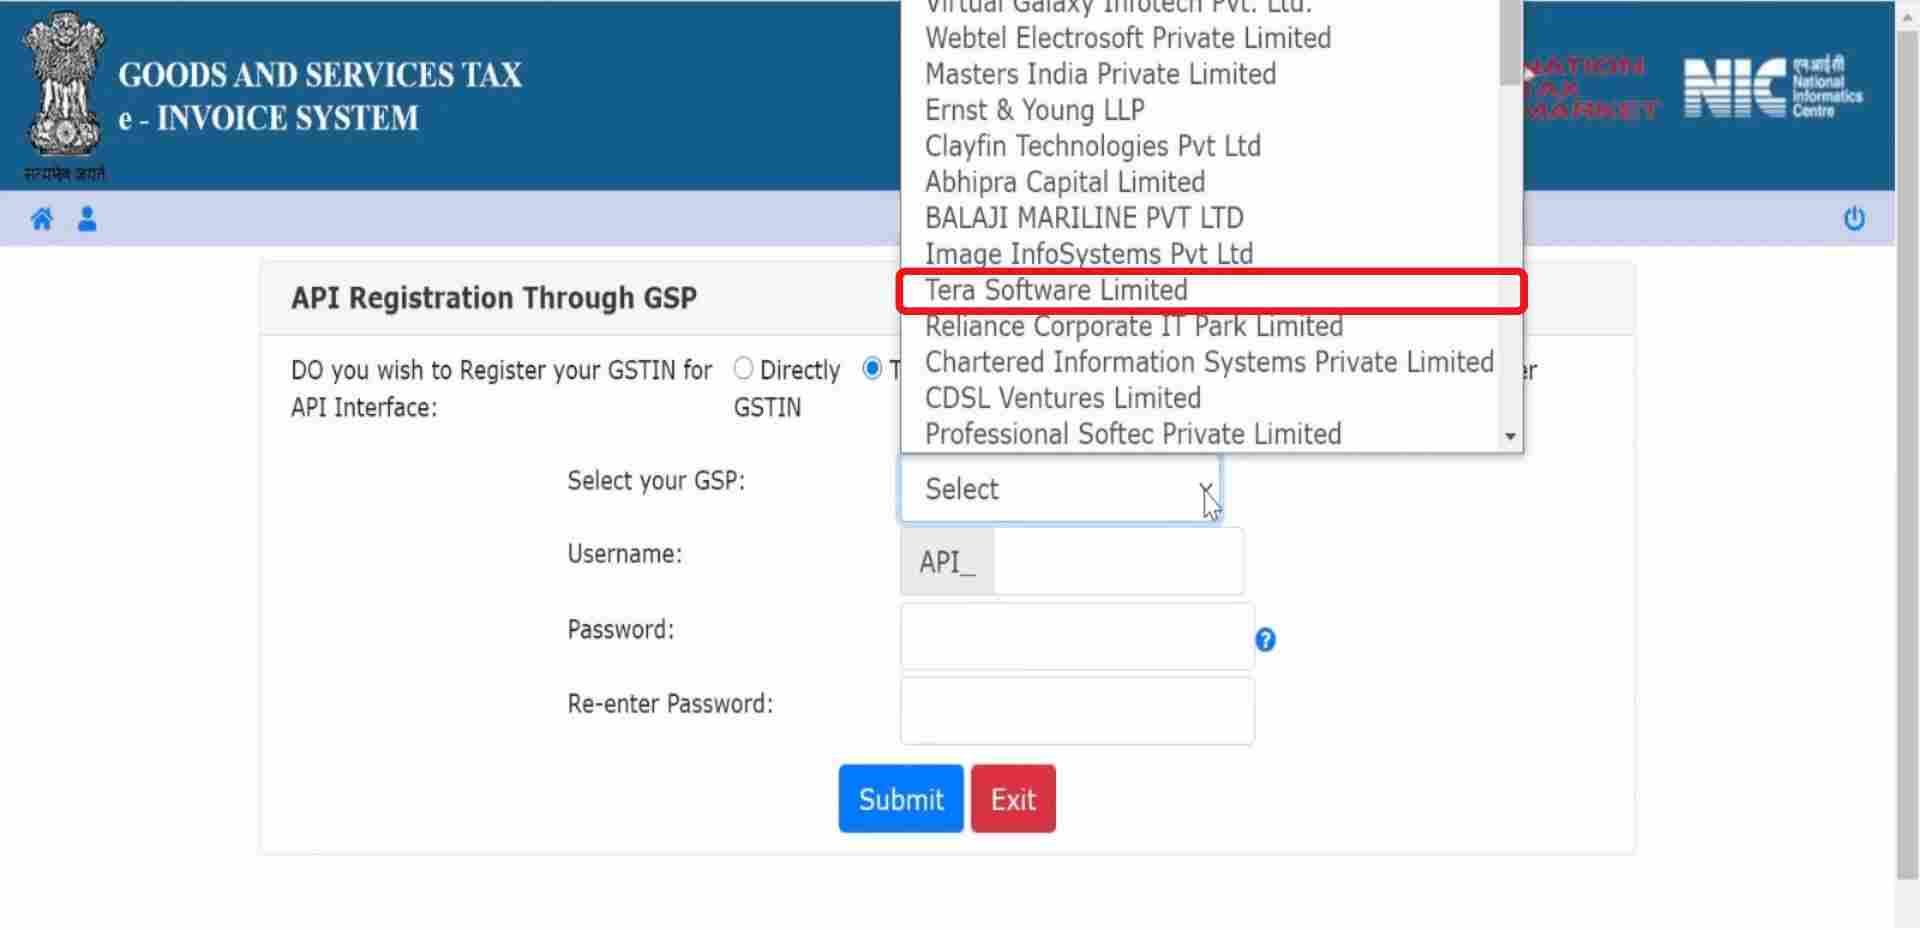
Step 4: Add GST Suvidha Provider
Here, Choose “through GSP” to integrate the API.
Now, click on the “select” box and Select Tera Software Limited from the dropdown list.
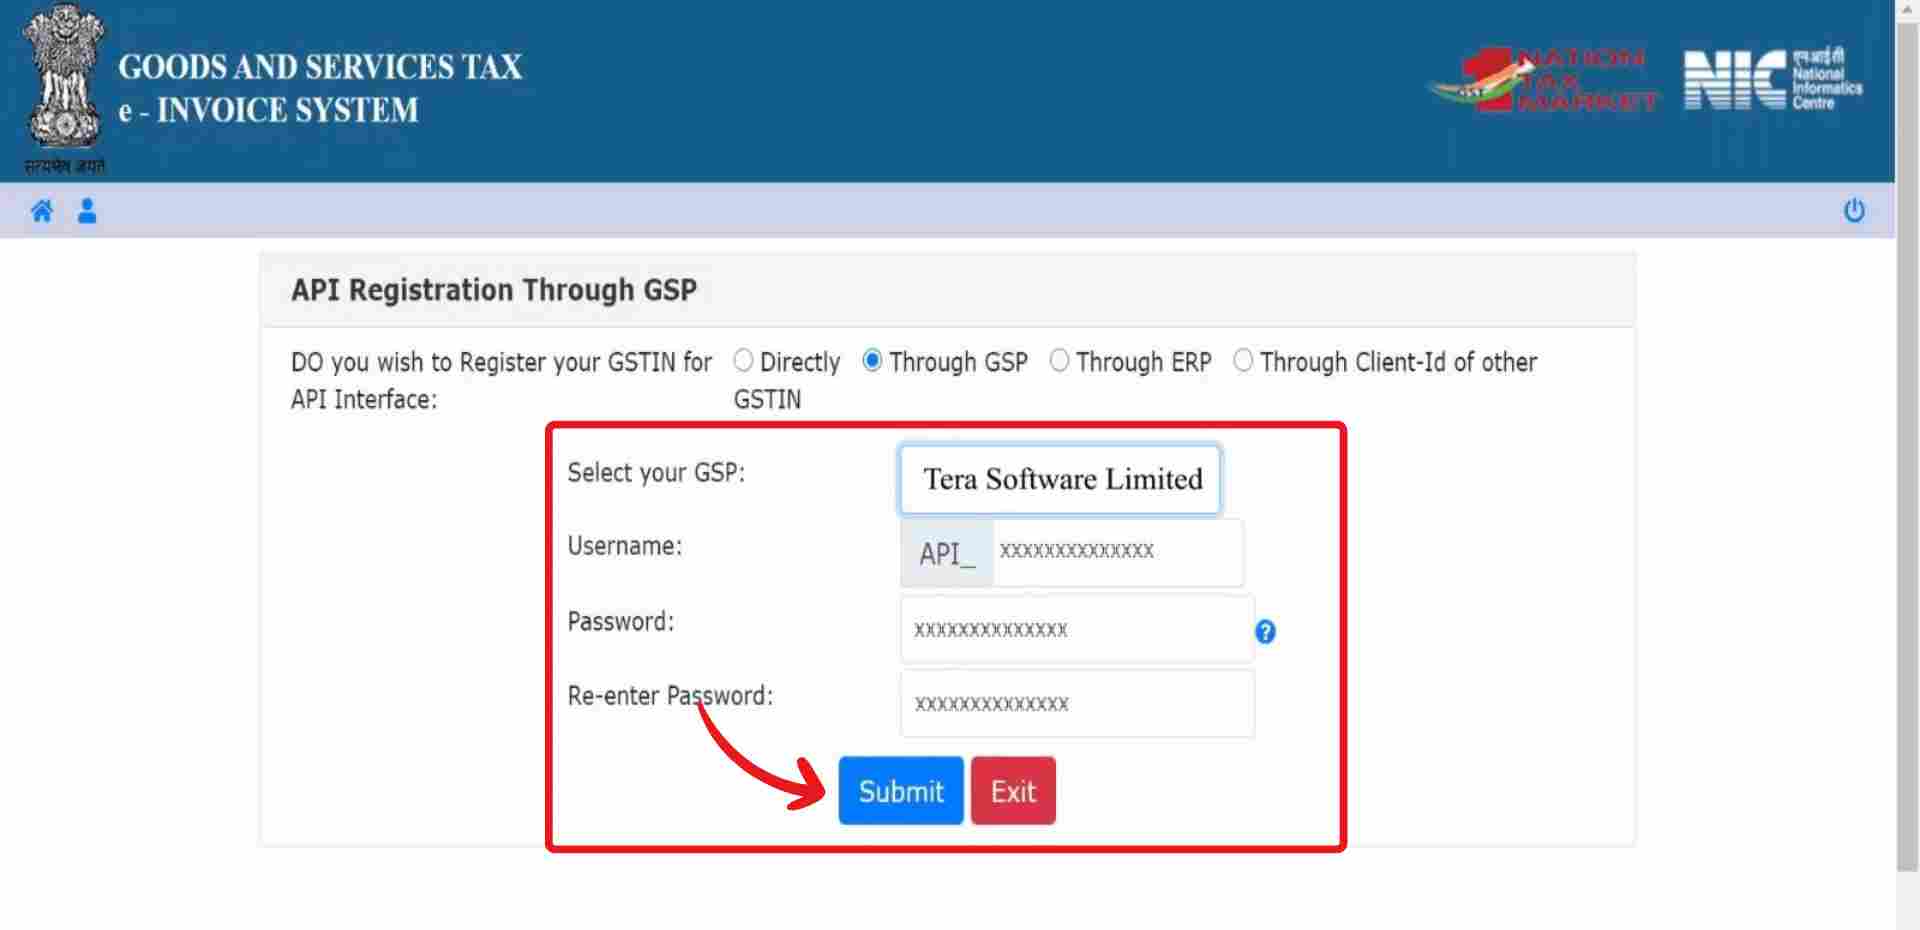
Step 5: Enter Username and password
Enter a 3 letter Suffix ID and a password. Re-enter the Username and Password and click “Submit”.
Now, you have successfully added Swipe as your GSP on e-Invoice portal.
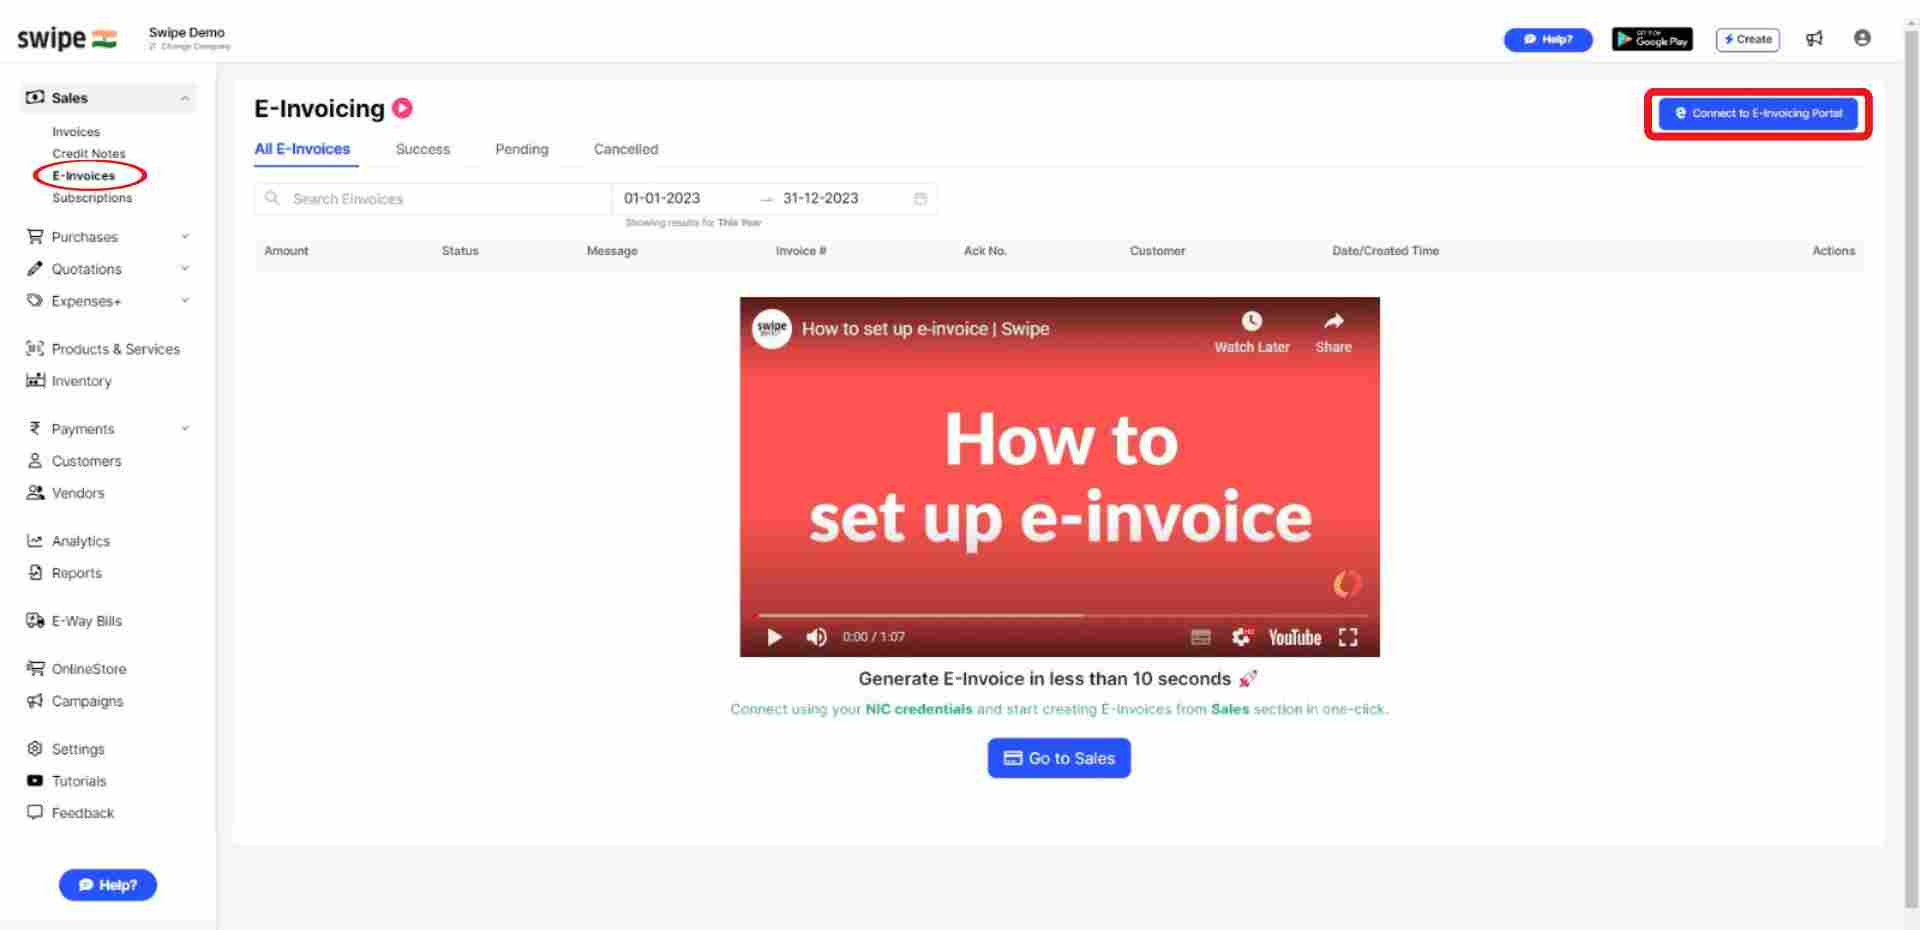
Step 6: Connect to E-Invoicing Portal
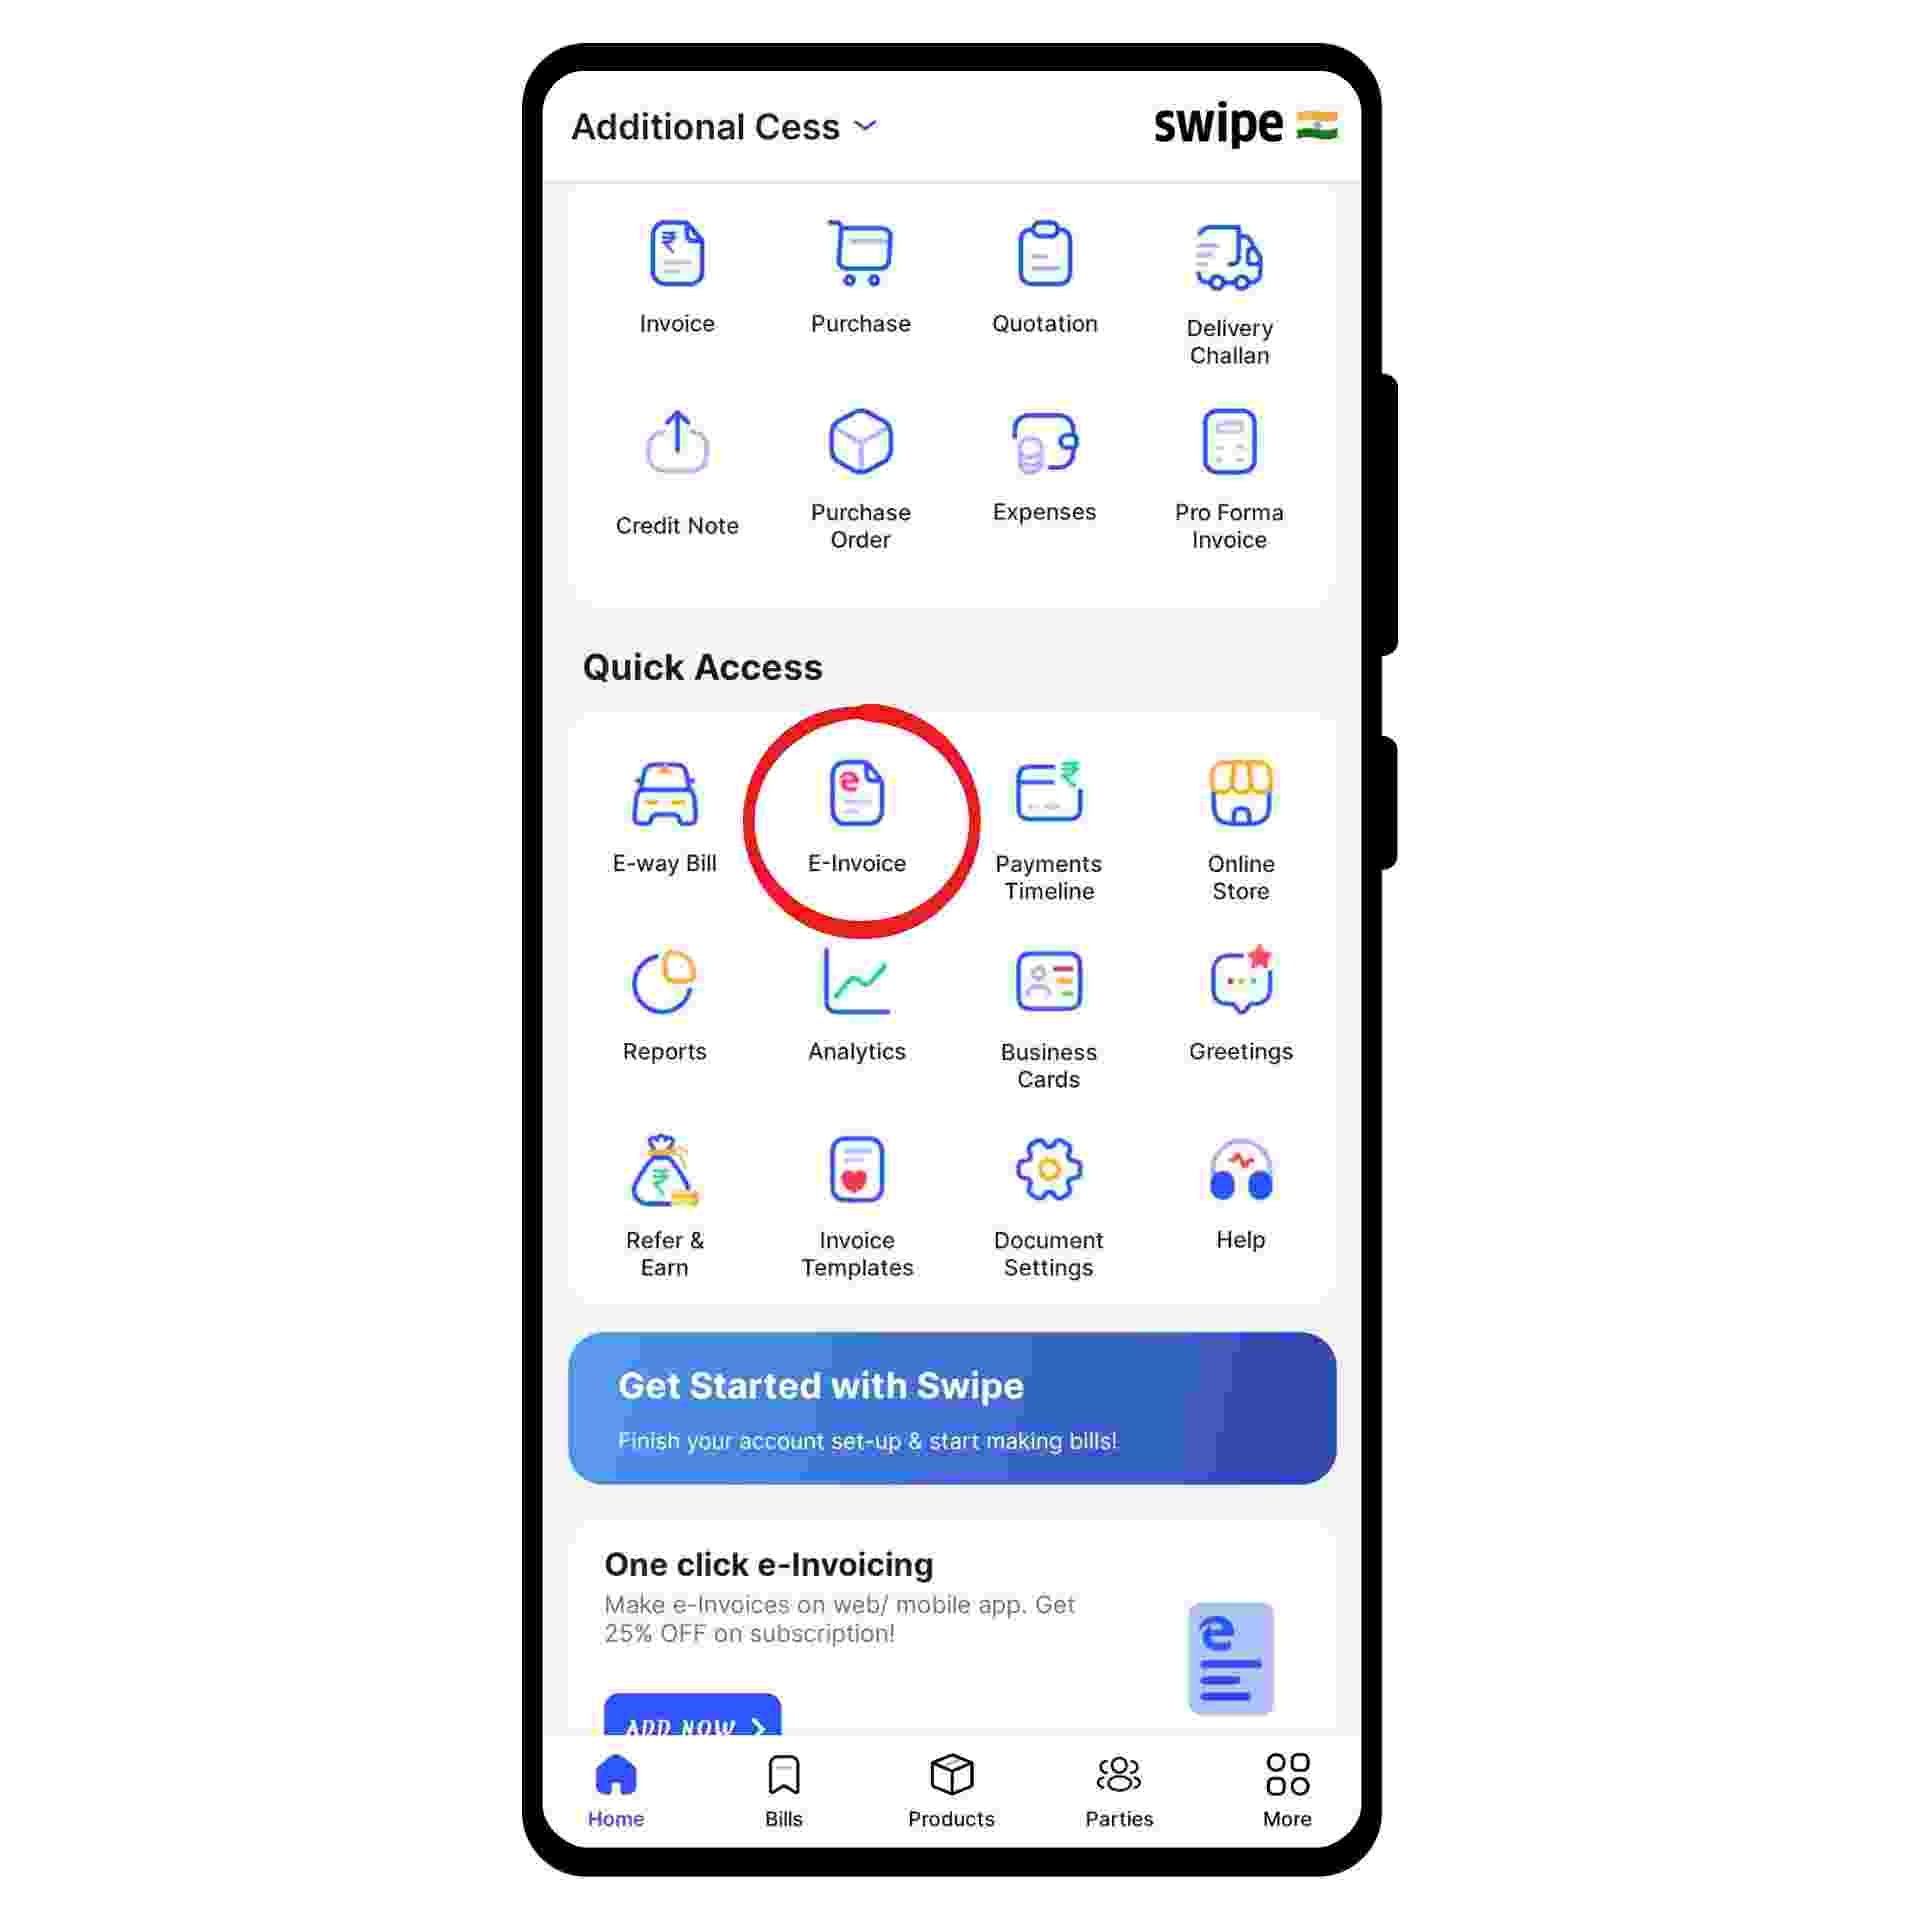
Go to Sales and Select e-Invoices.
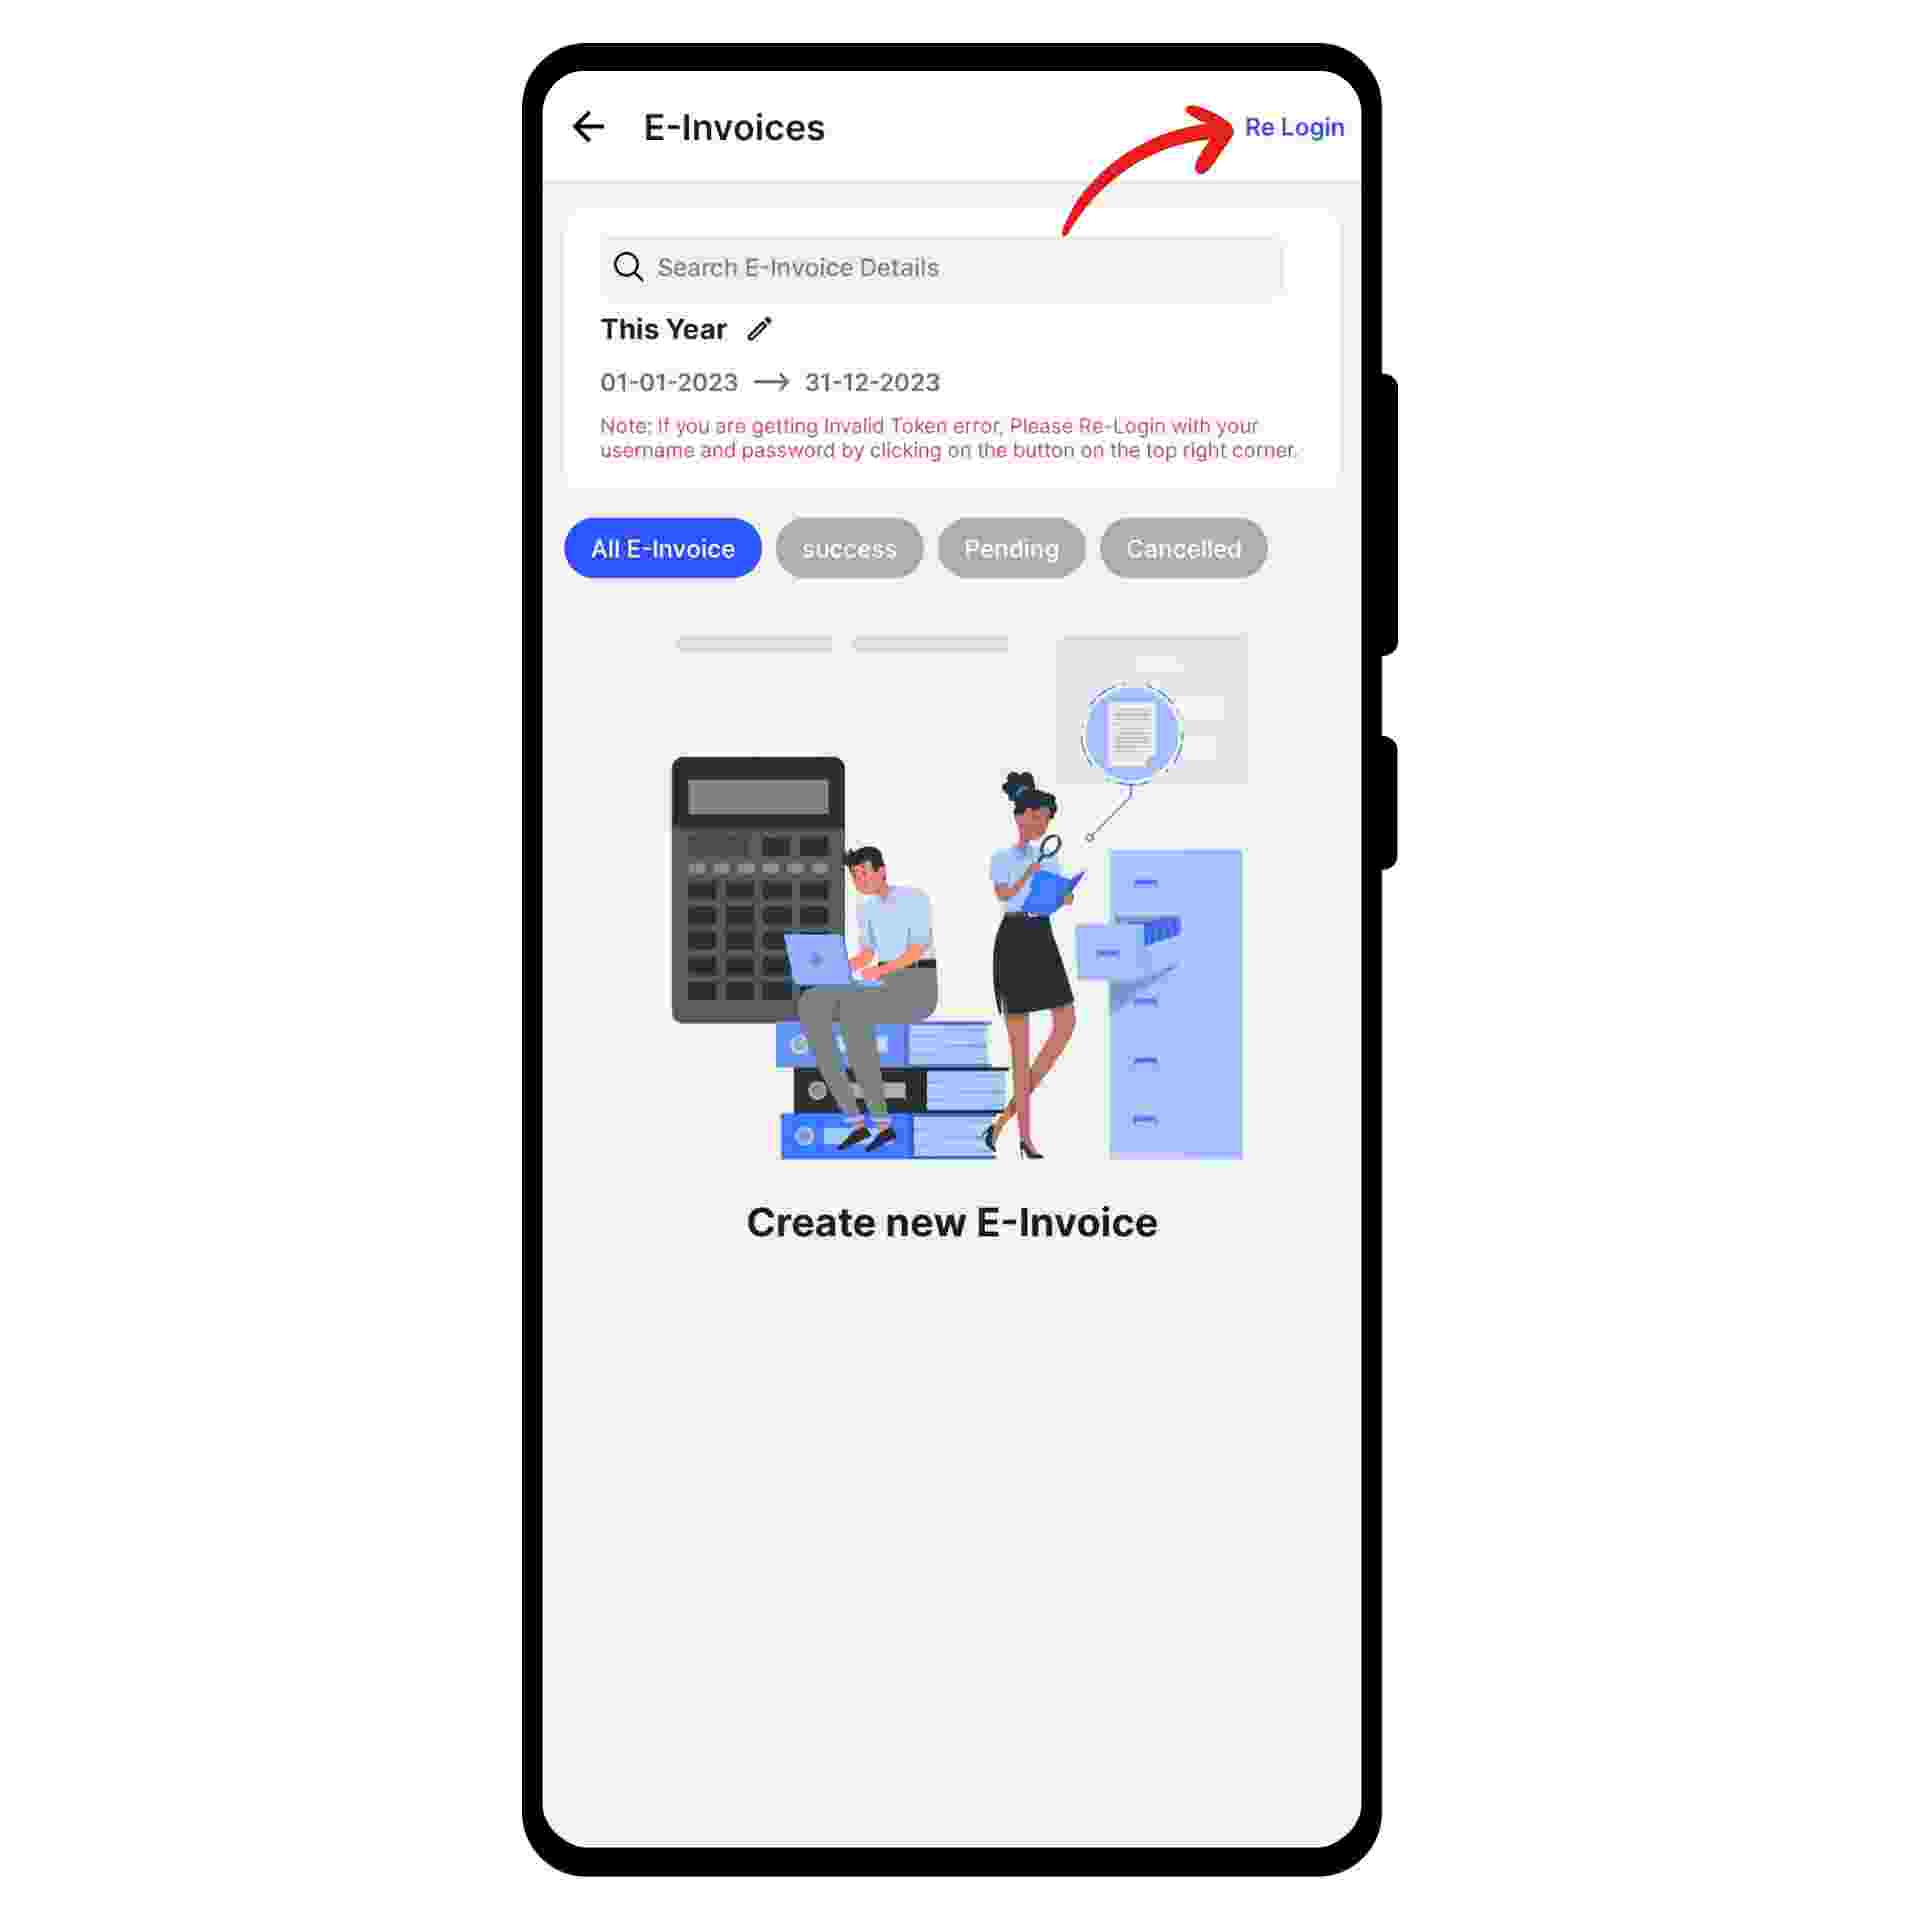
Now, click on "Connect to E-Invoicing Portal” from the top right corner of the screen.
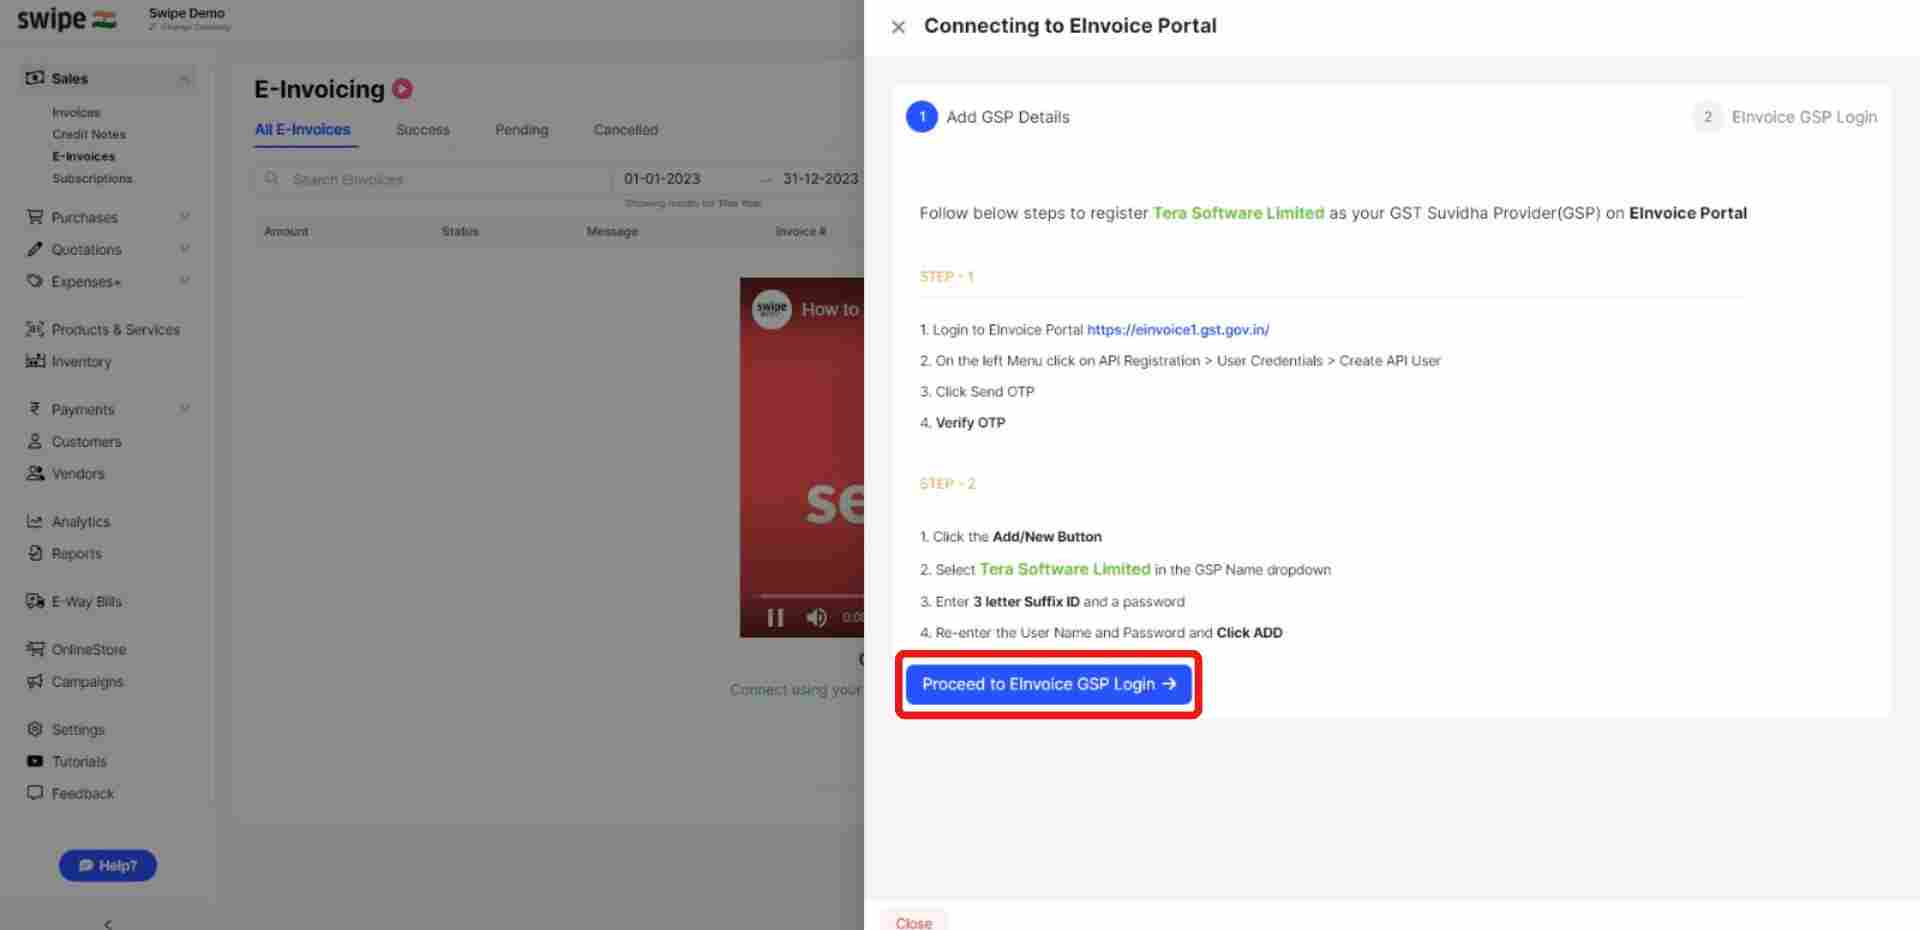
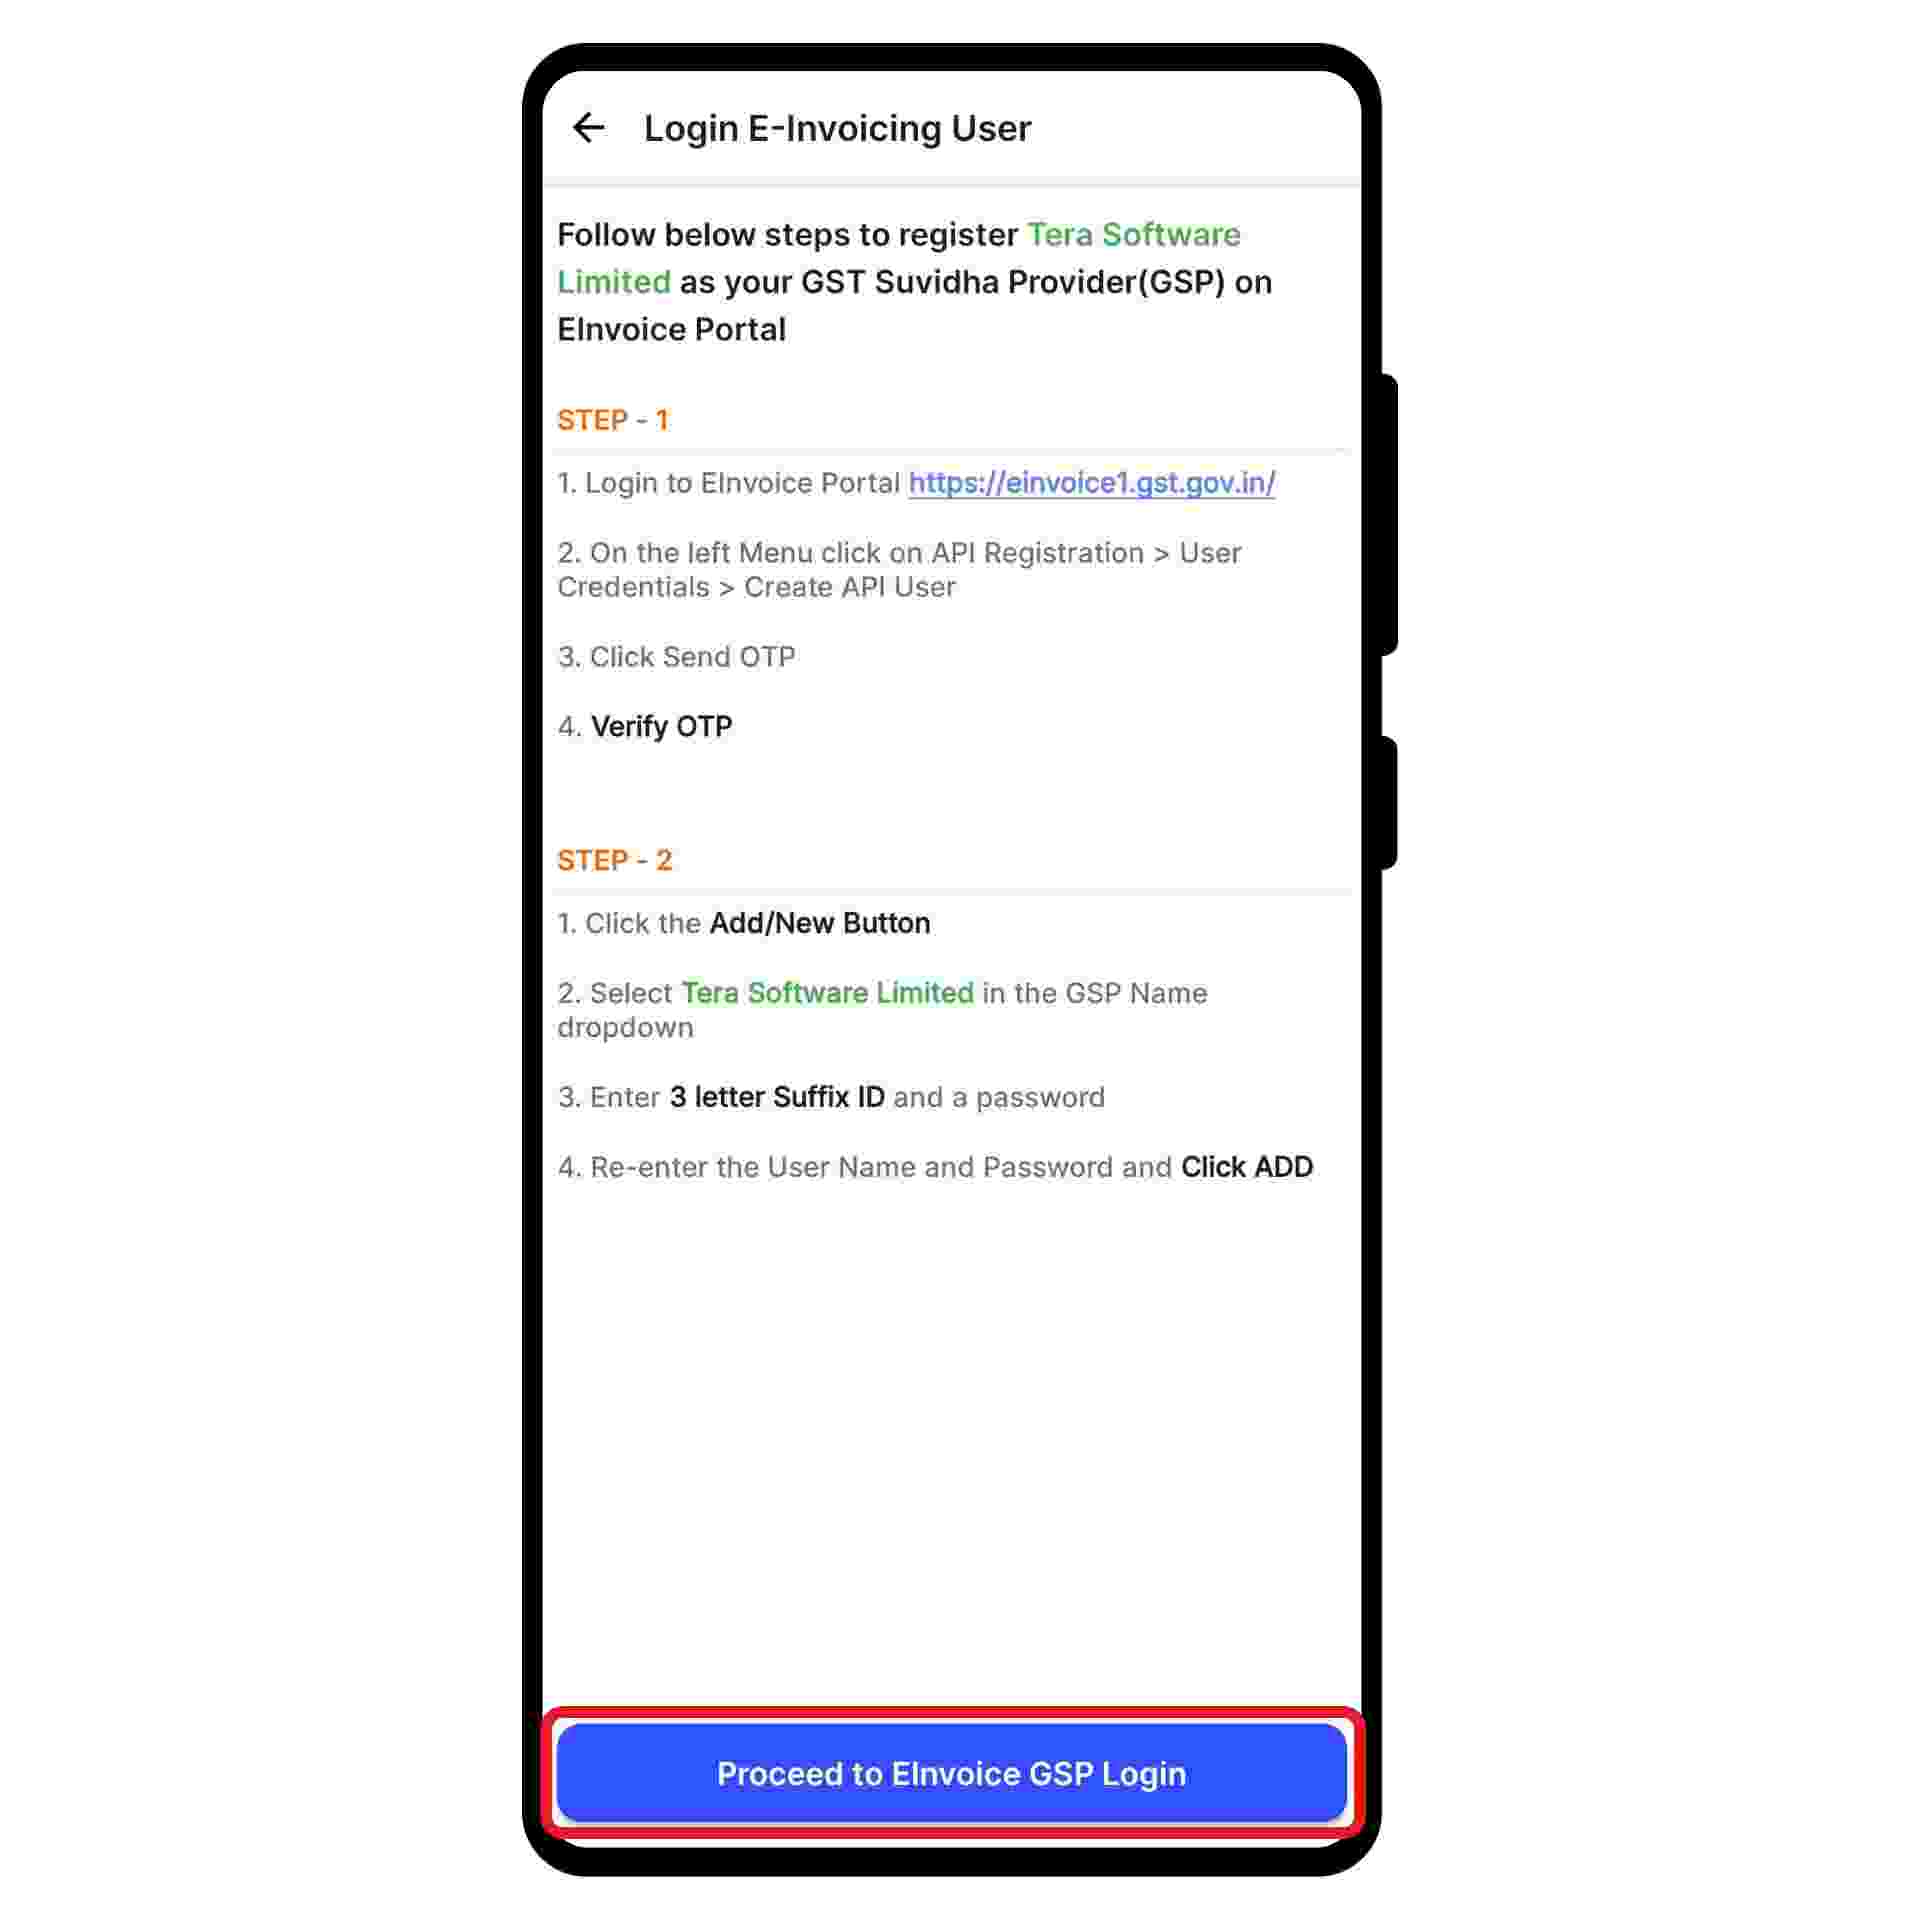
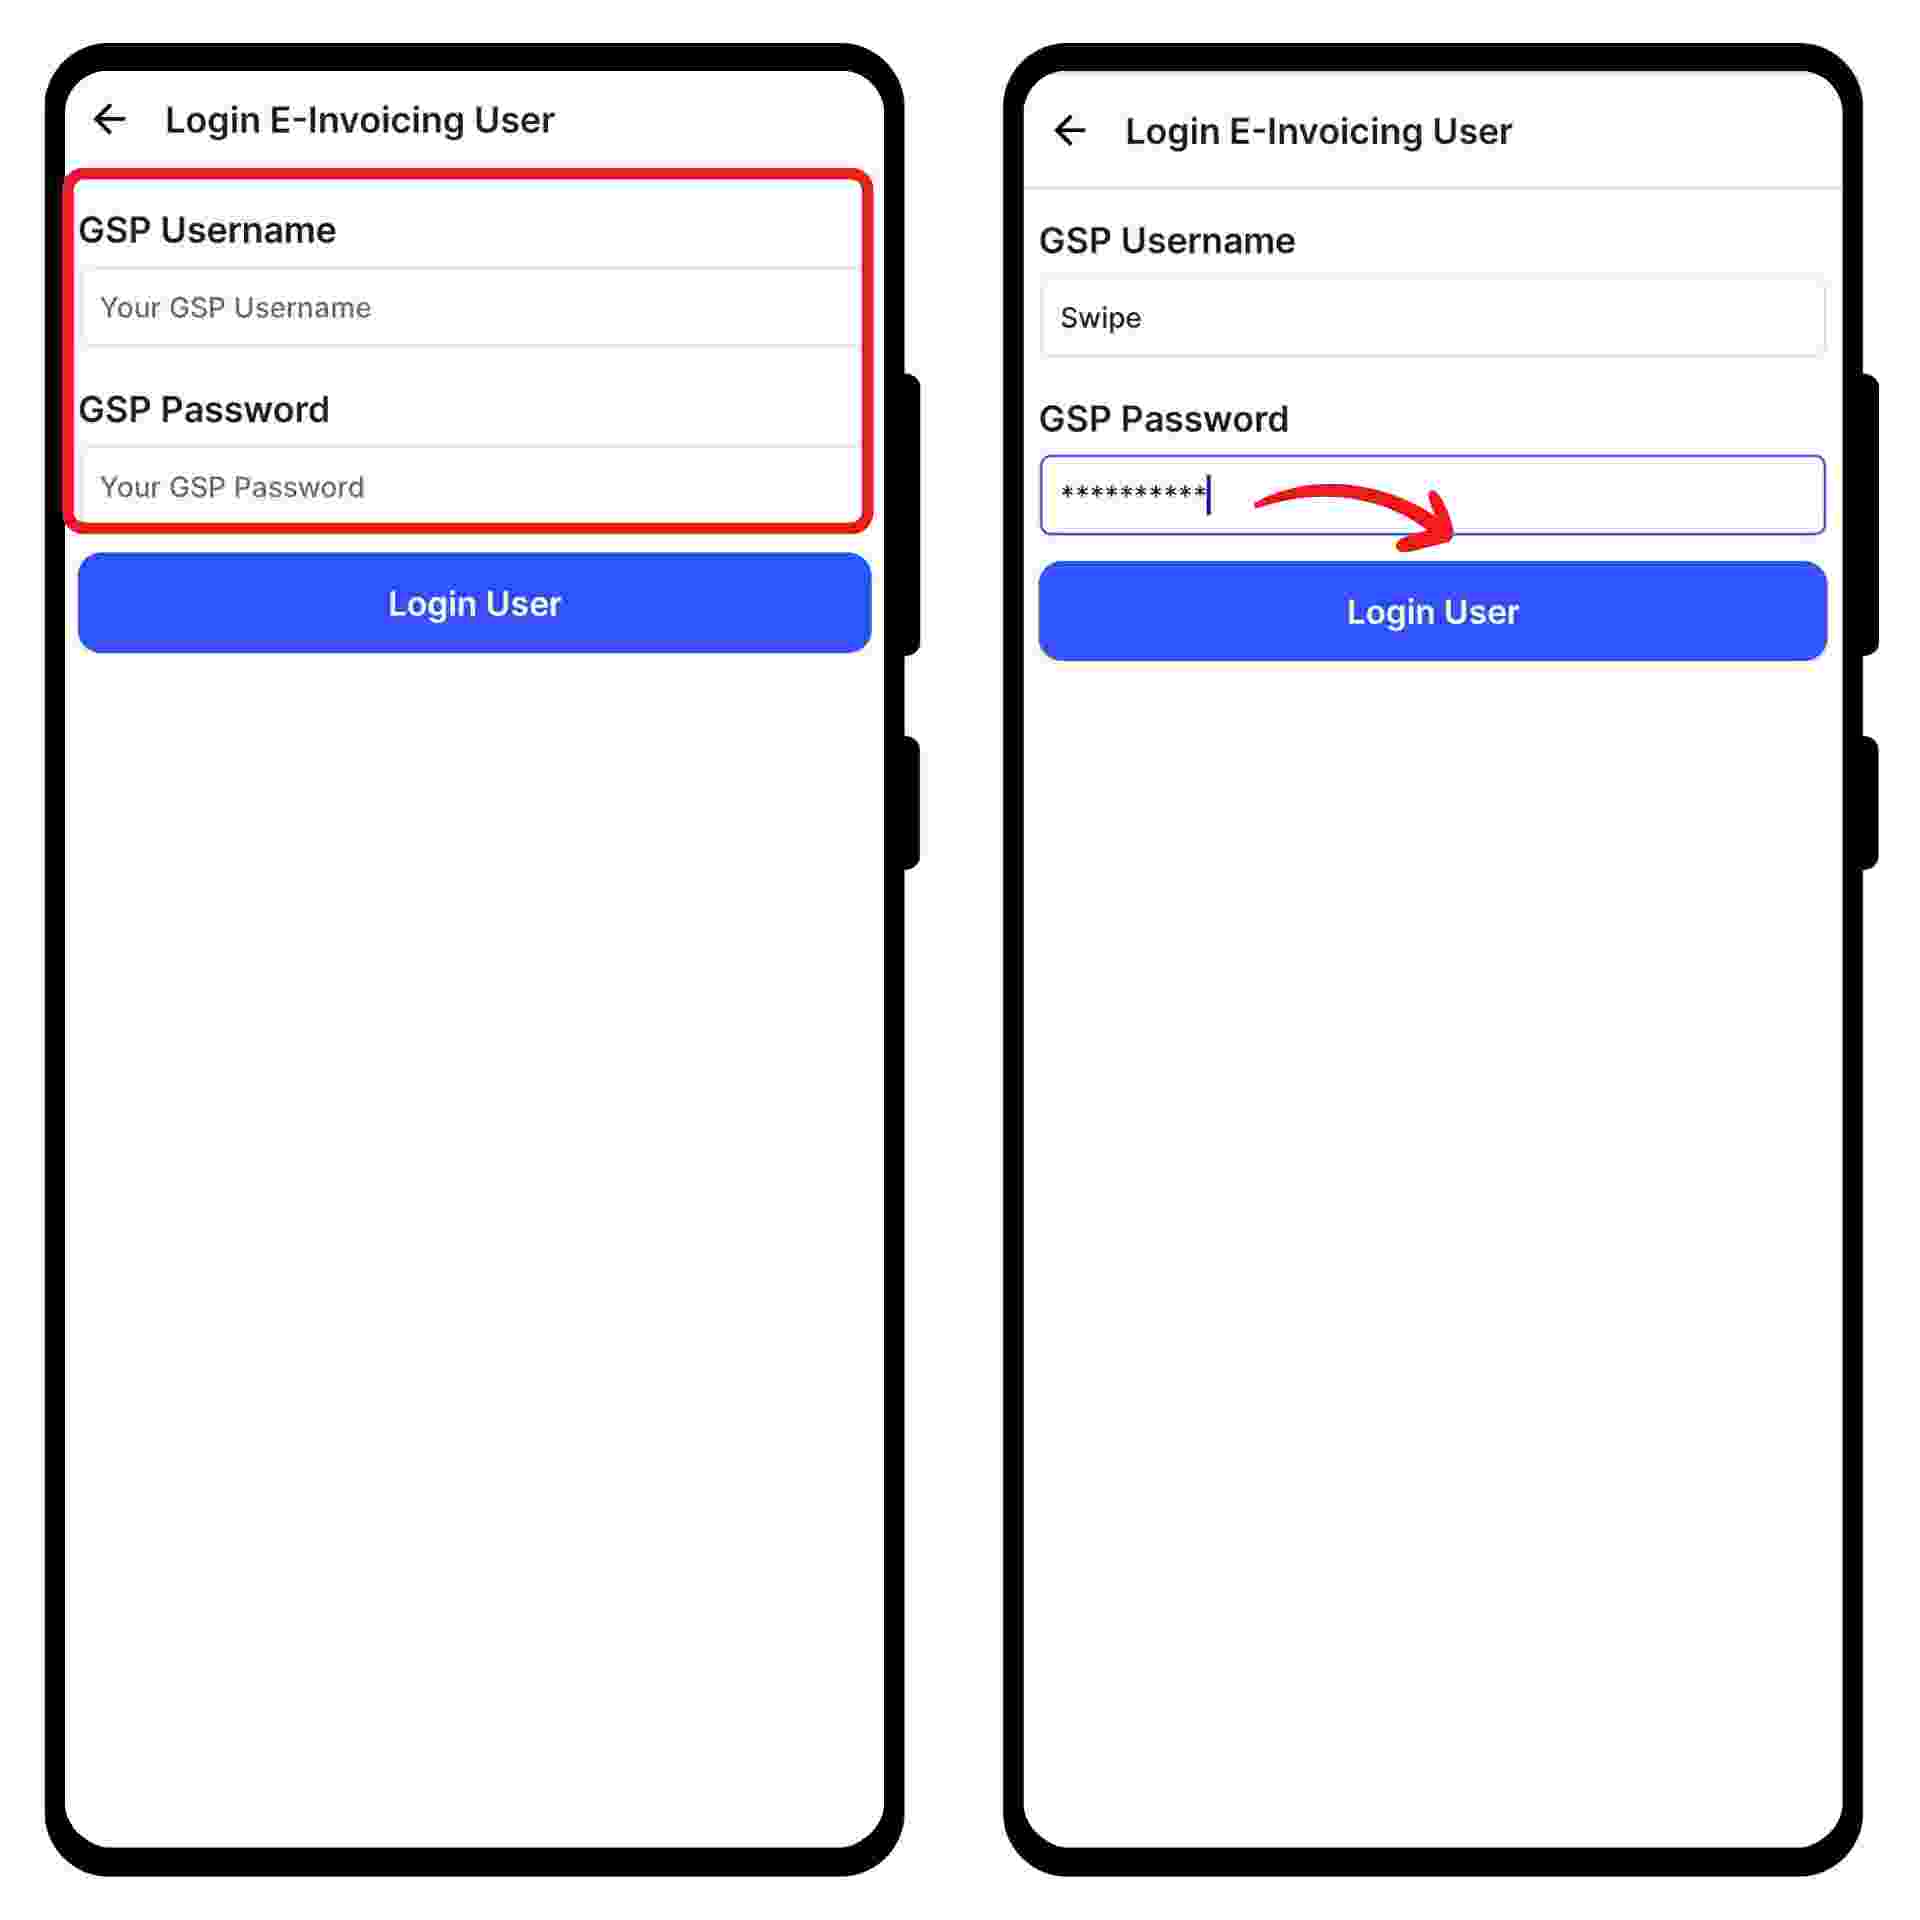
Step 7: E-Invoice GSP login
Click on “Proceed to EInvoice GSP Login” button at the bottom of the screen.
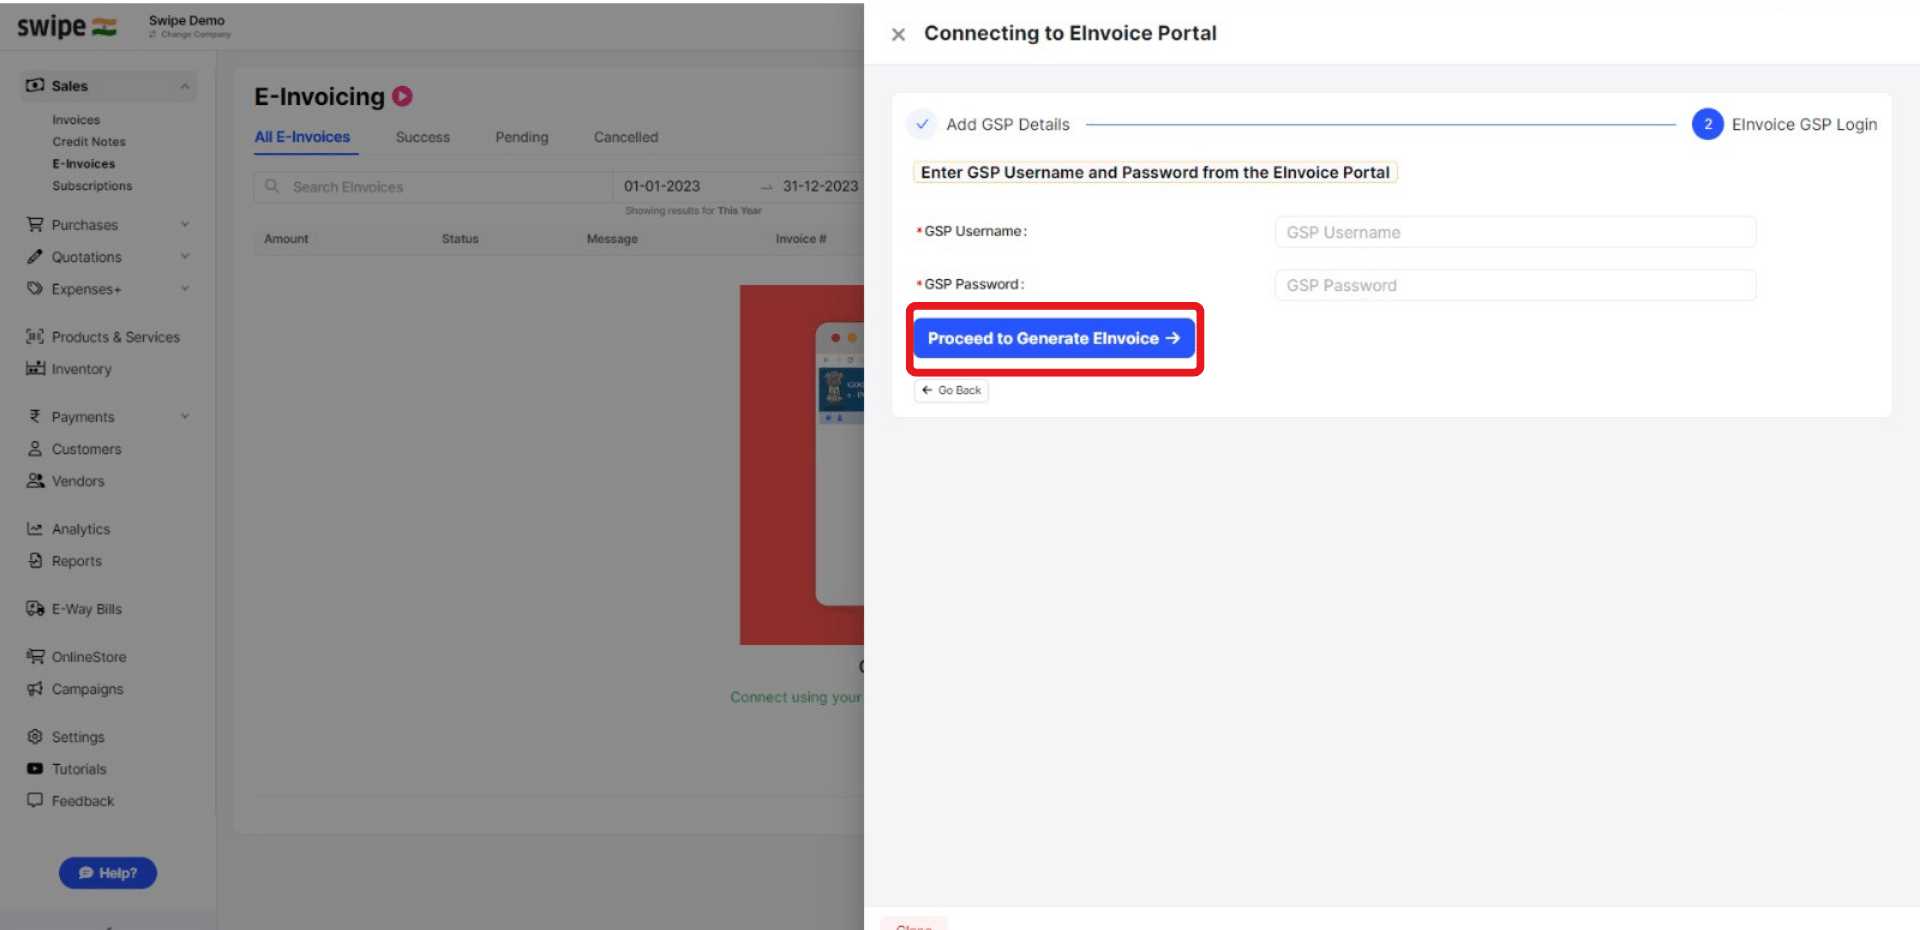
Step 8: Click on "proceed to Generate e-Invoice"
Here, Enter the GSP Username and Password from the E-Invoice Portal and confirm the credentials by clicking on “Proceed to Generate E-Invoice”.
Congratulations! You have successfully connected Swipe with your E-Invoice portal. Now, enjoy one click e-Invoicing on Swipe.
Video Demo
Suggestions
How to cancel E-Invoice on Web
How to cancel E- Invoice on Android
How to create a Purchase Invoice on Web


%20(1).png)
%20(1).png)