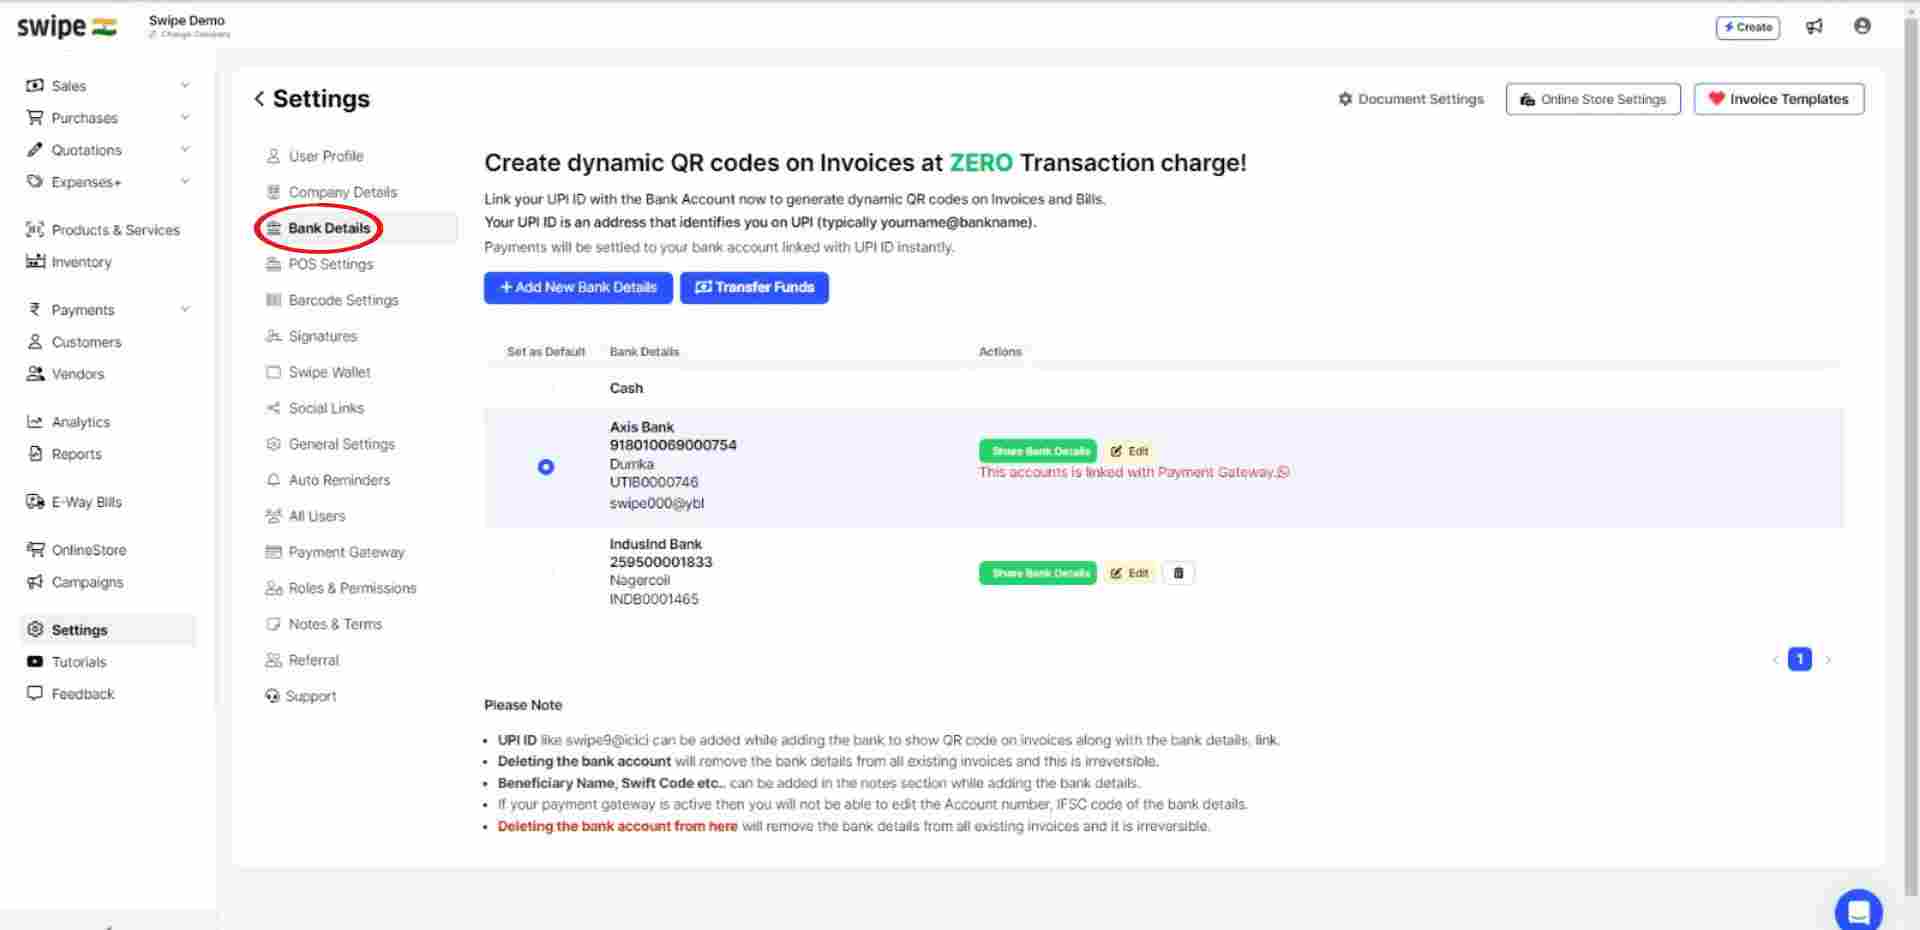
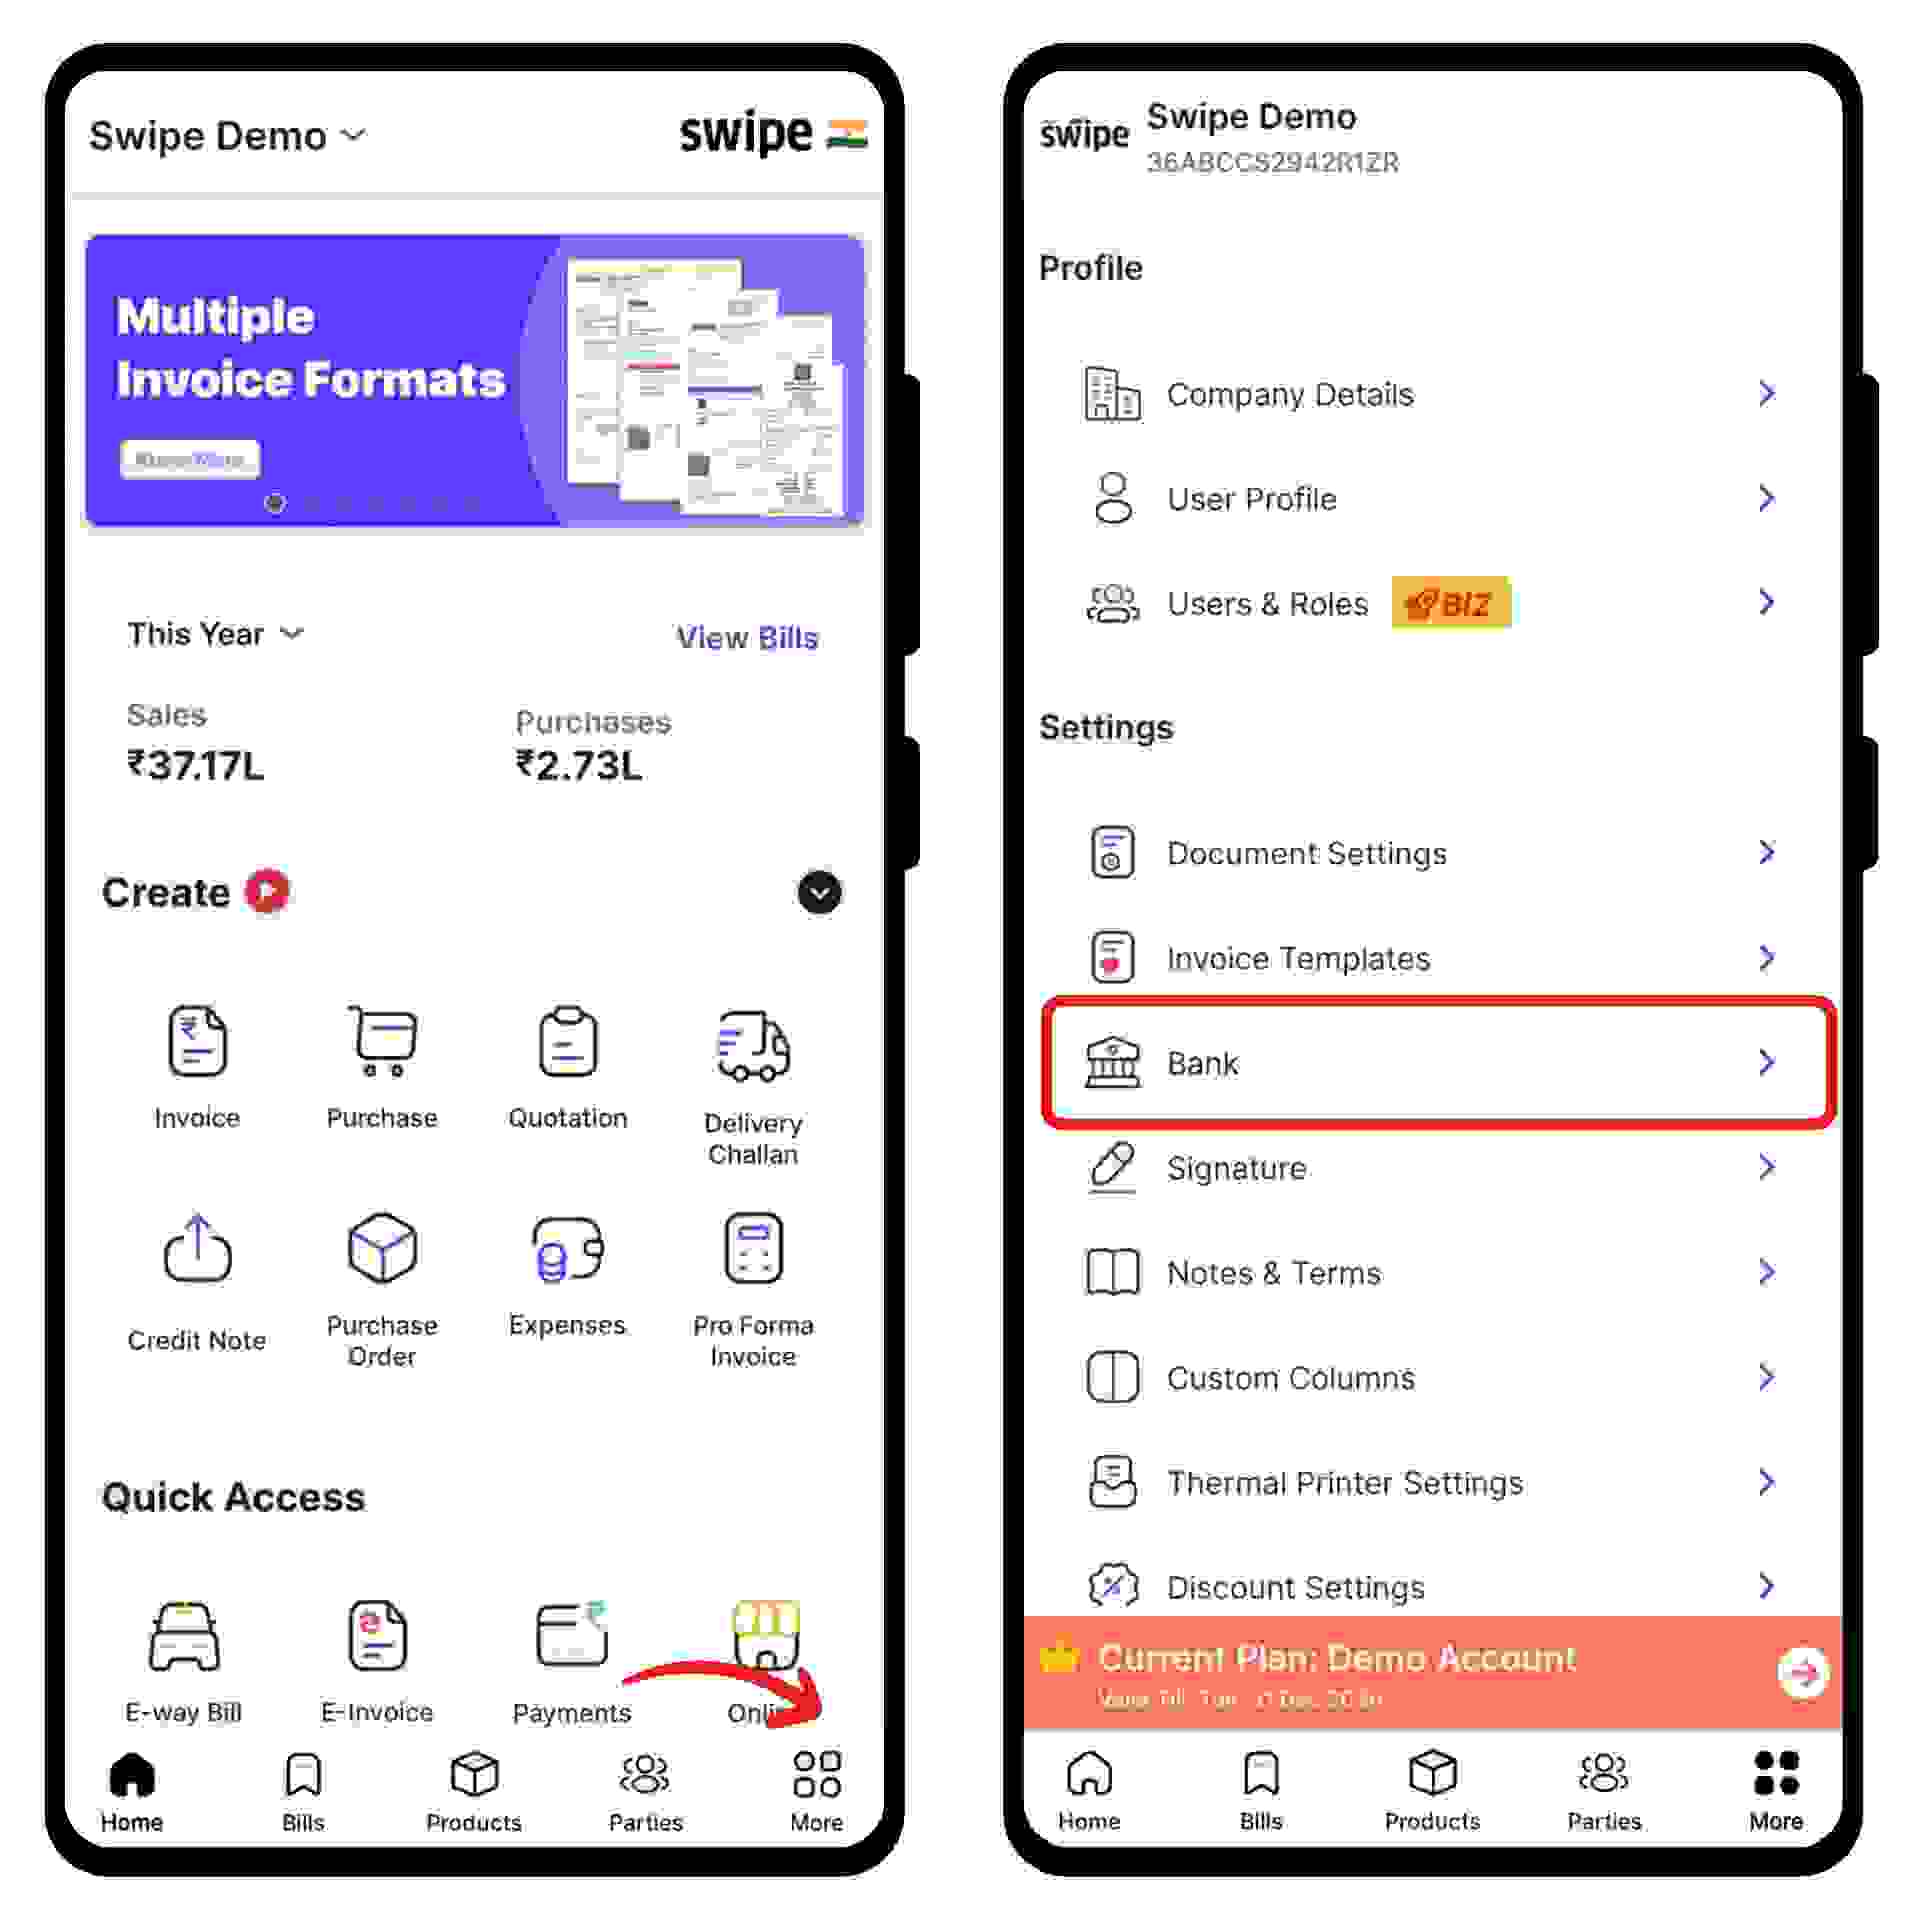
Click on the “Settings” icon on the left dashboard and Select the “Bank Details” option from the menu.
Step 2: Edit the Bank Details.
Select the Bank account to which you would like to add the UPI ID and click on the "edit” Icon under the “Actions” column.
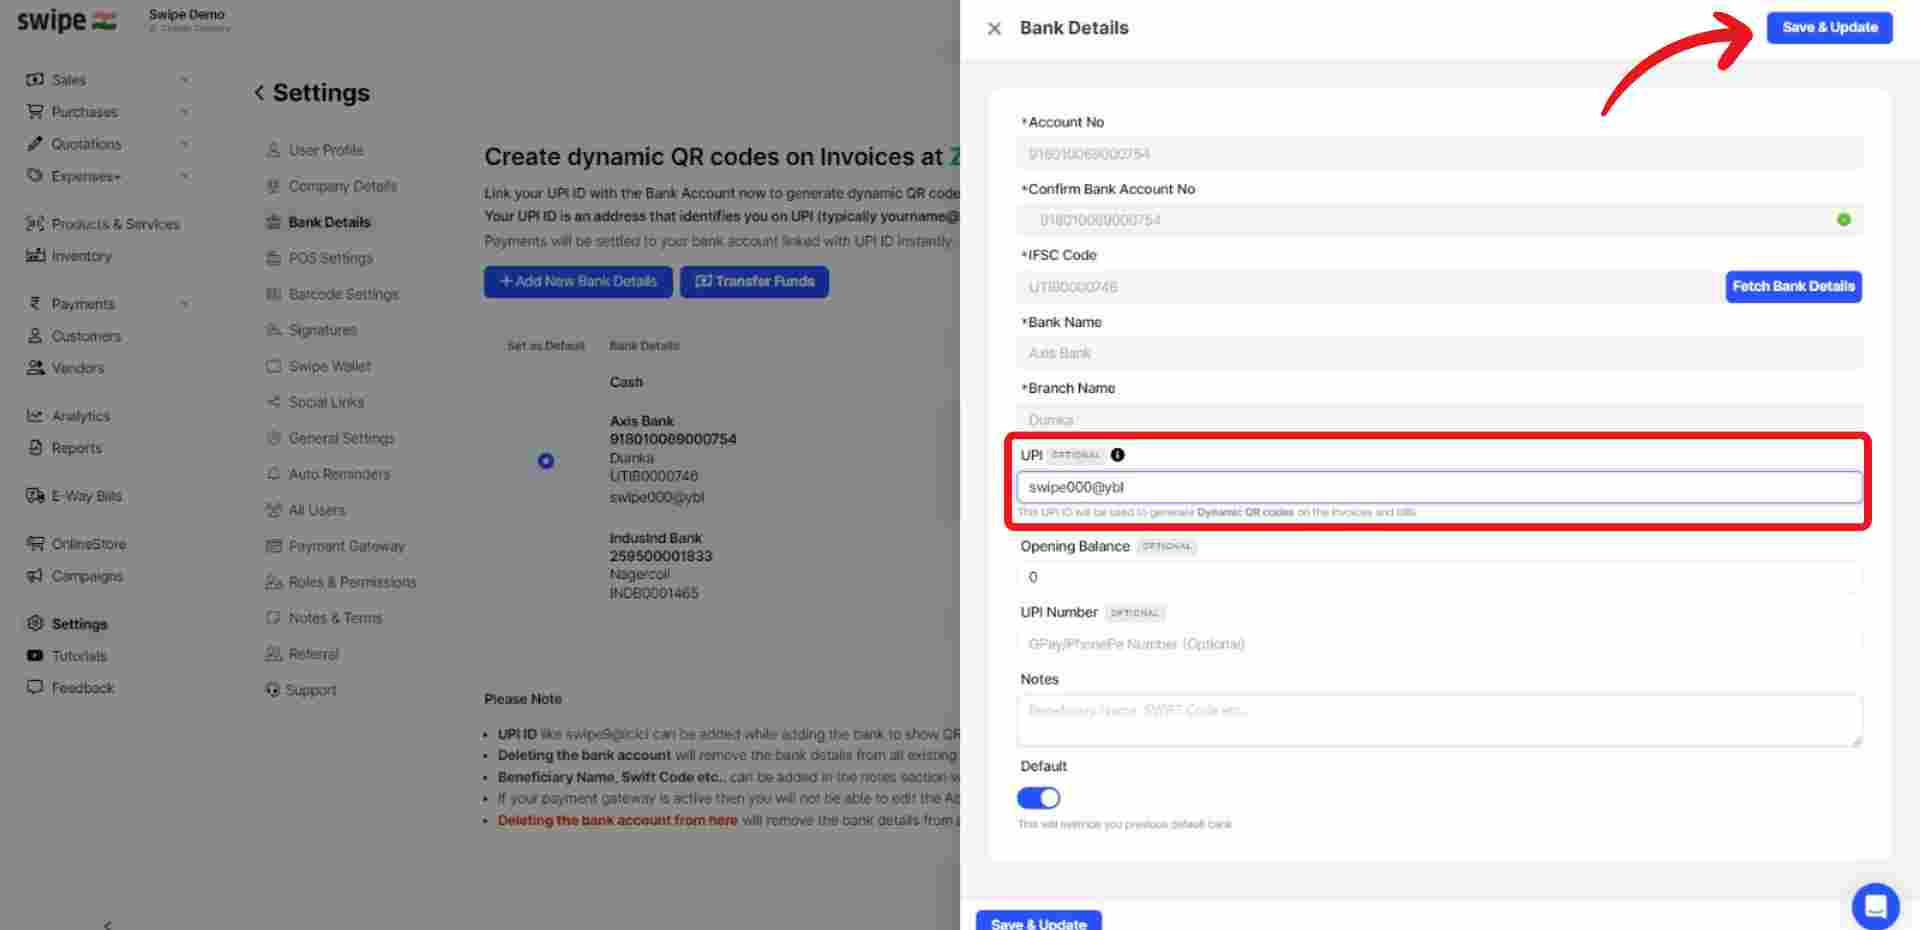
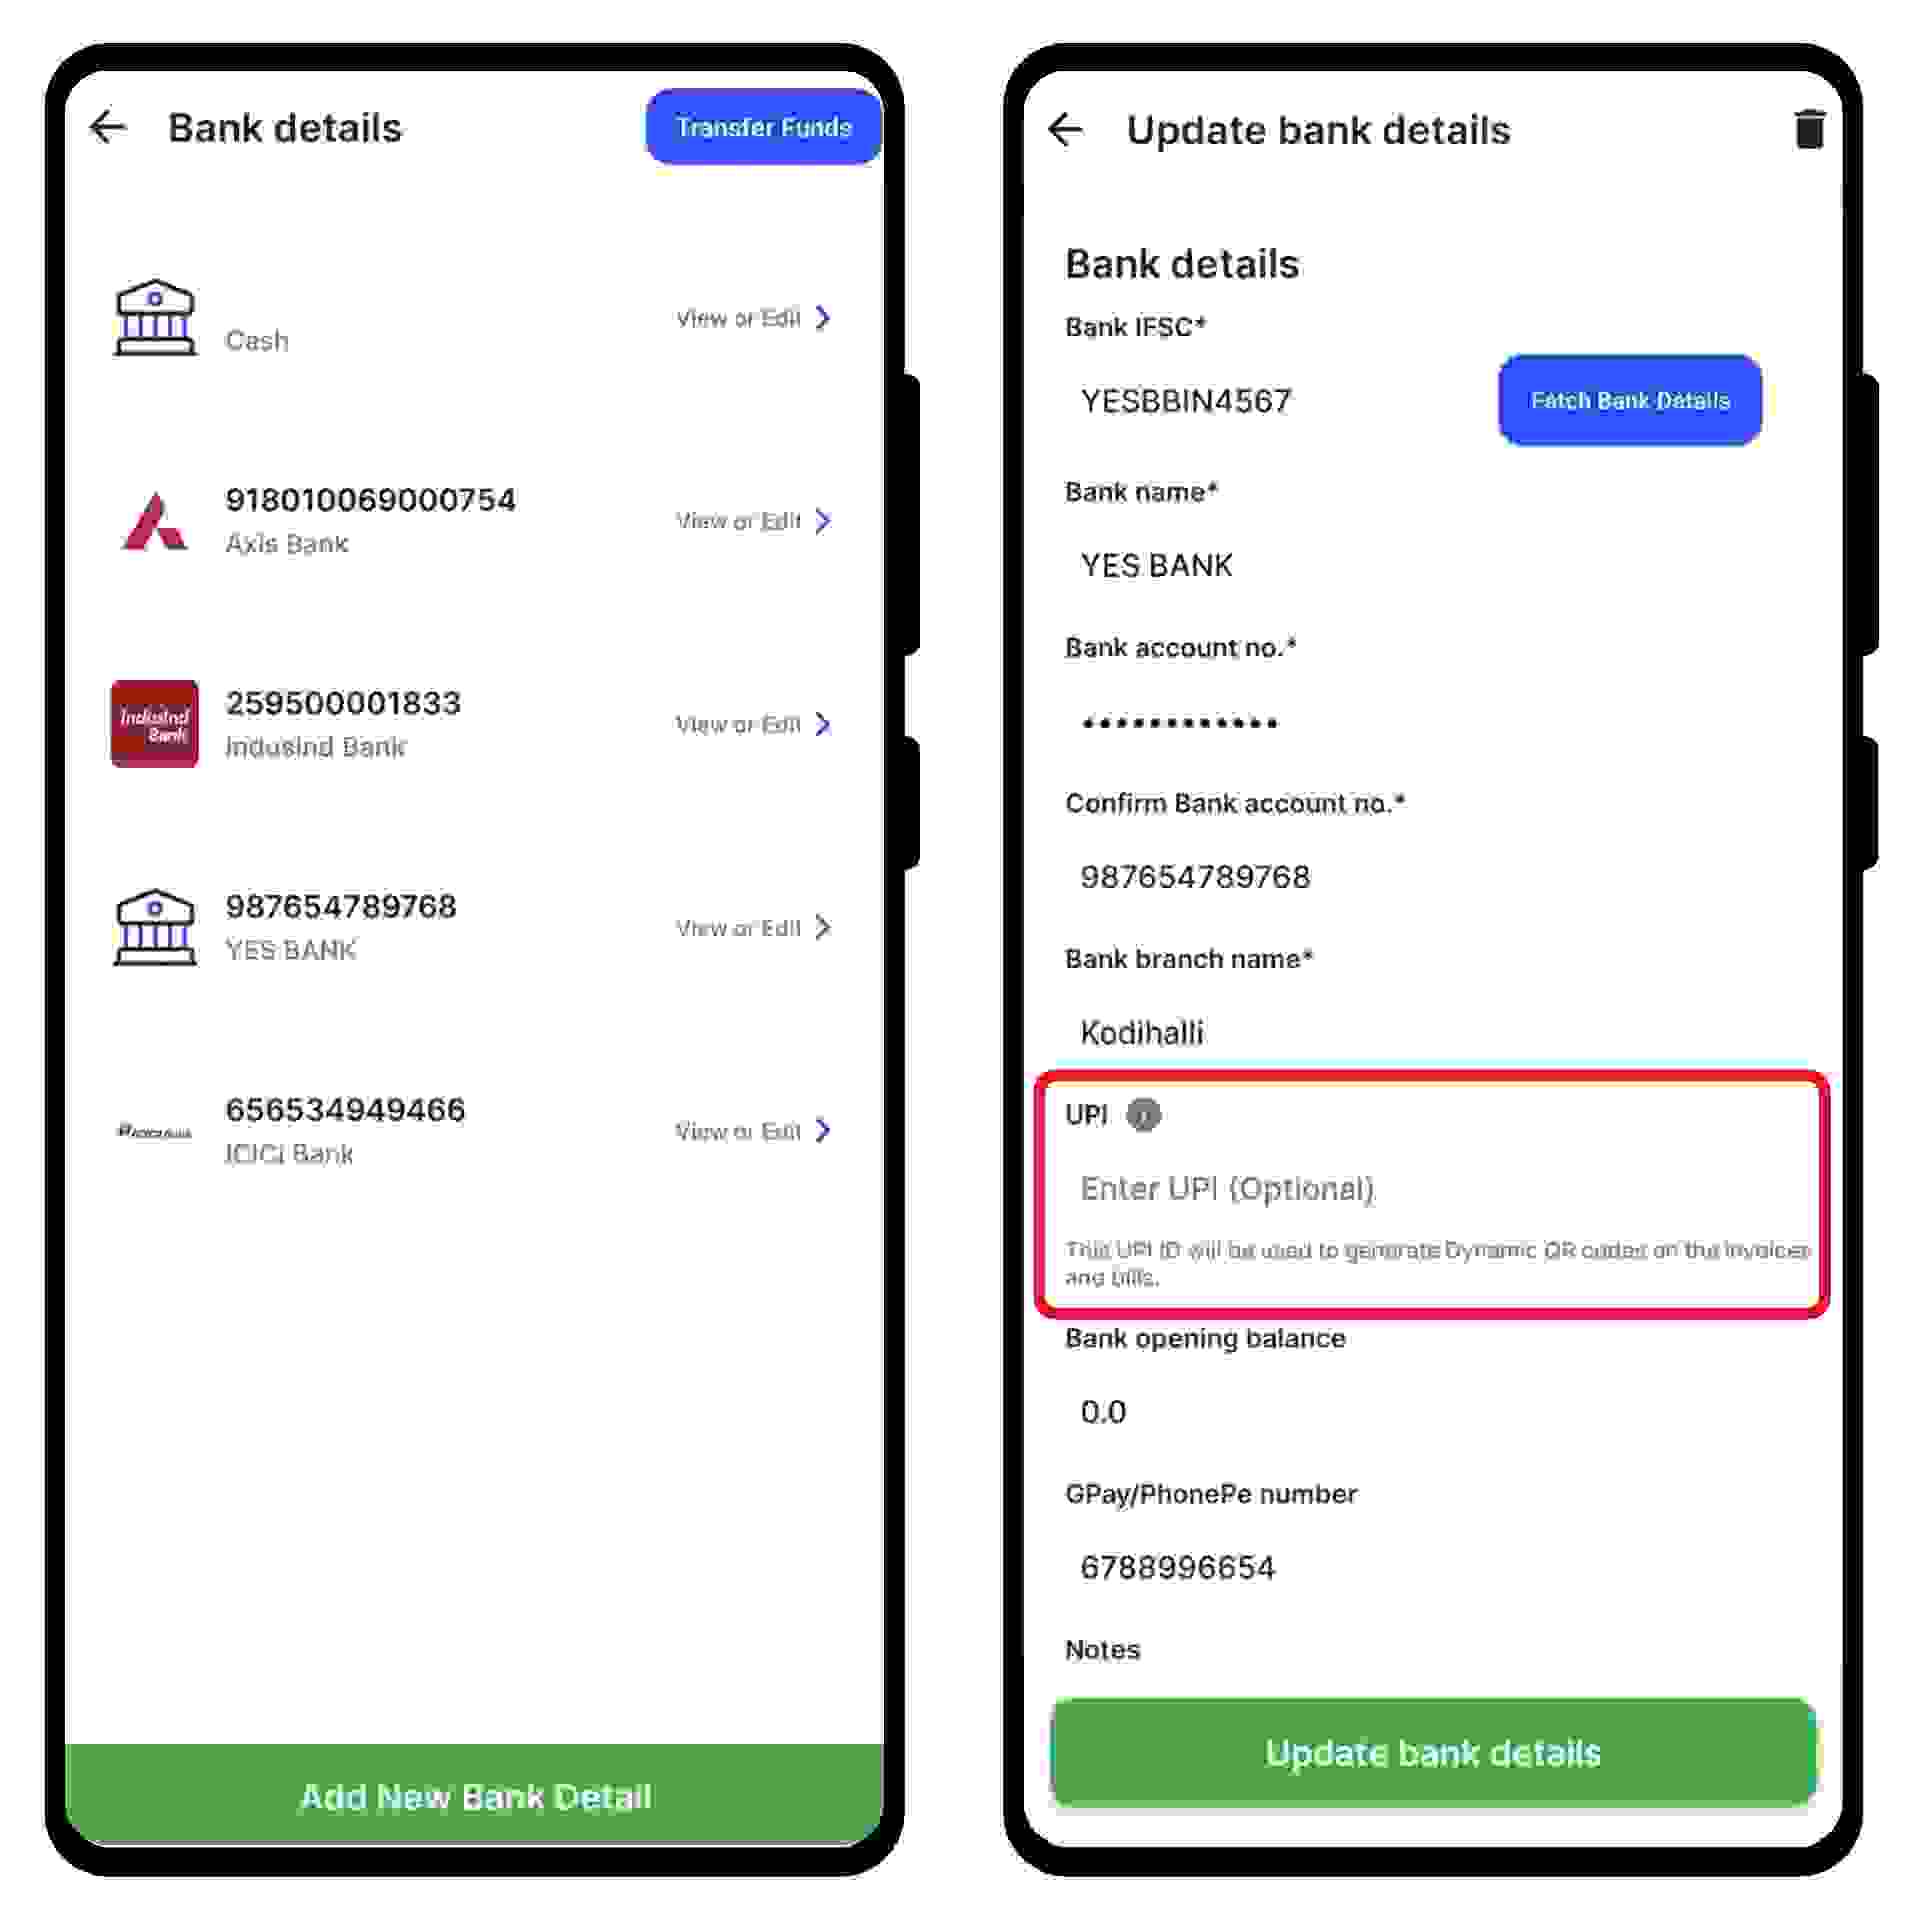
Step 3: Enter the UPI ID.
A new form appears. Here, enter the UPI ID and click on “Save and Update.” present at the top right corner of the screen.
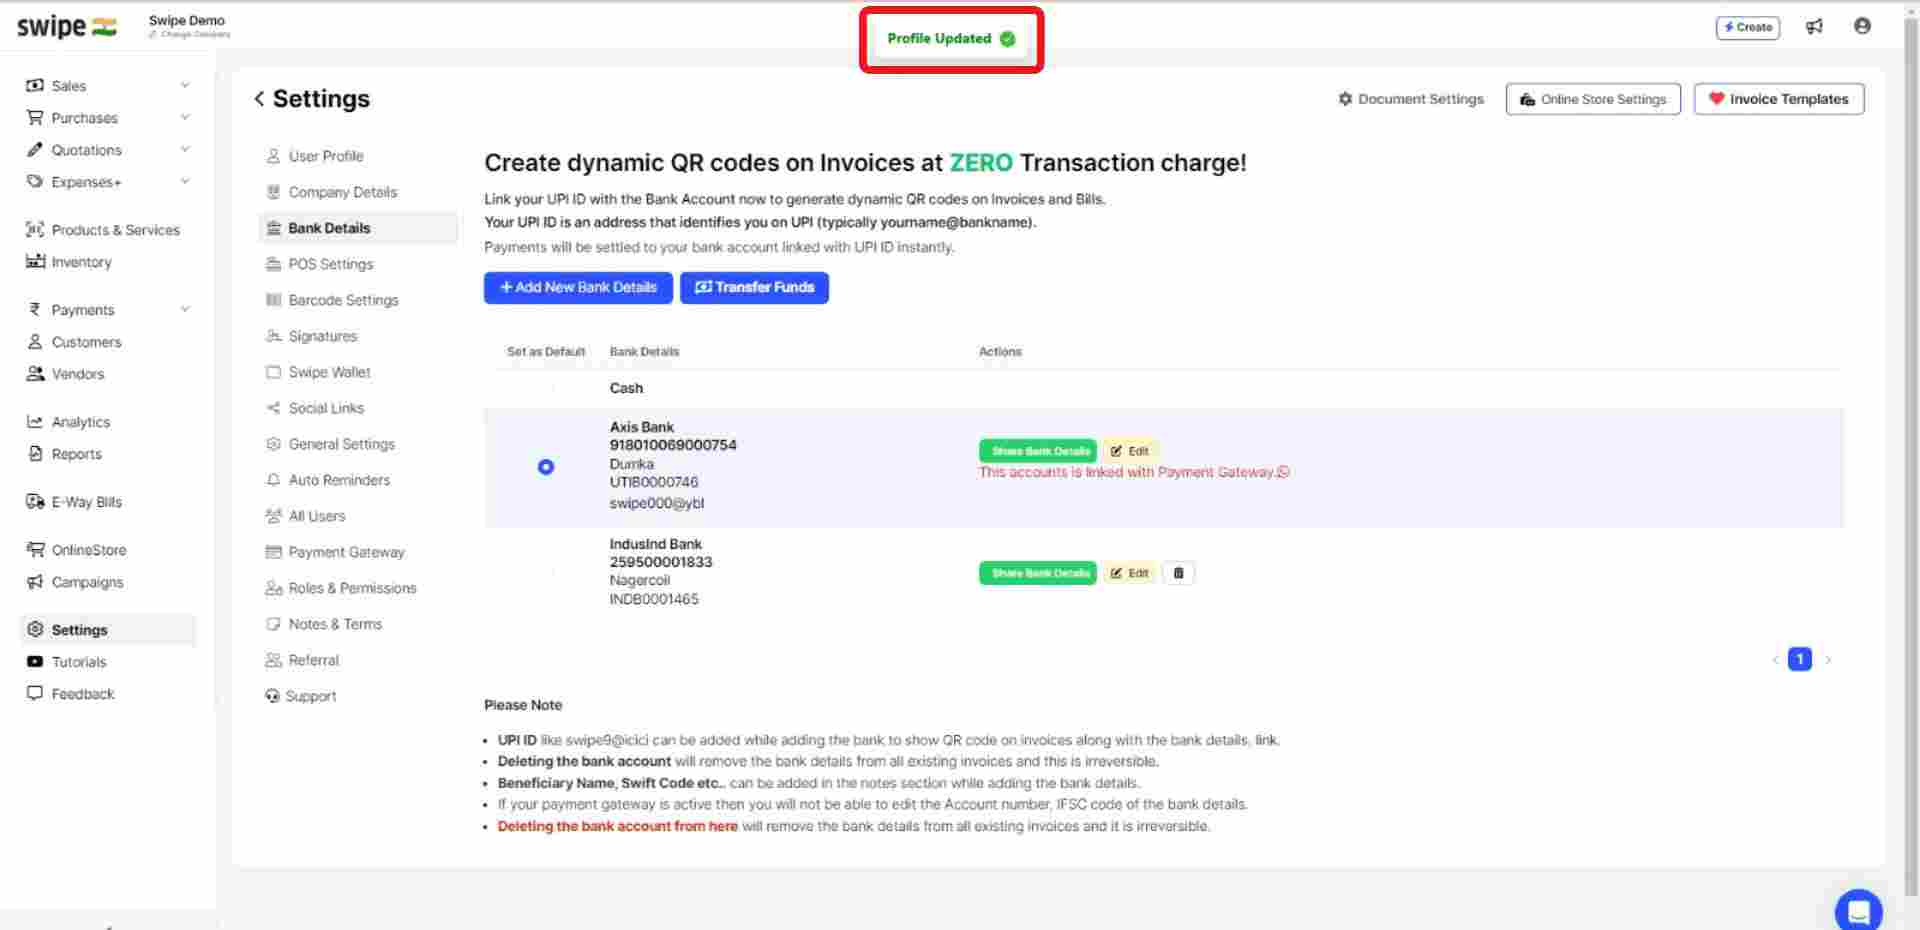
Congratulations! You have successfully added your UPI ID to the Bank account. A pop-up will appear on top of the screen informing the same.
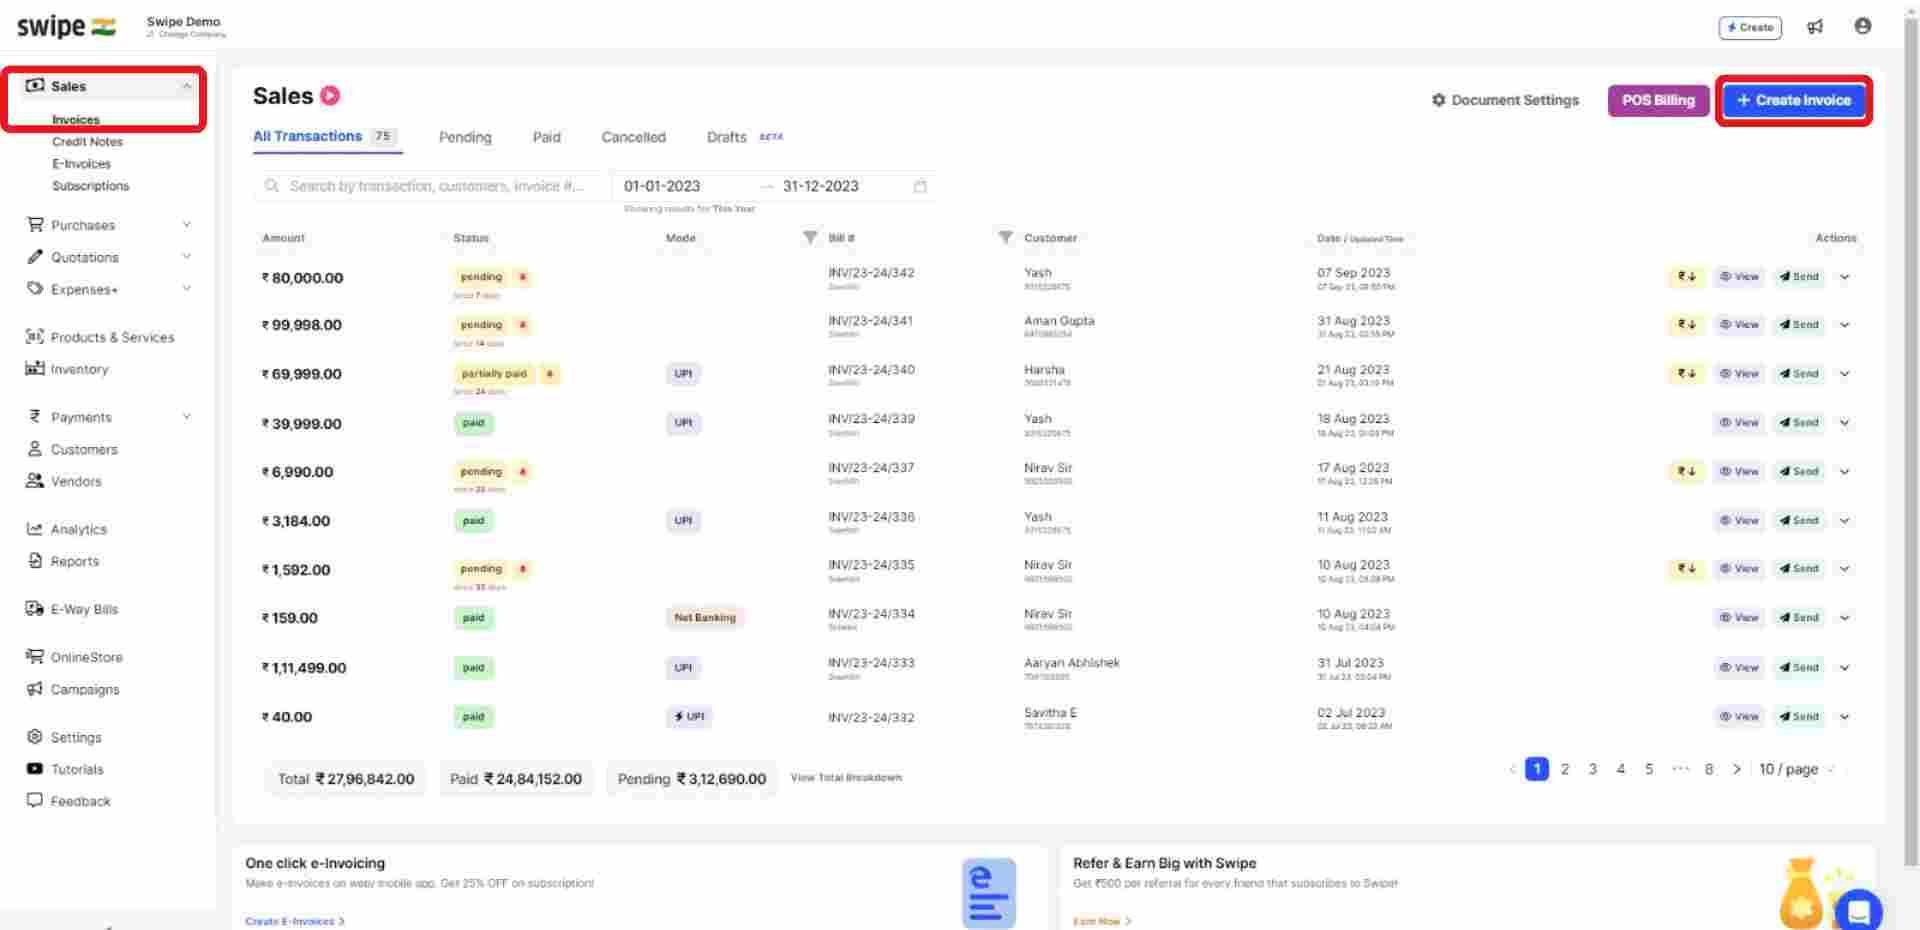
Step 4: Go to “Sales”, and Select “Invoices”.
Now, click on "Create Invoice” from the top right-hand corner of the screen.
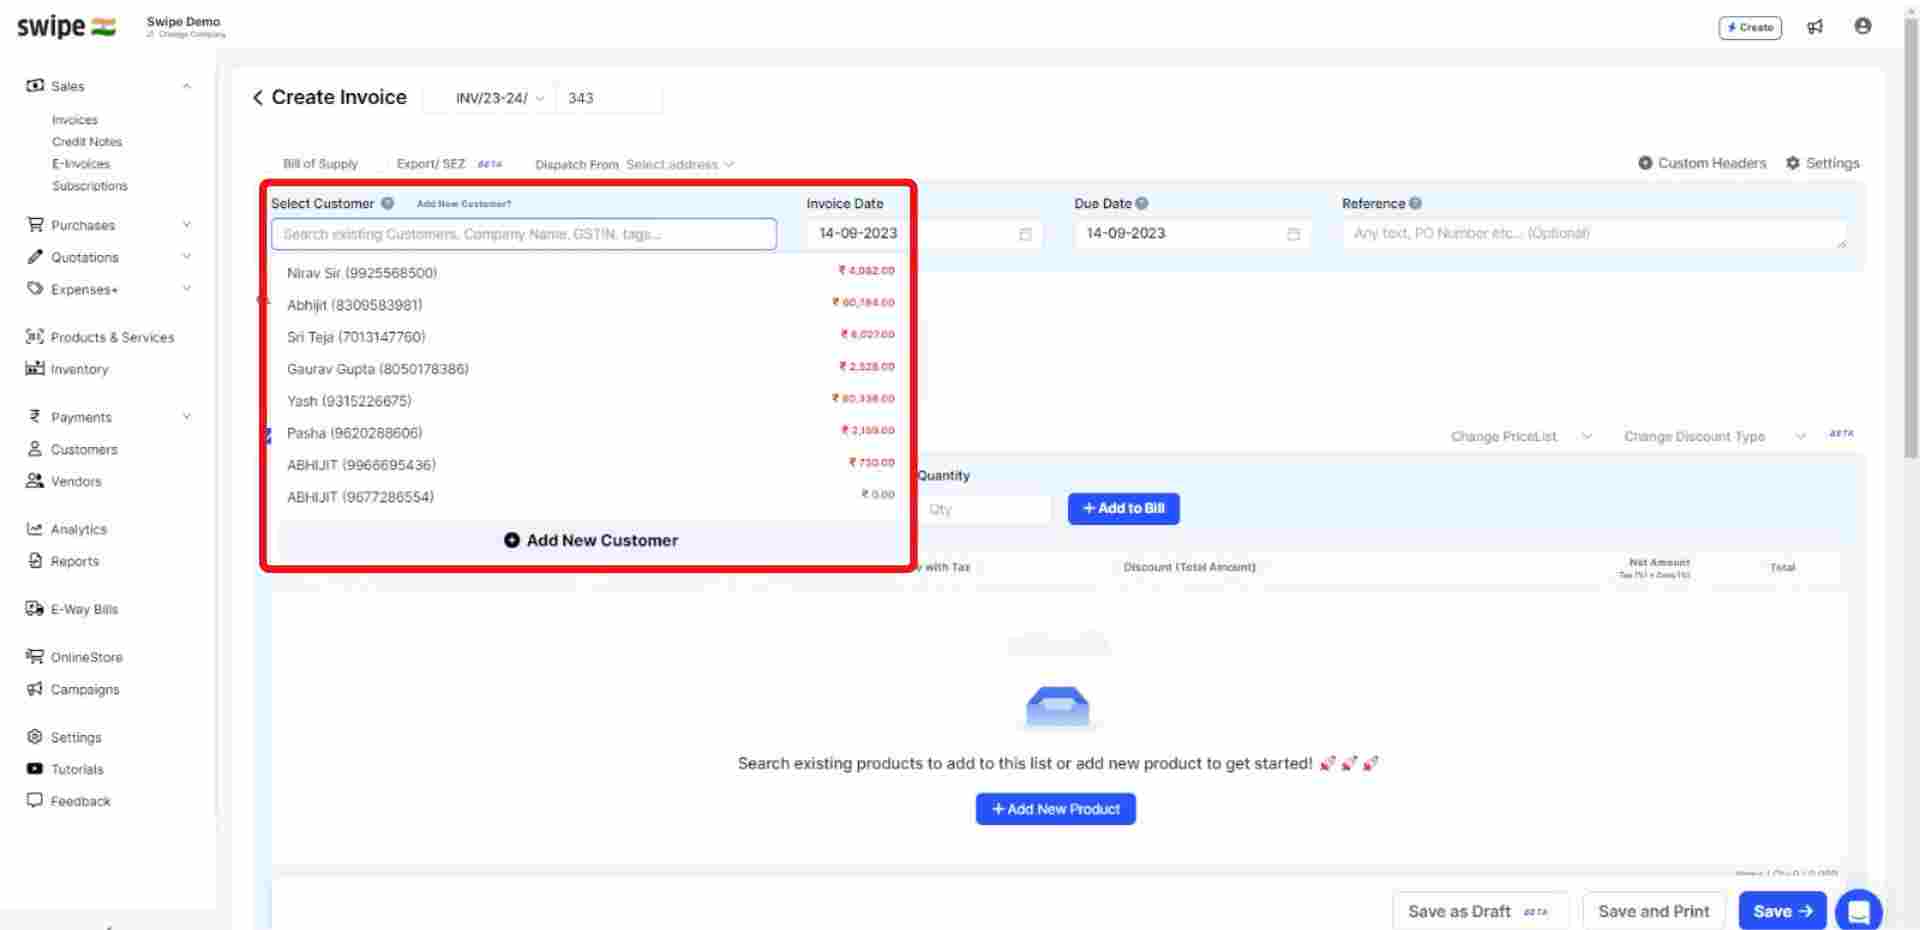
Step 5: Fill in the customer's details.
You can select existing customers from the drop-down list or add new customers by typing in their details manually.
(And fill in the necessary details like due date, reference number, etc.)
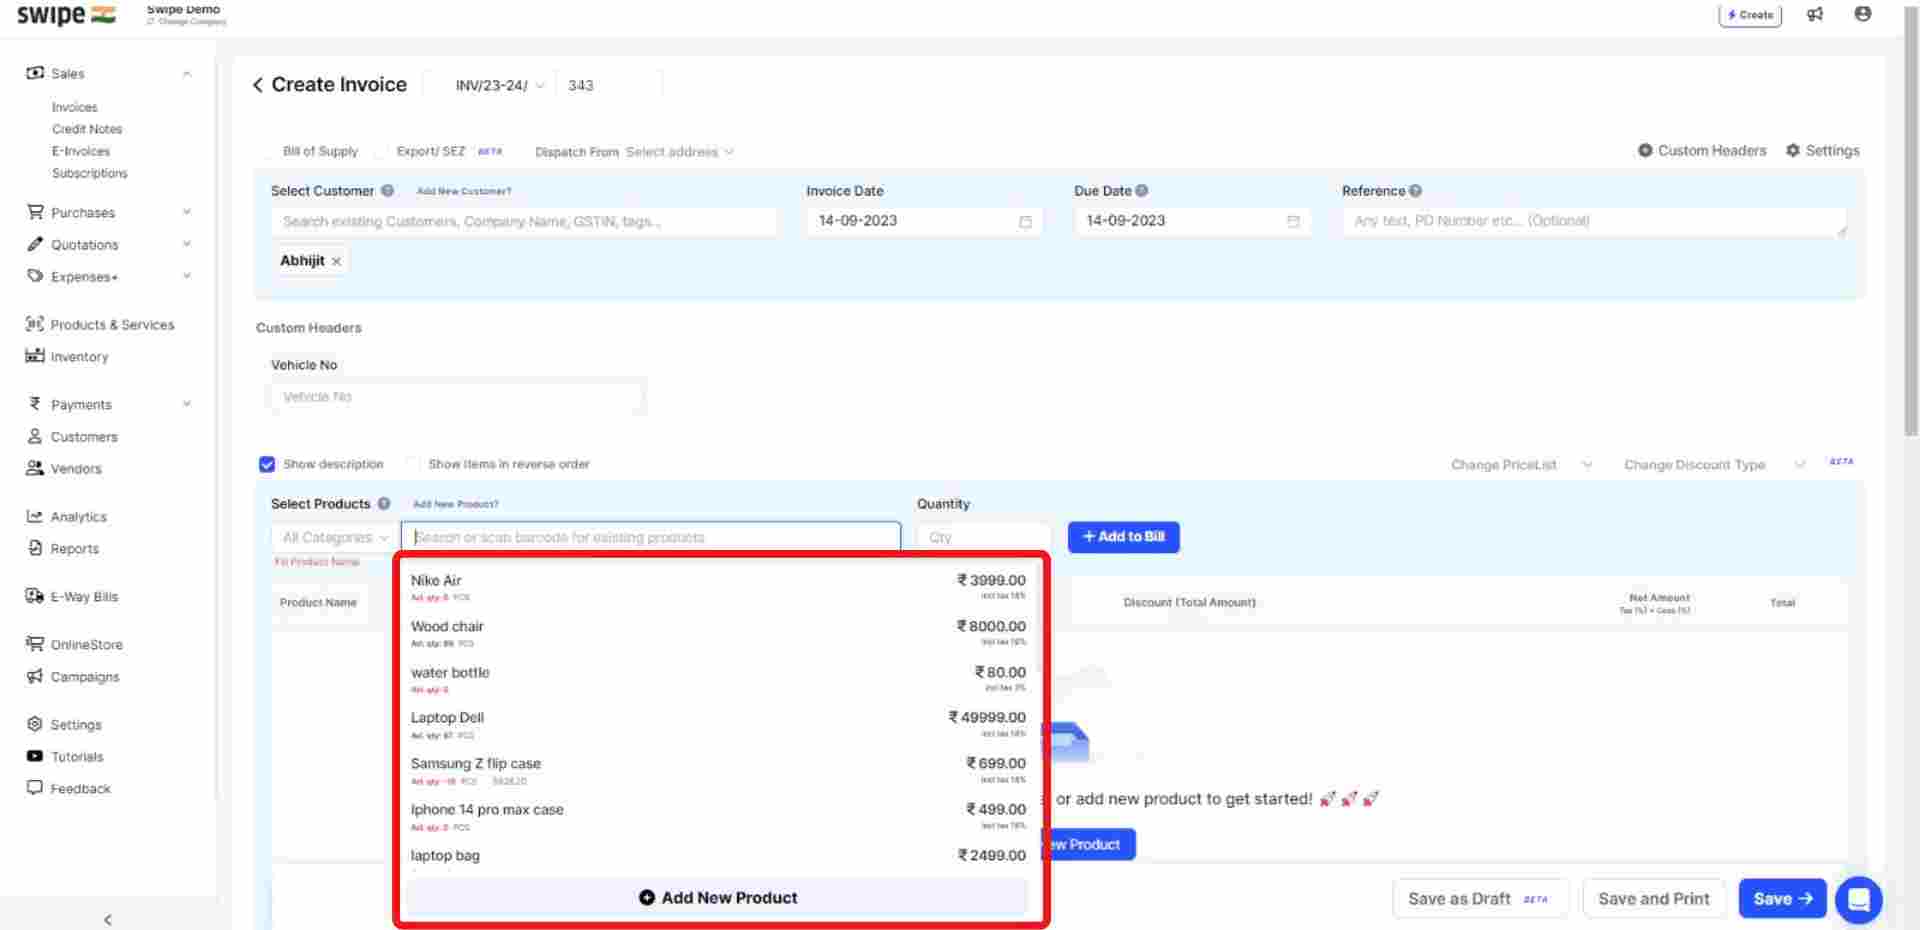
Step 6: Fill in the details of the products.
You can select existing products from the drop-down list or add new products by typing in their details manually.
To add more products, click on ‘+ Add New Product’, which will add new item rows.
Also, Click on ‘+ Add to bill’ and add the rest of the product details like quantity, category, discount, etc.
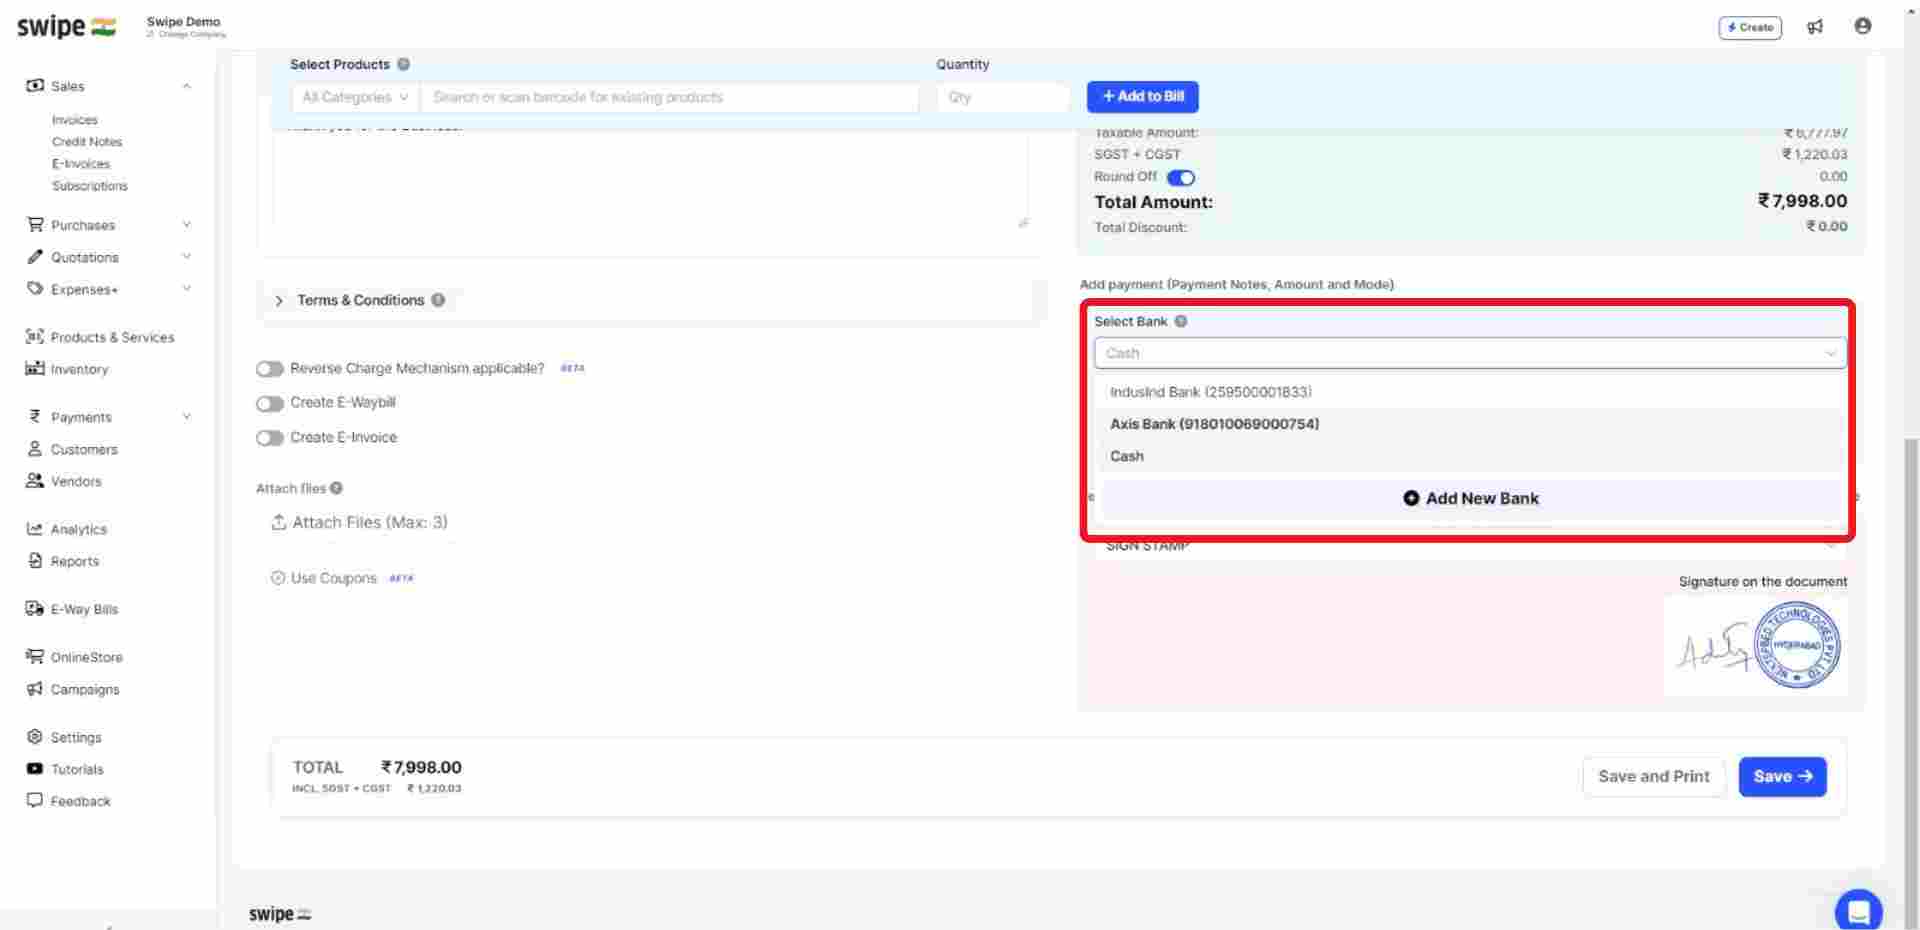
Step 7: Select the bank account
Go to the “Add Payment” section and click on the drop-down box below “Select Bank”
Select the bank to which you added your UPI ID earlier.
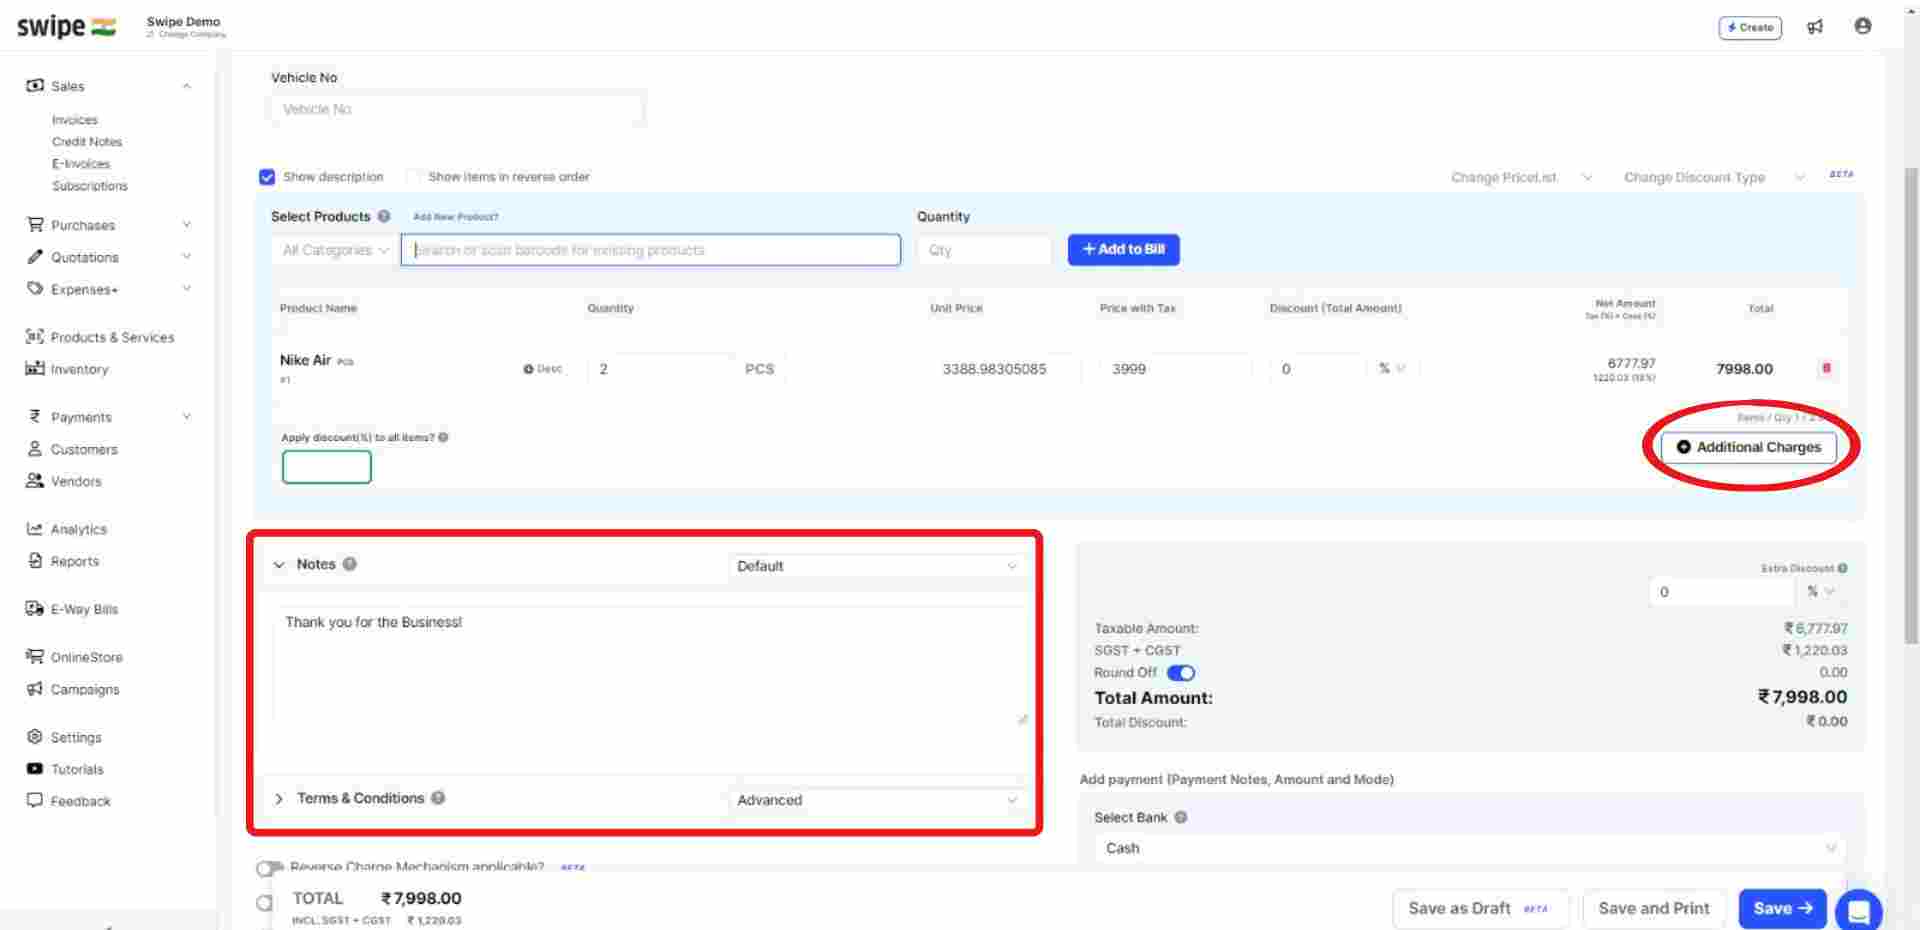
Also, add additional charges (if applicable) and create or edit notes, as well as terms and conditions.
Step 8: Add your signature and click "save".
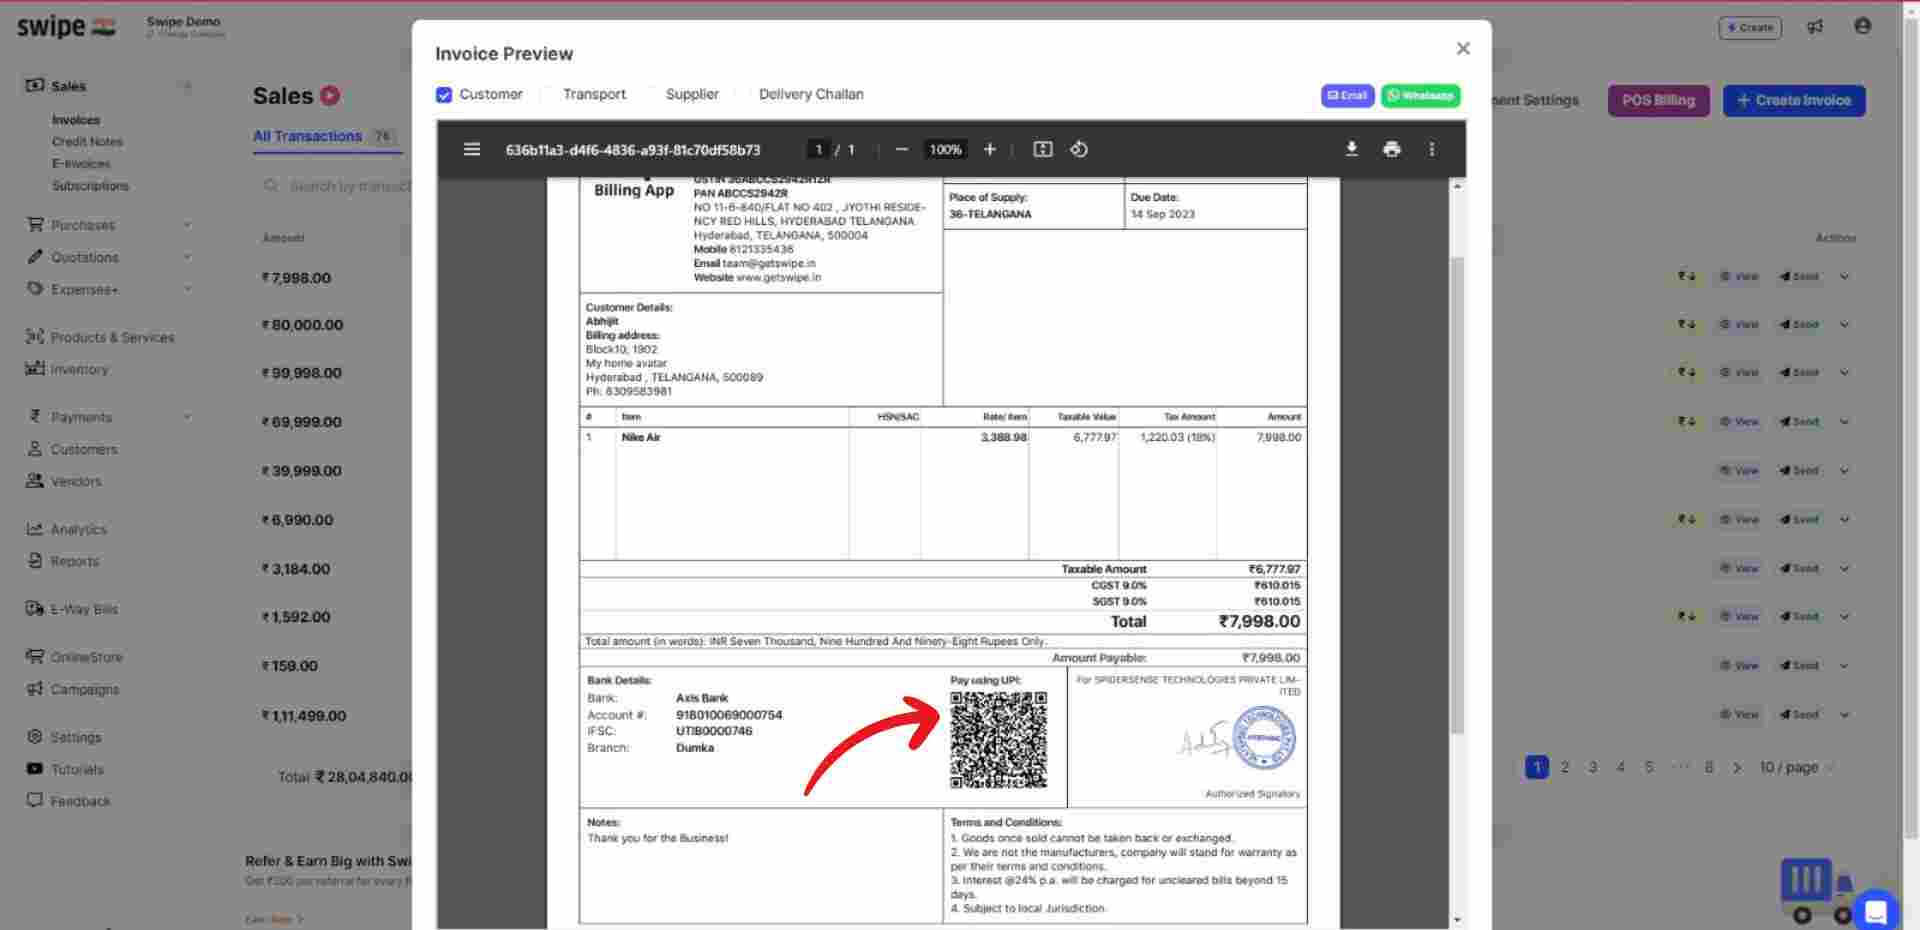
Your Invoice with the QR Code is ready.
You can now share it via WhatsApp, SMS, or Email with your customers, and they can pay you by scanning the payment QR code on the invoice.
Note: You cannot add an existing QR code to the invoice, you can only add a payment QR code by adding a UPI ID to your bank account, through which the software automatically generates a unique QR code for your bank account.
How to add QR code to invoices on Android
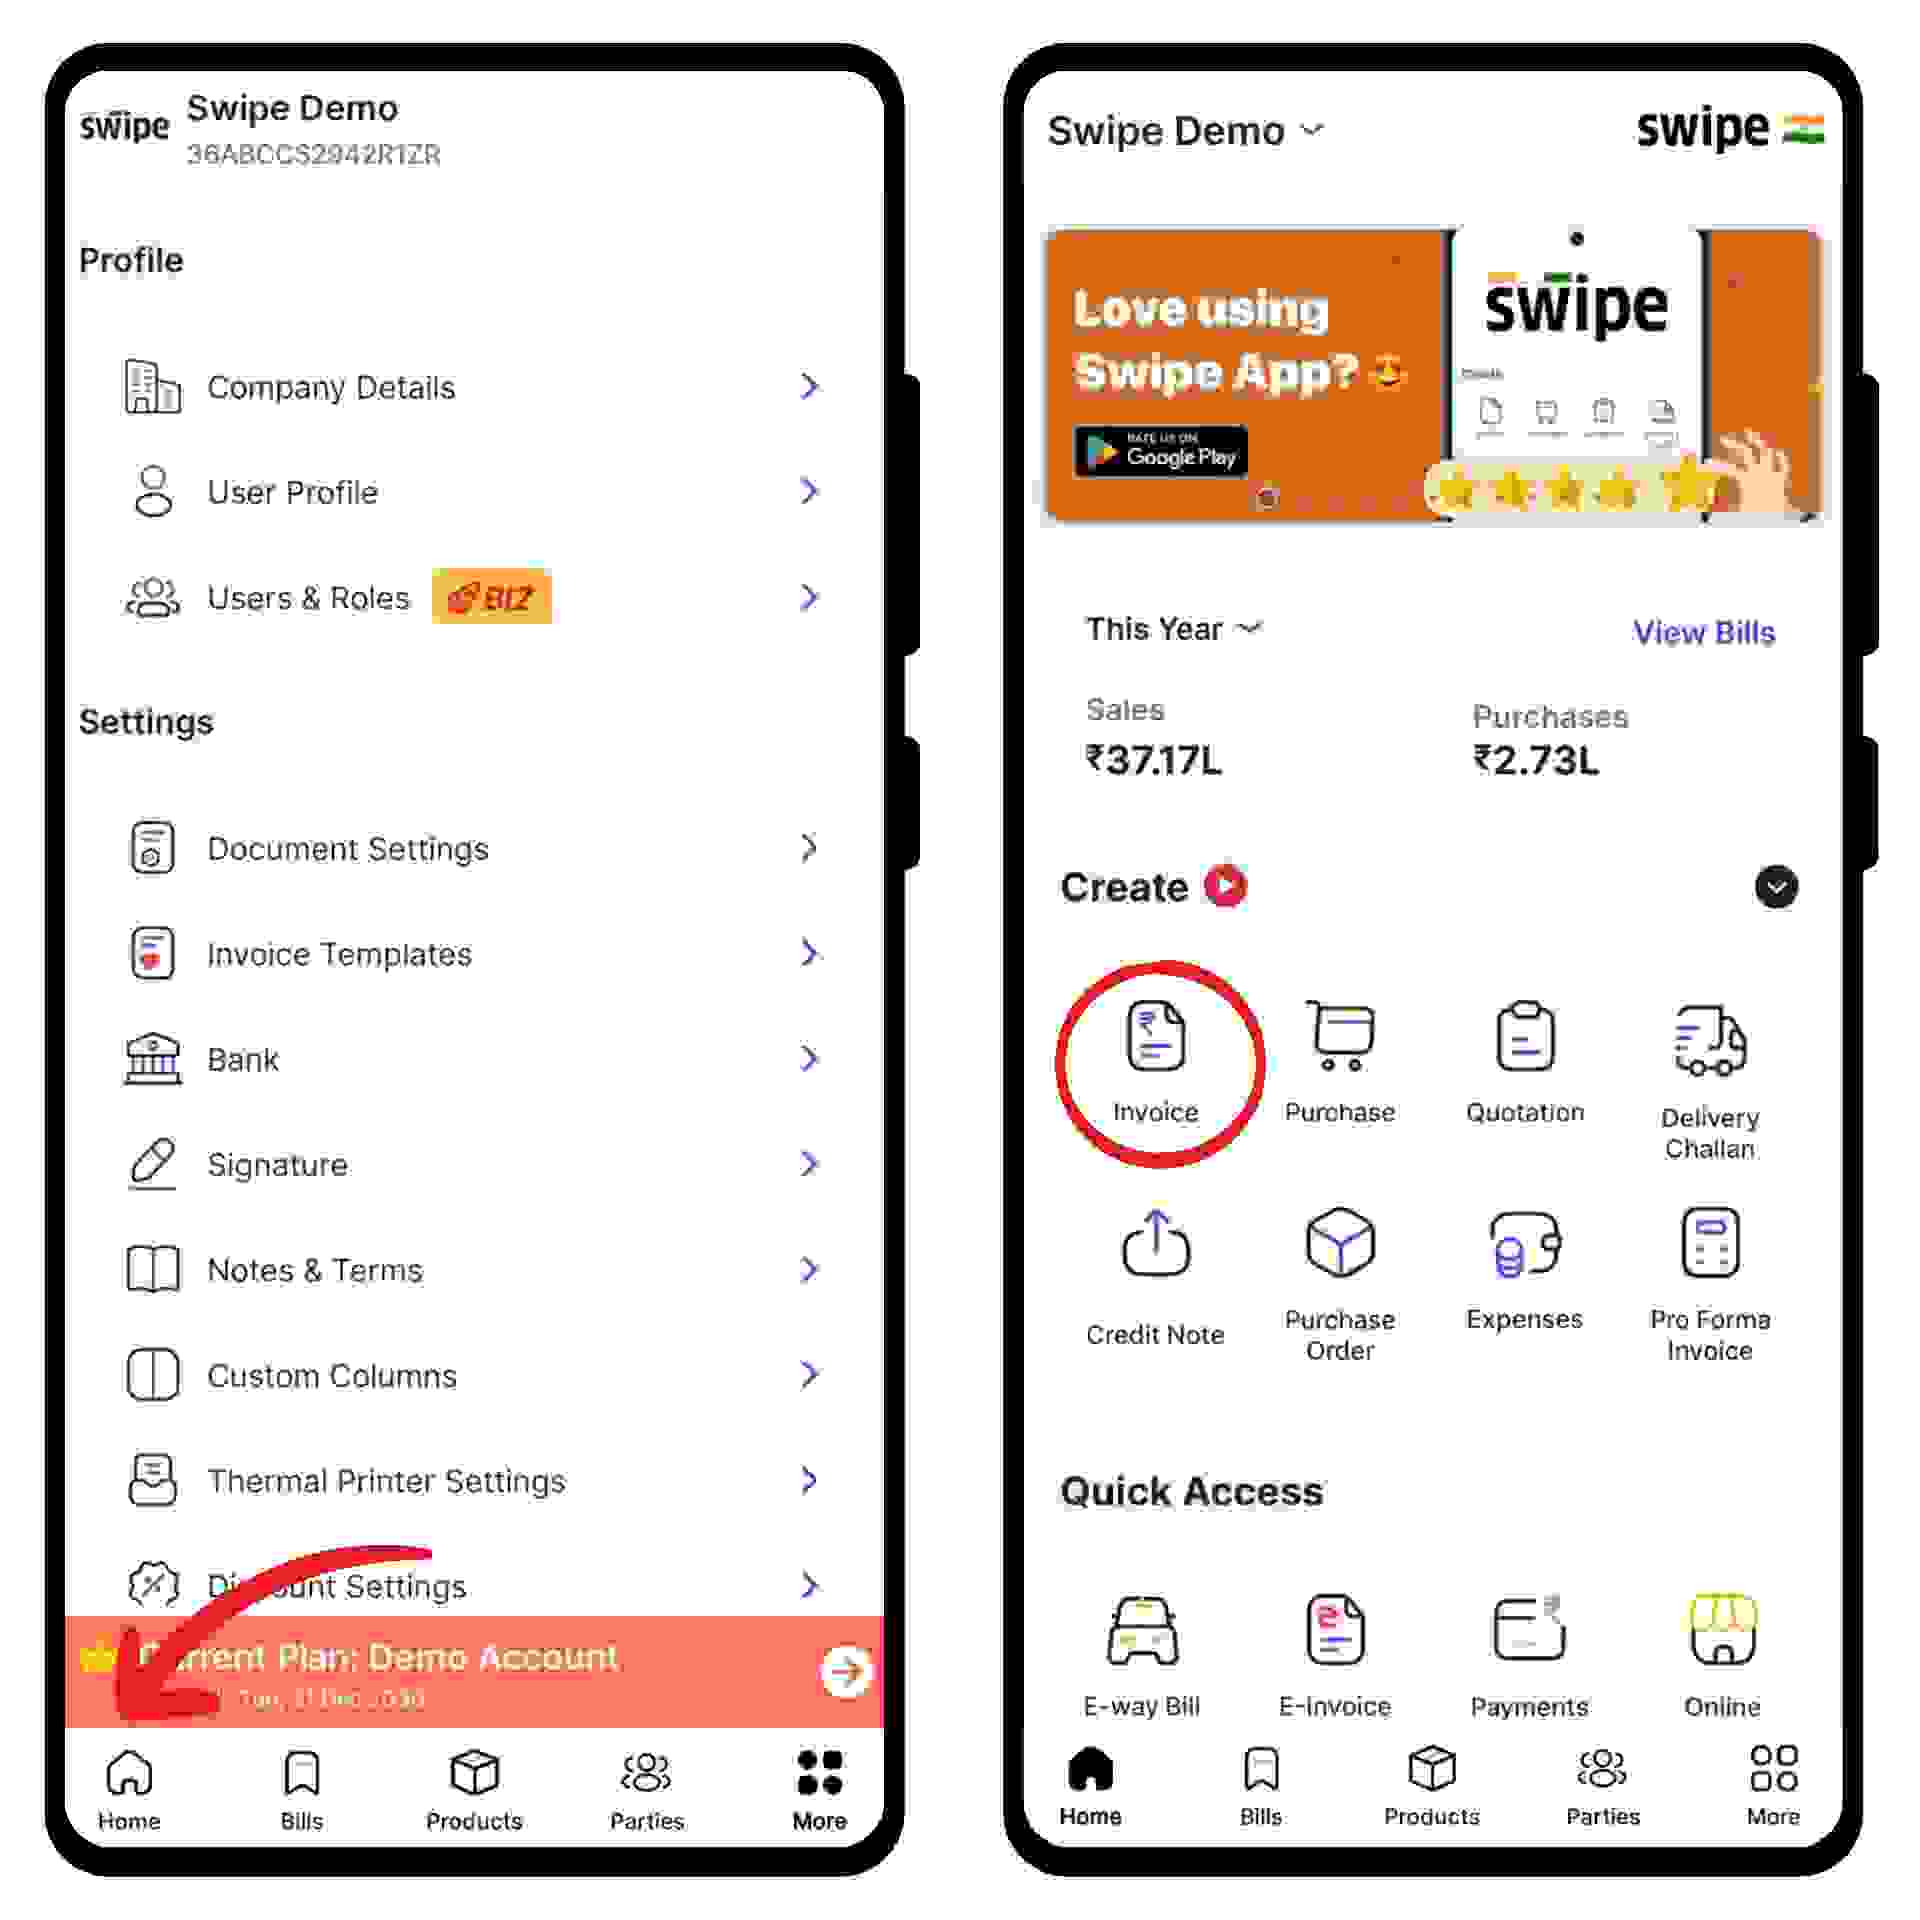
Step 1: Go to "More".
Choose the “Bank” option from the menu.
Step 2: Edit the bank details.
Select the bank account to which you would like to add the UPI ID and click on the bank column and enter the UPI ID
Step 3: Update the UPI ID.
Click on “Update bank details” at the bottom of the screen.
Congratulations! You have successfully updated your bank details and a pop up appears at the bottom of the screen informing the same.
Step 4: Click on “Invoice”.
Go back to Home and click on the "Invoice" option under the Create section.
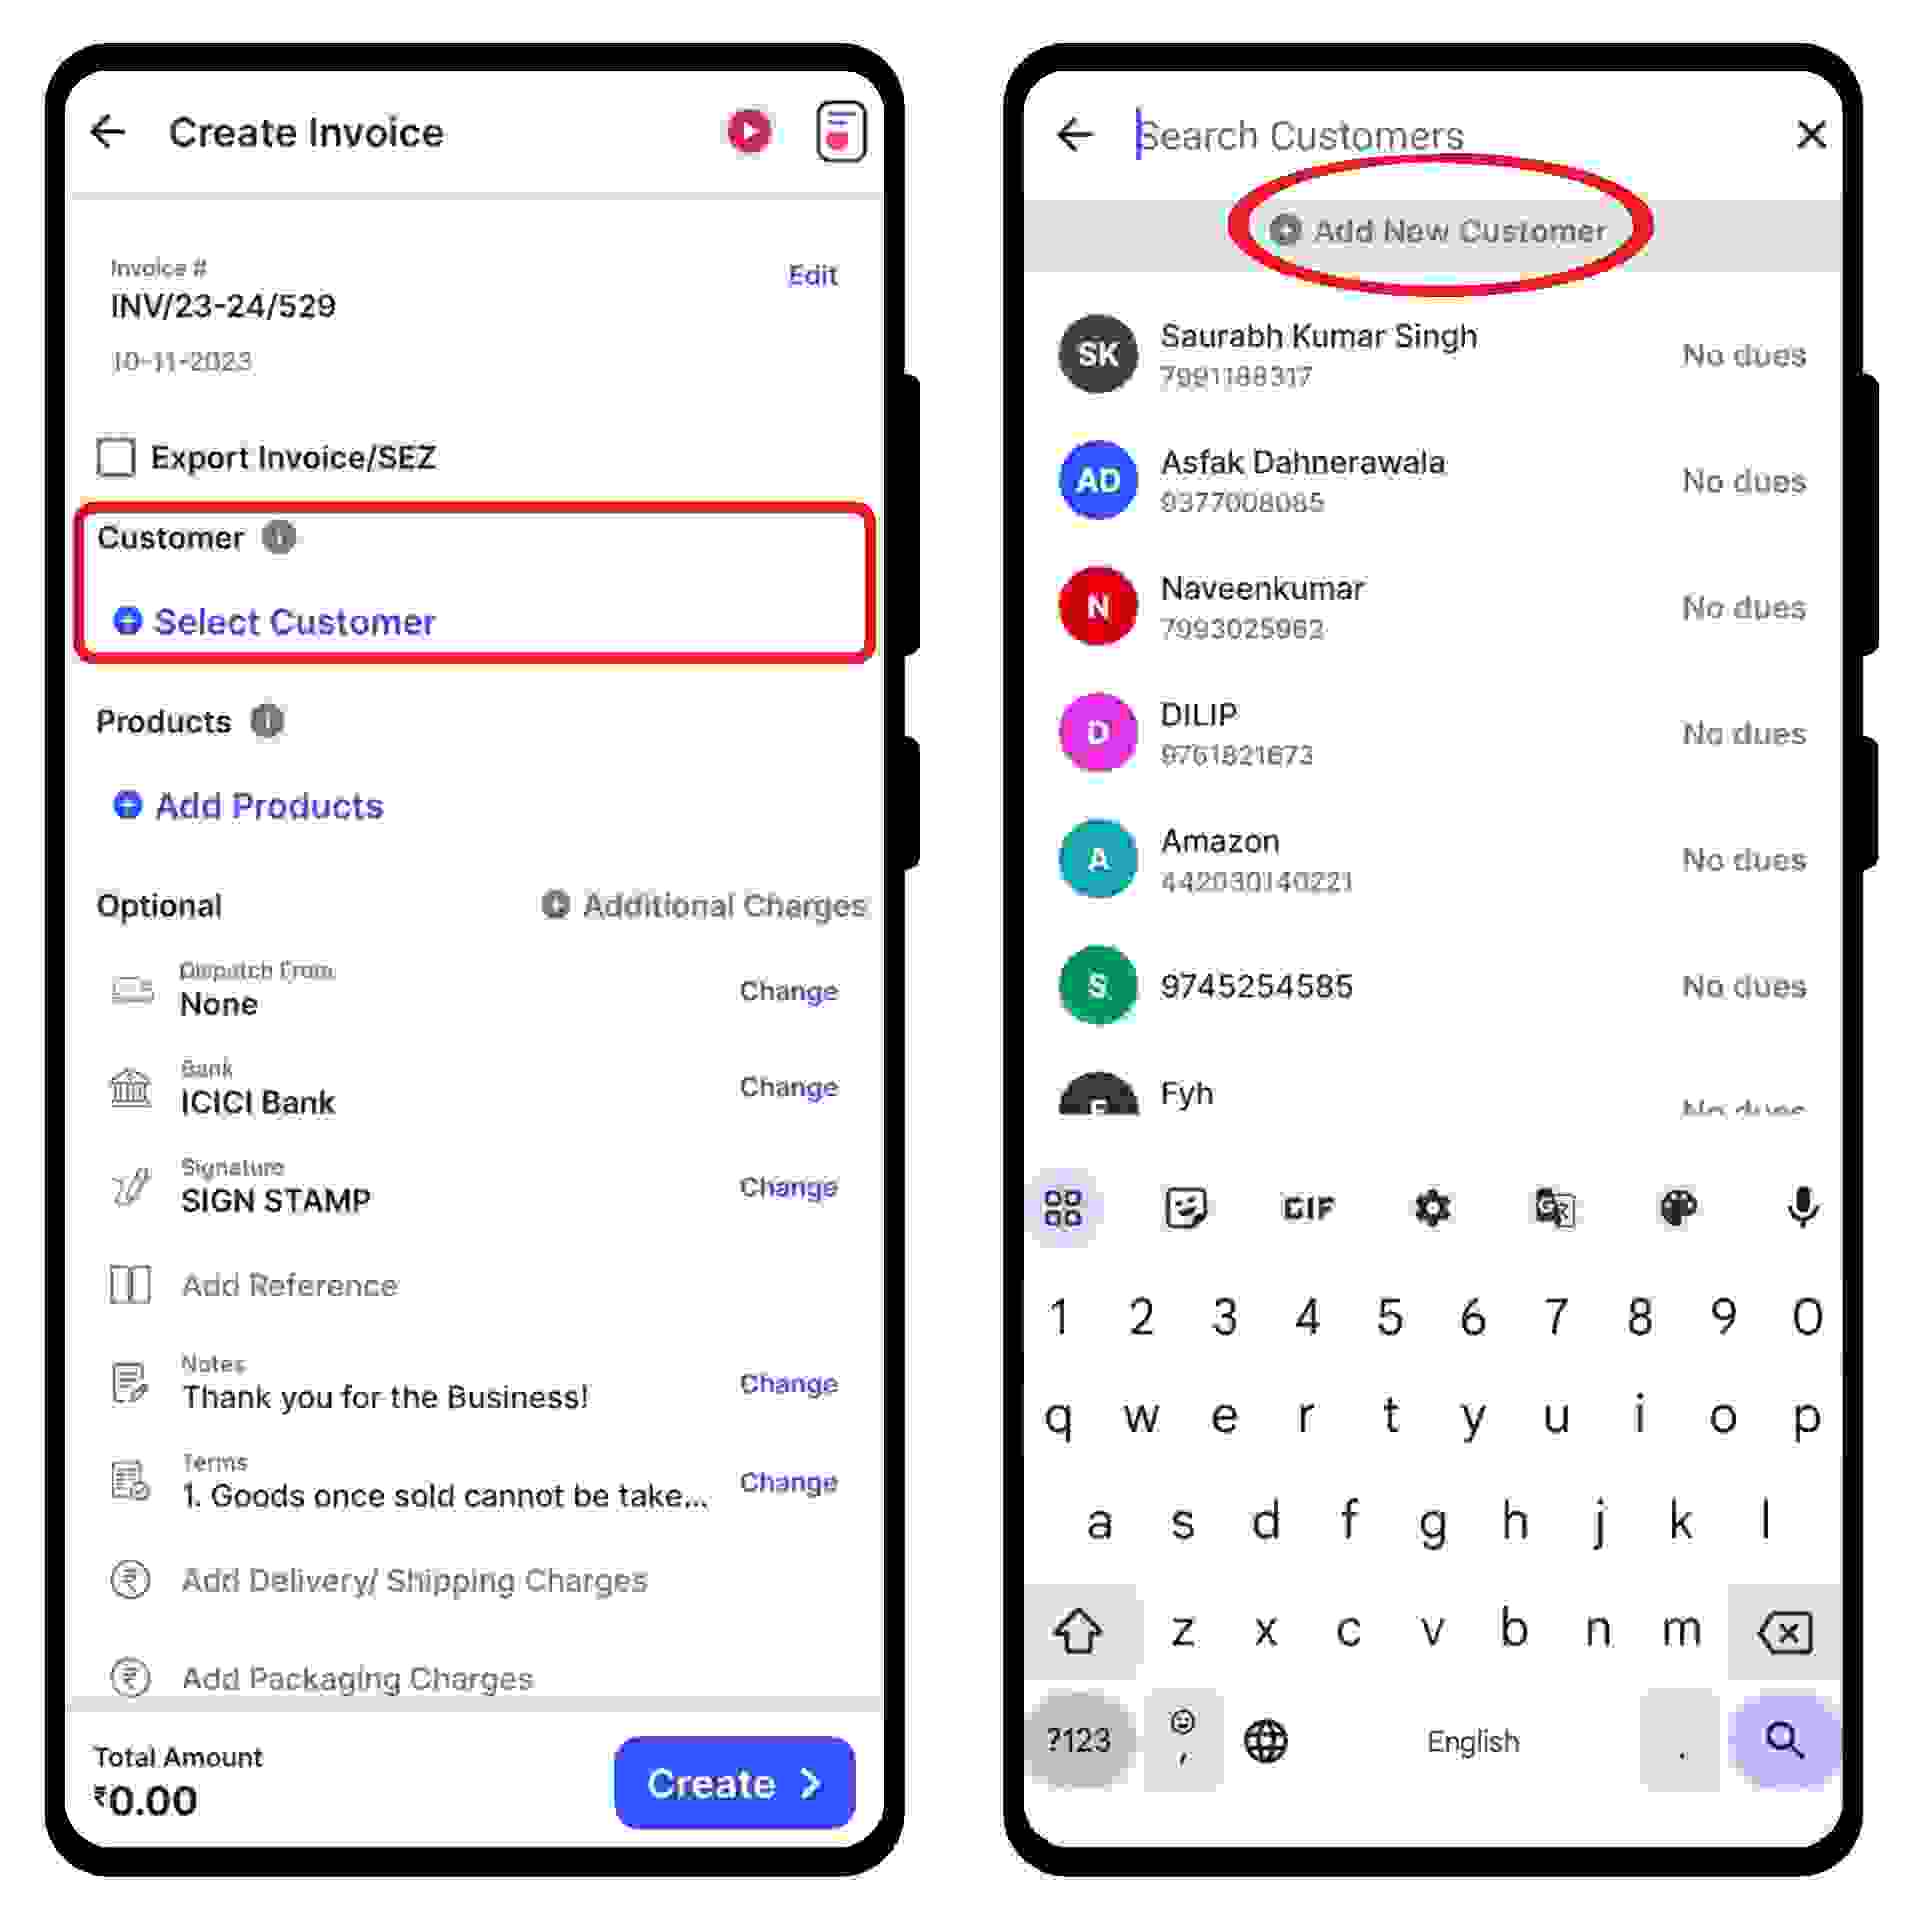
Step 5: Fill in the customer’s details
Click on “Select Customer” and select the customer you want to create the invoice for or create a new customer profile by clicking on the “Add customer” button.
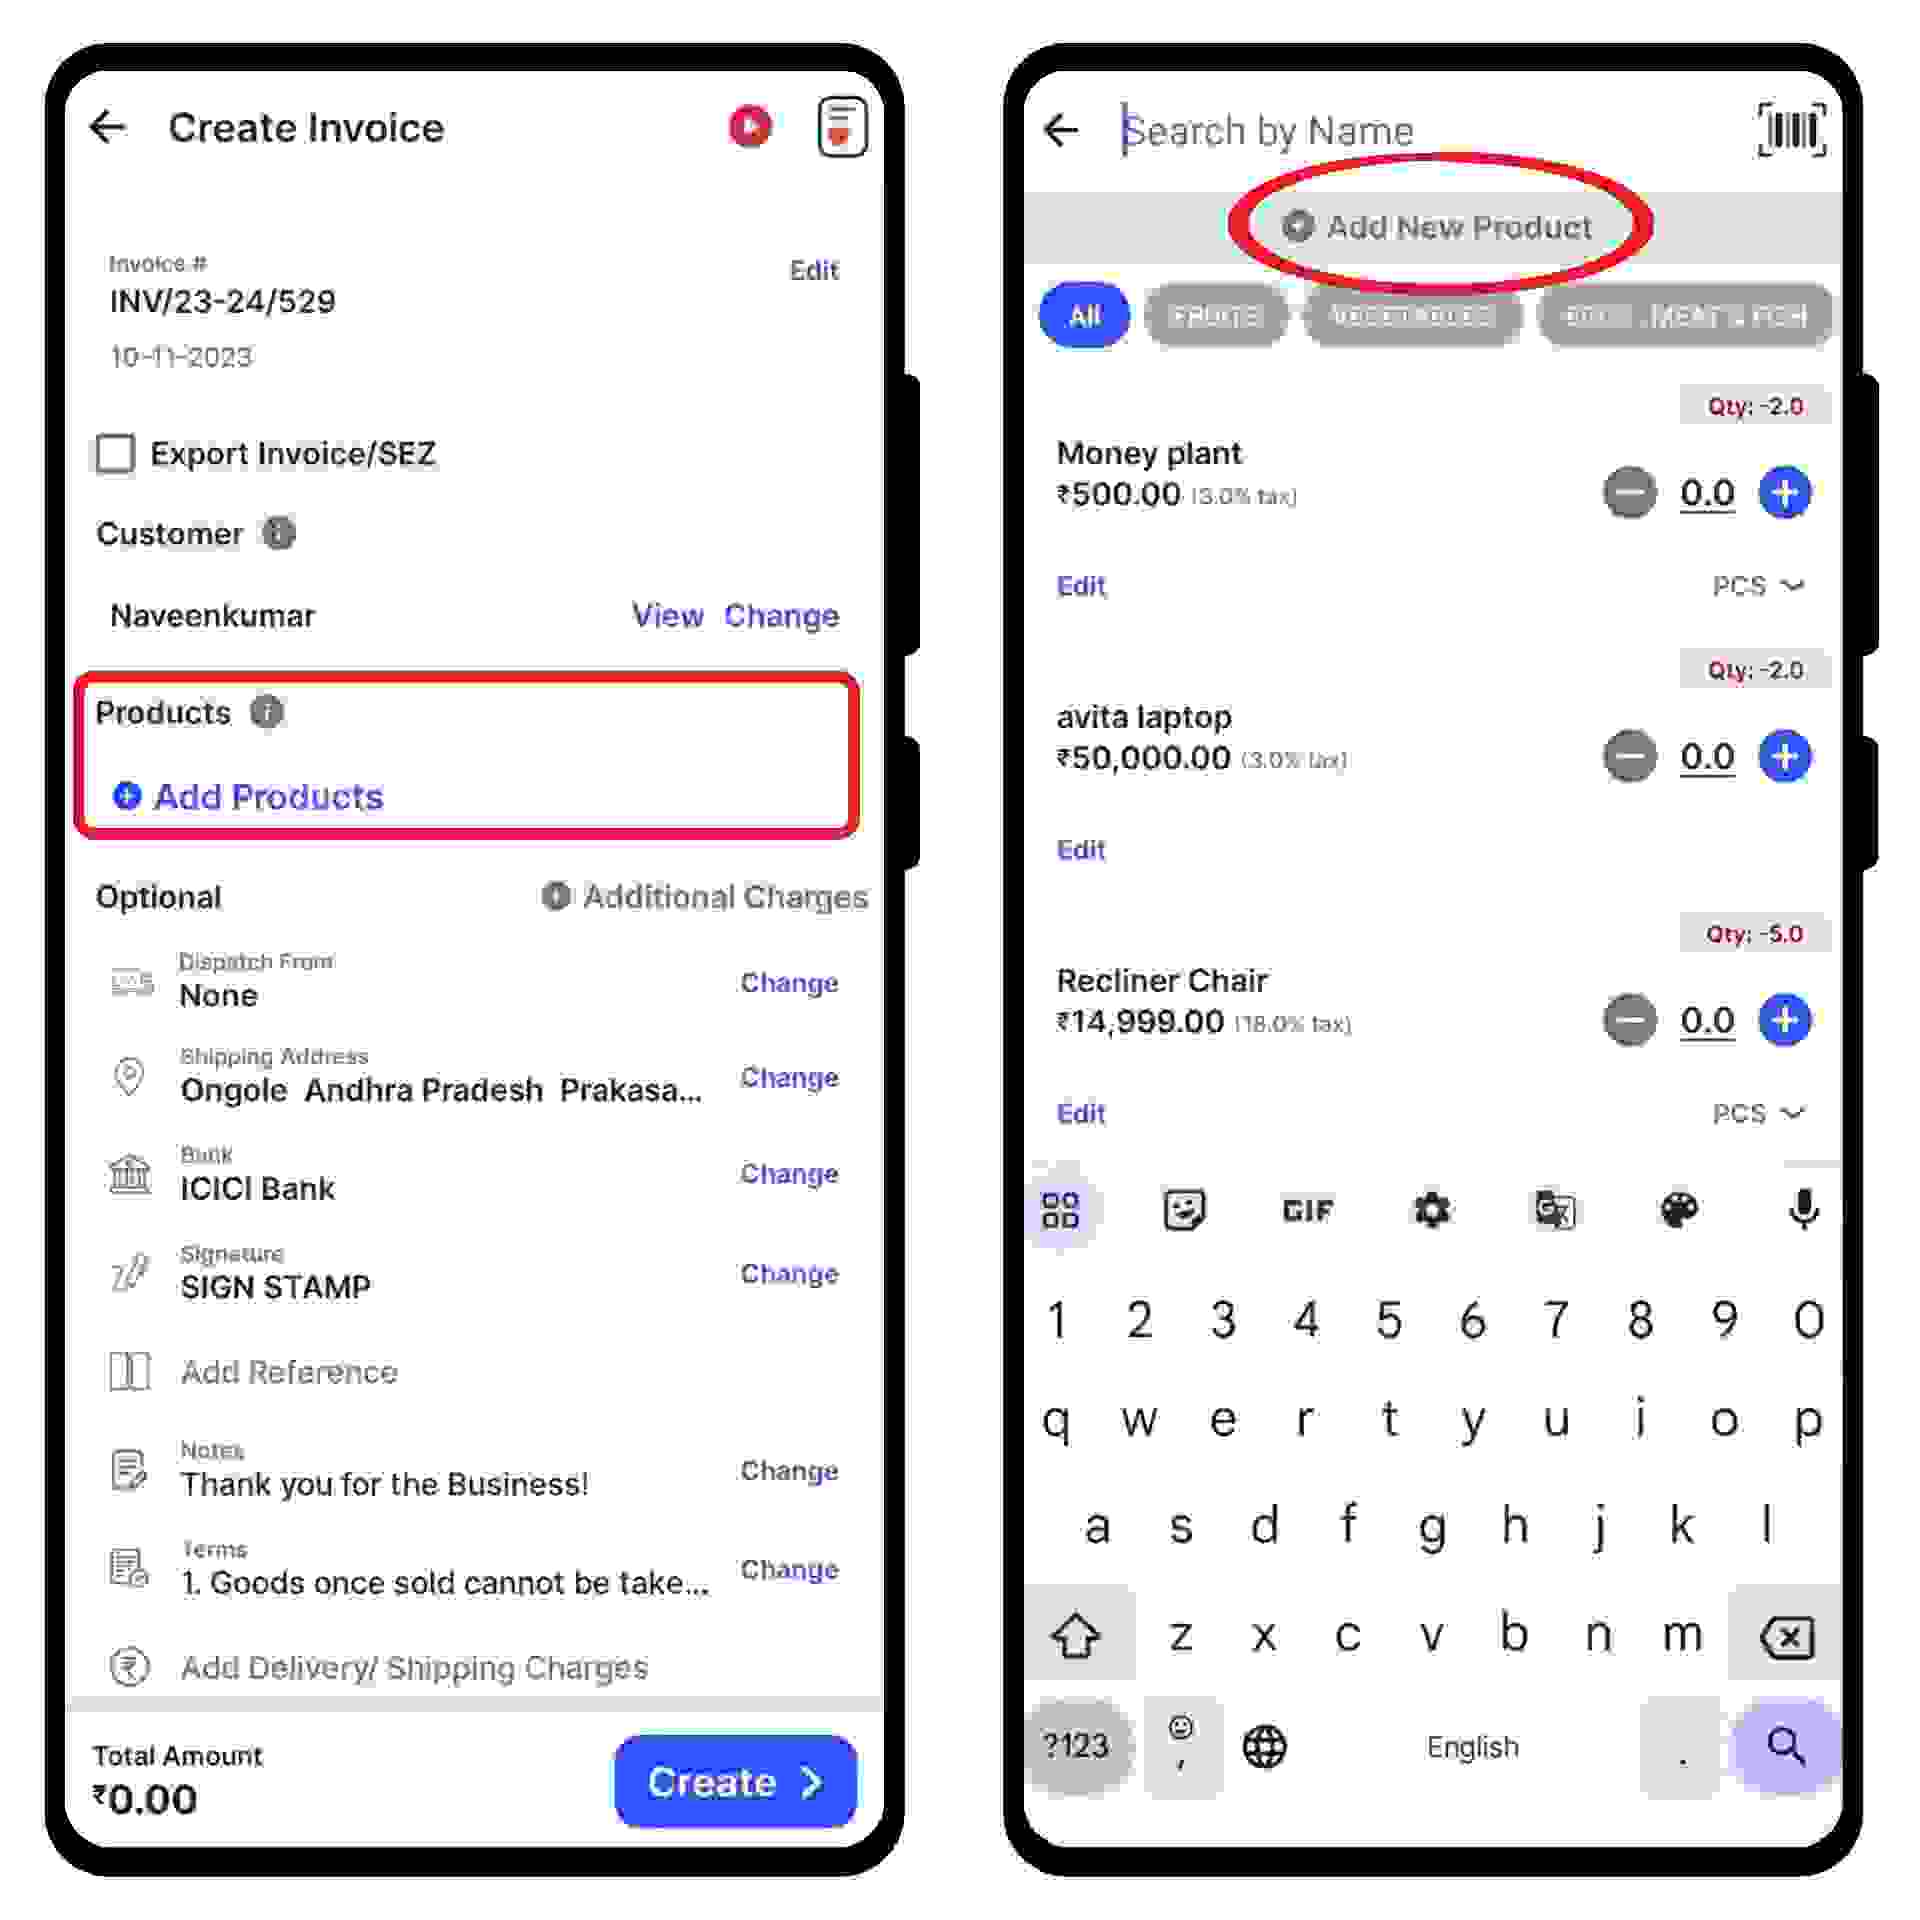
Step 6: Fill in the product details.
Click on “Add Products” and select/ search for the product you would like to add. Now click on “+” to add the quantity of the product.
or click on “+ Add New Product" at the top of the screen and type in their details manually.
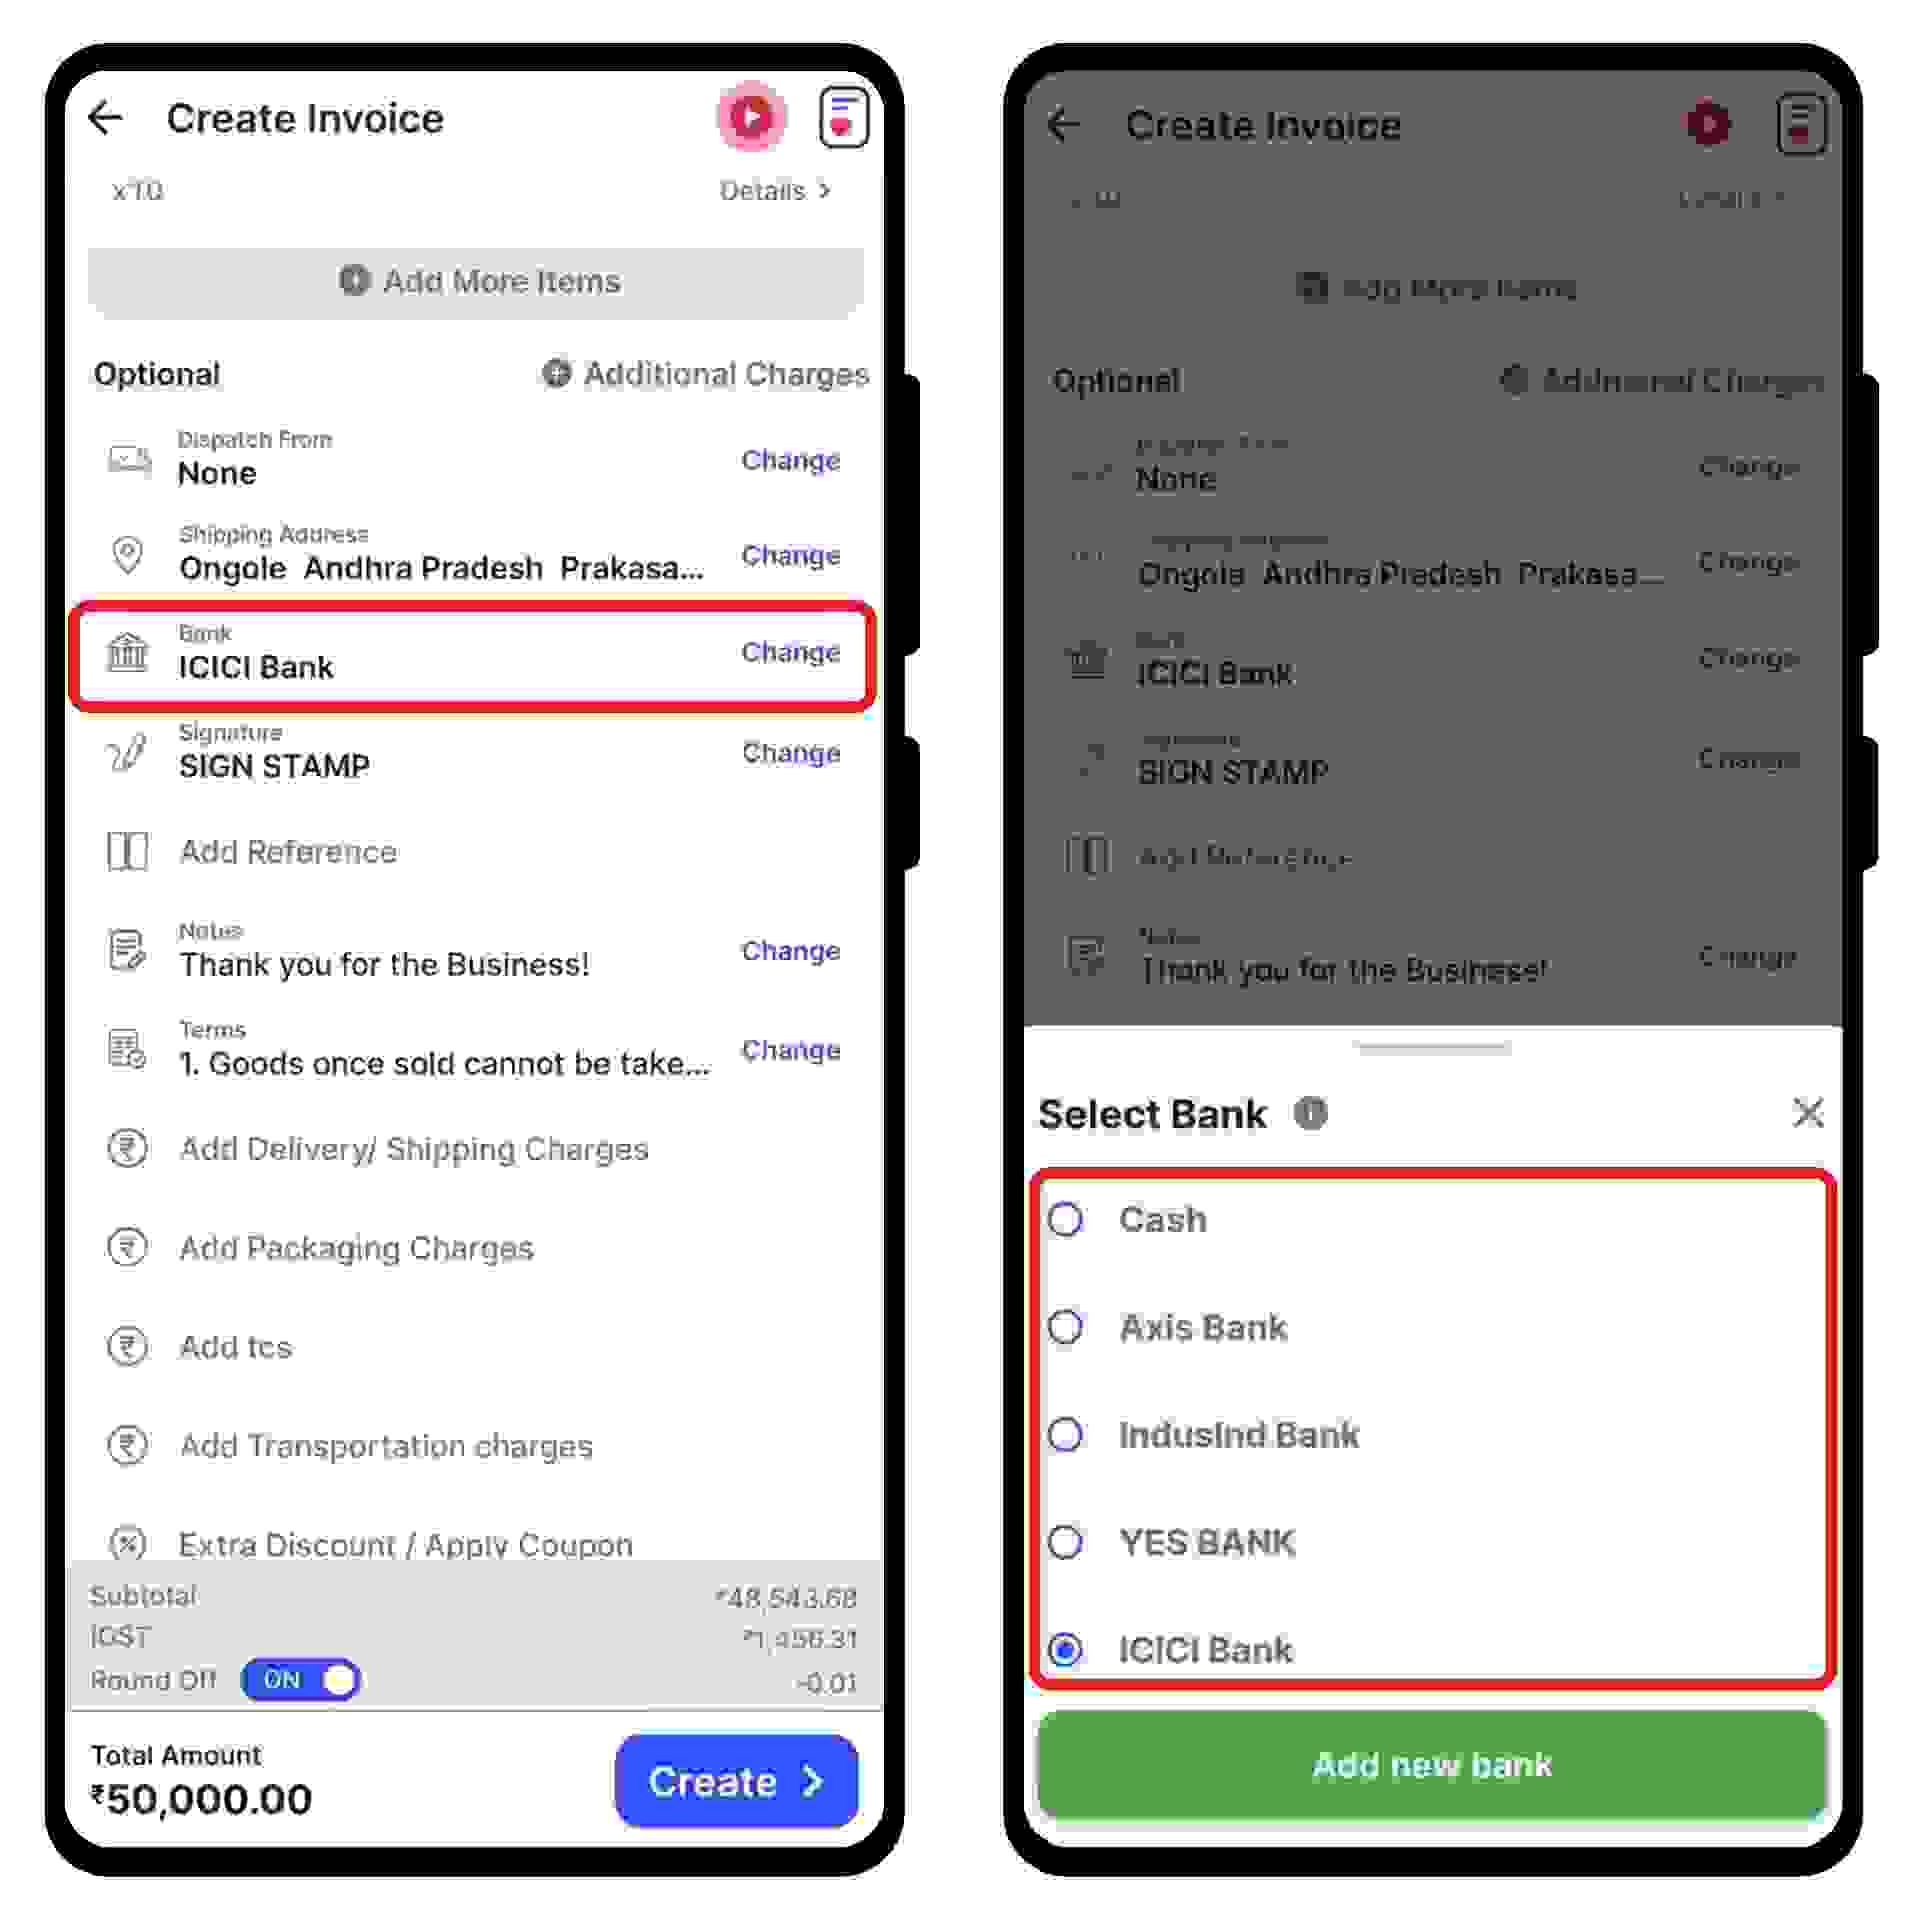
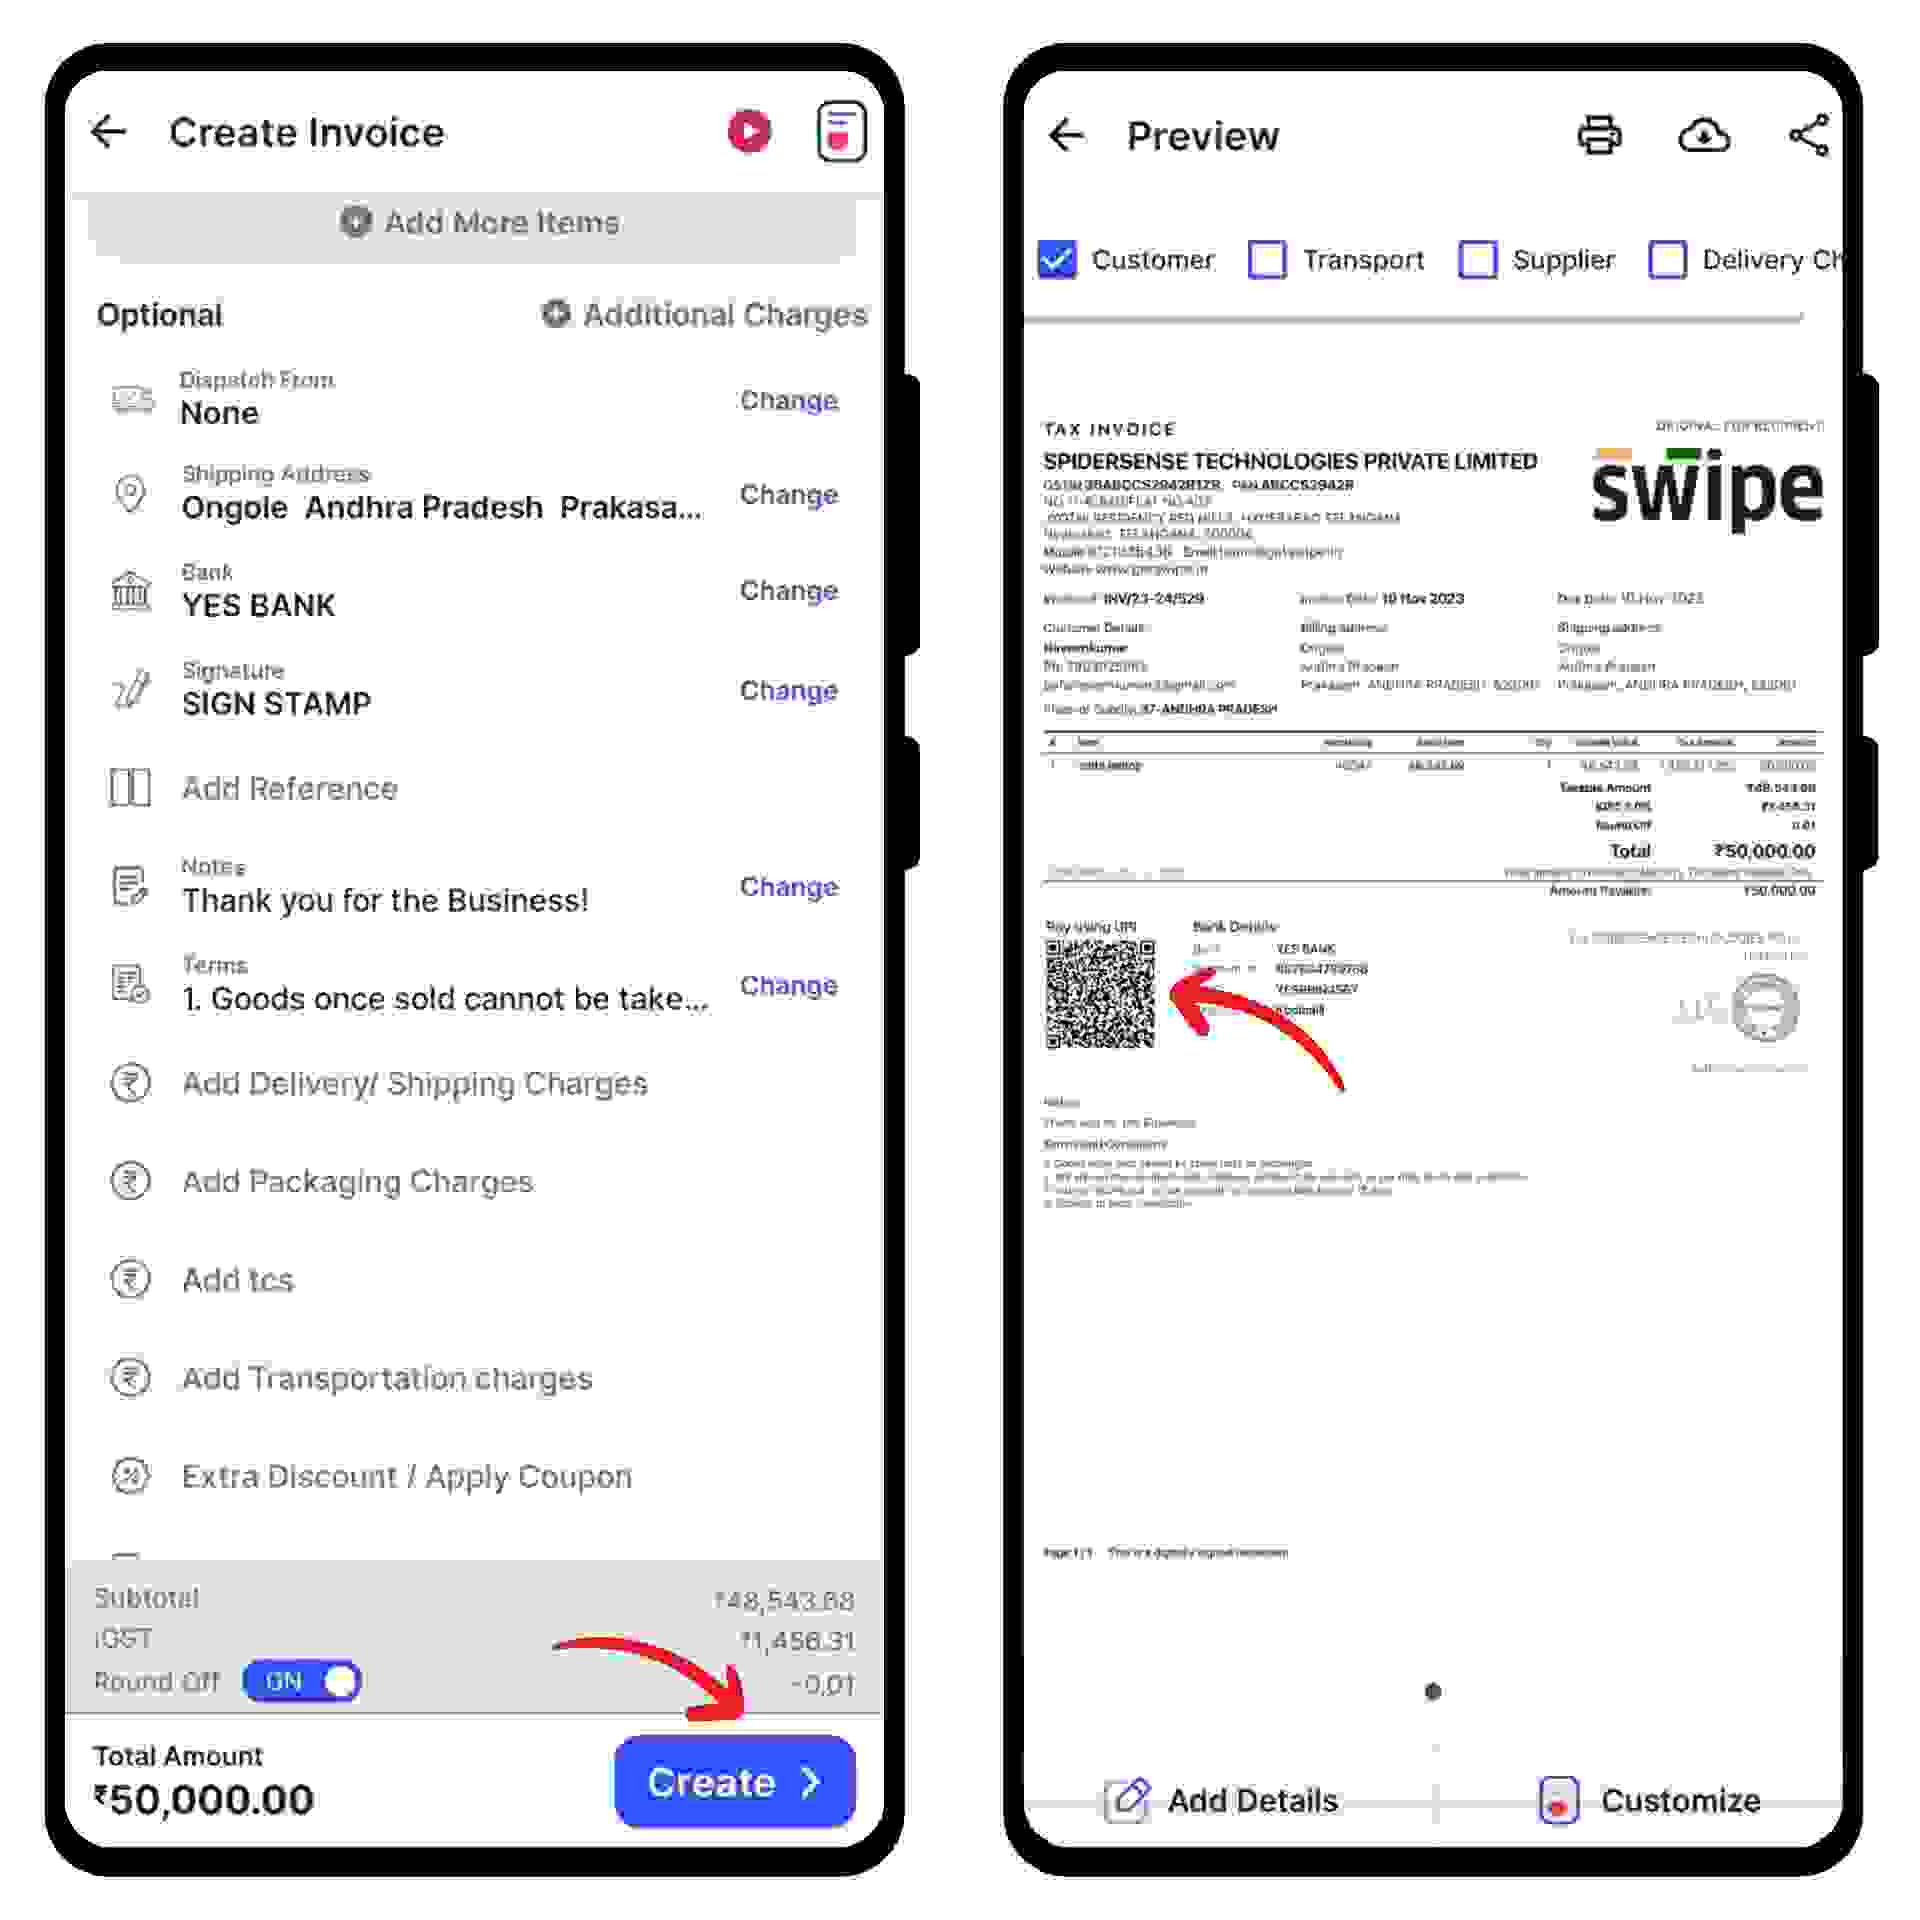
Step 7: Select the bank account.
Click on “Bank” under the optional section and select the bank to which you added your UPI ID earlier.
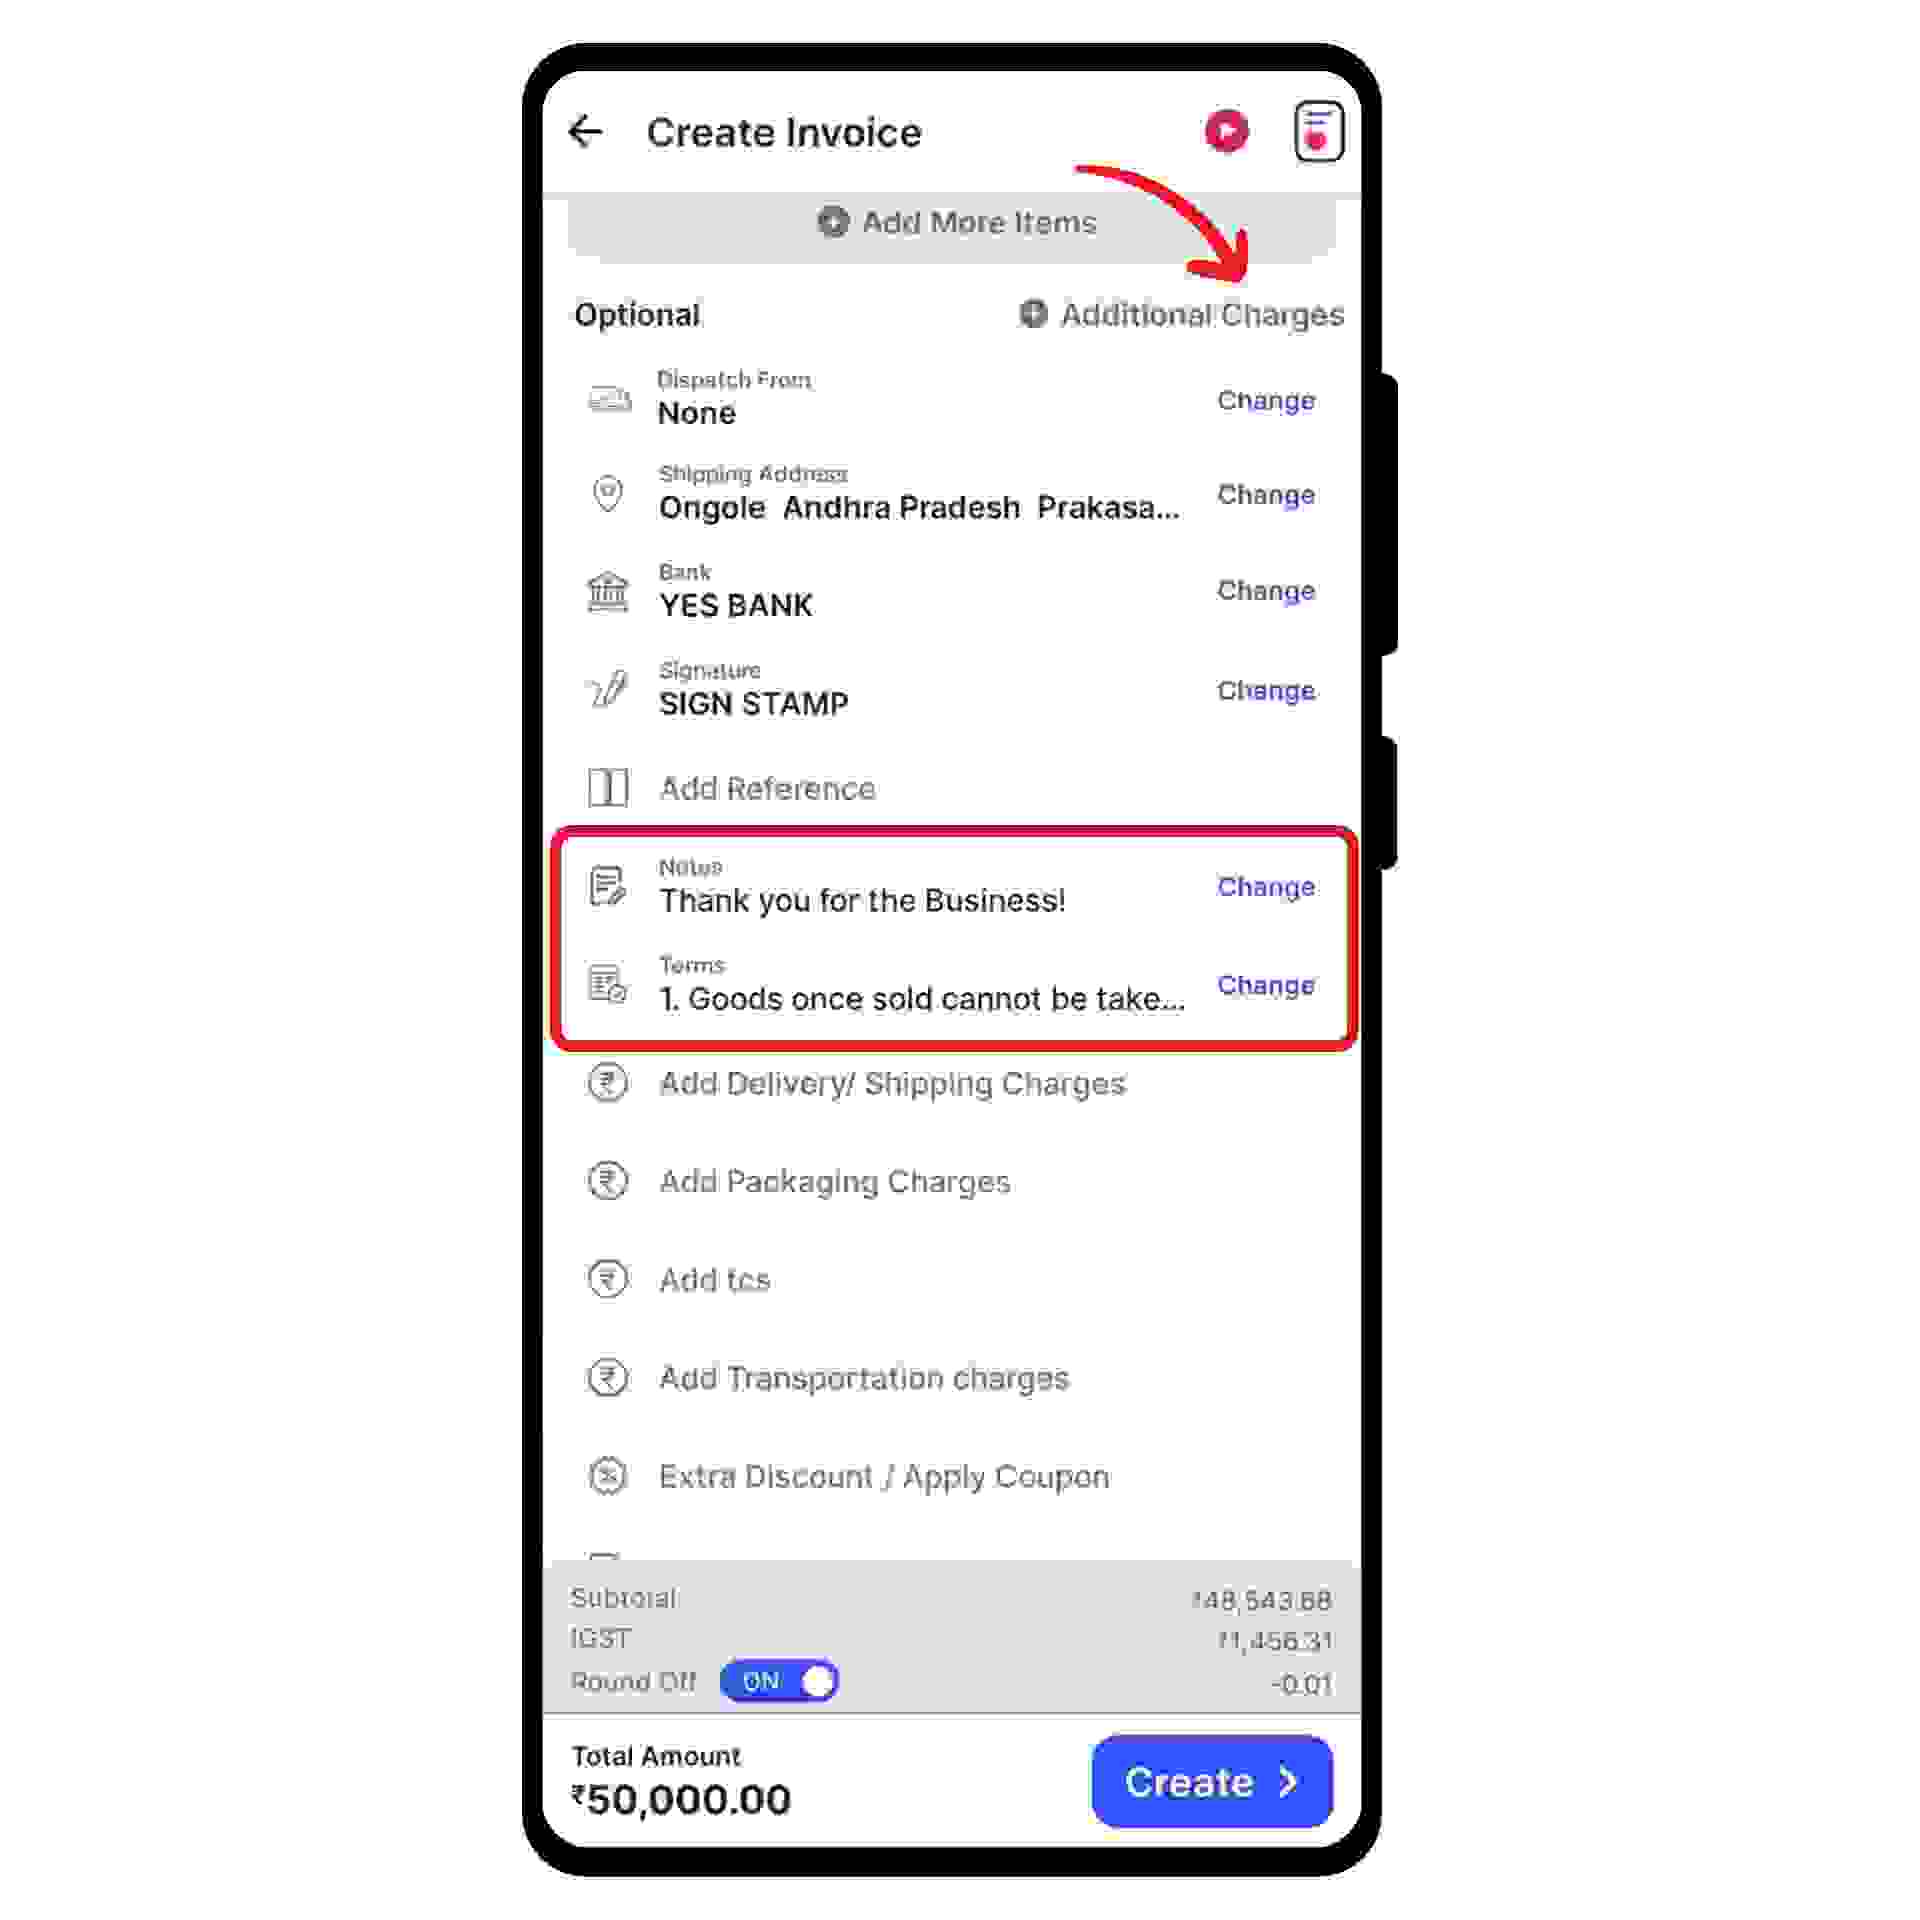
Also, add additional delivery or packaging charges (if applicable) and create or edit the notes, as well as the terms and conditions.
Step 8: Add your signature and click on “create”.
Your invoice with the QR code is ready.
You can now share it via WhatsApp, SMS, or email with your customers, and they can pay you by scanning the payment QR code on the invoice.
Note: You cannot add an existing QR code to the invoice, you can only add a payment QR code by adding a UPI ID to your bank account, through which the software automatically generates a unique QR code for your bank account.


%20(1).png)
%20(1).png)