How to show a description in the invoice on the web
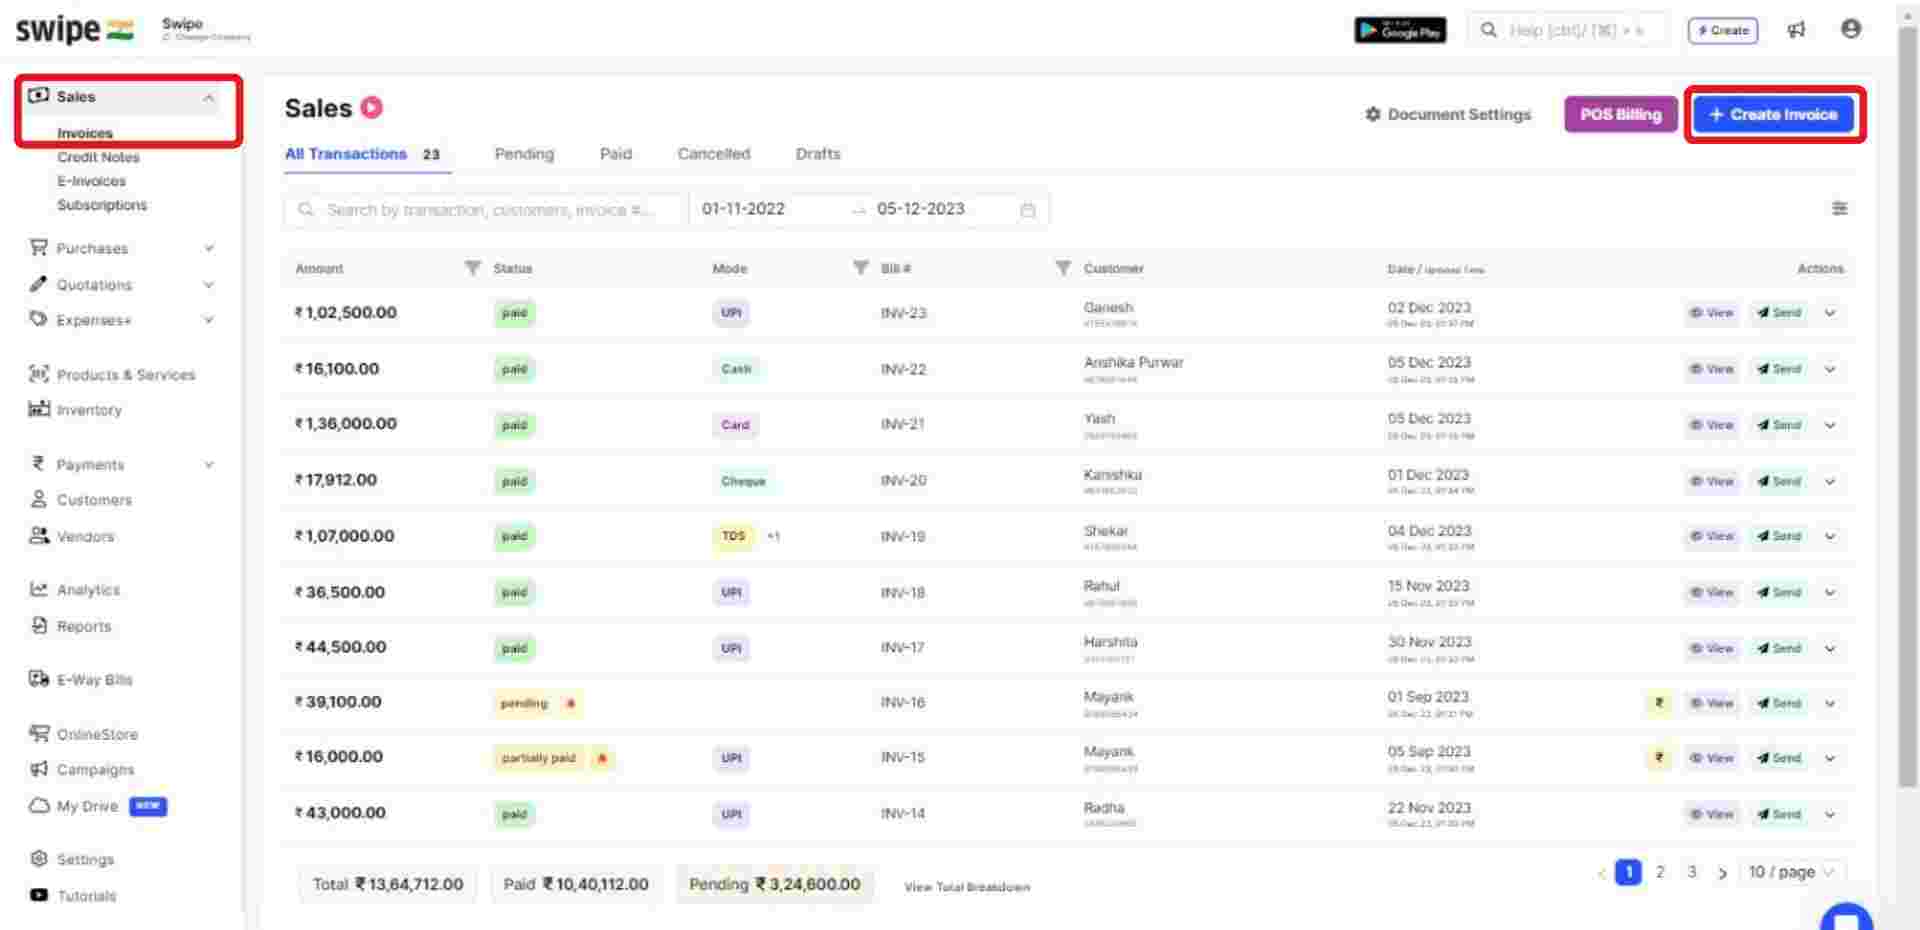
Step 1: Go to Sales and select Invoices
First, go to sales on the left-hand side of the dashboard. After clicking on 'sales', A drop-down menu appears.
Select Invoices from the drop-down menu and click on "Create Invoice” from the top right-hand corner of the screen.
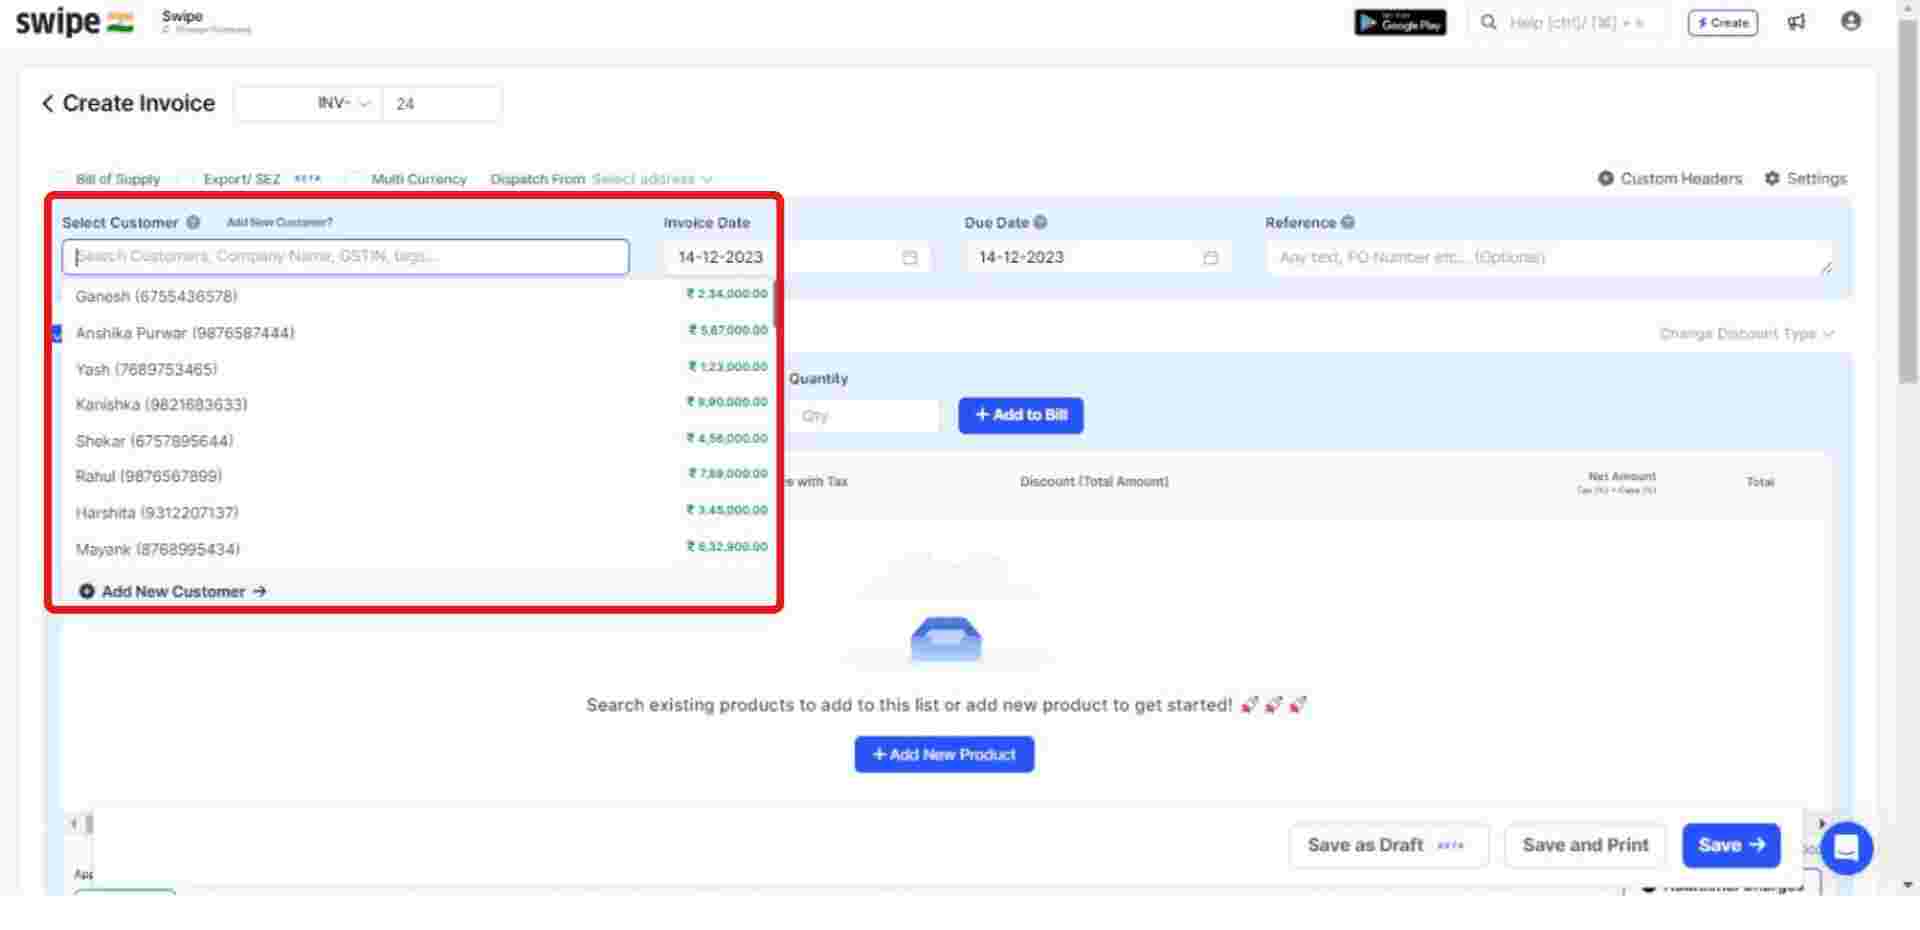
Step 2: Fill in the customer's details.
You can select existing customers from the drop-down list or add new customers by typing in their details manually.
(And fill in the necessary details like due date, reference number, etc.)
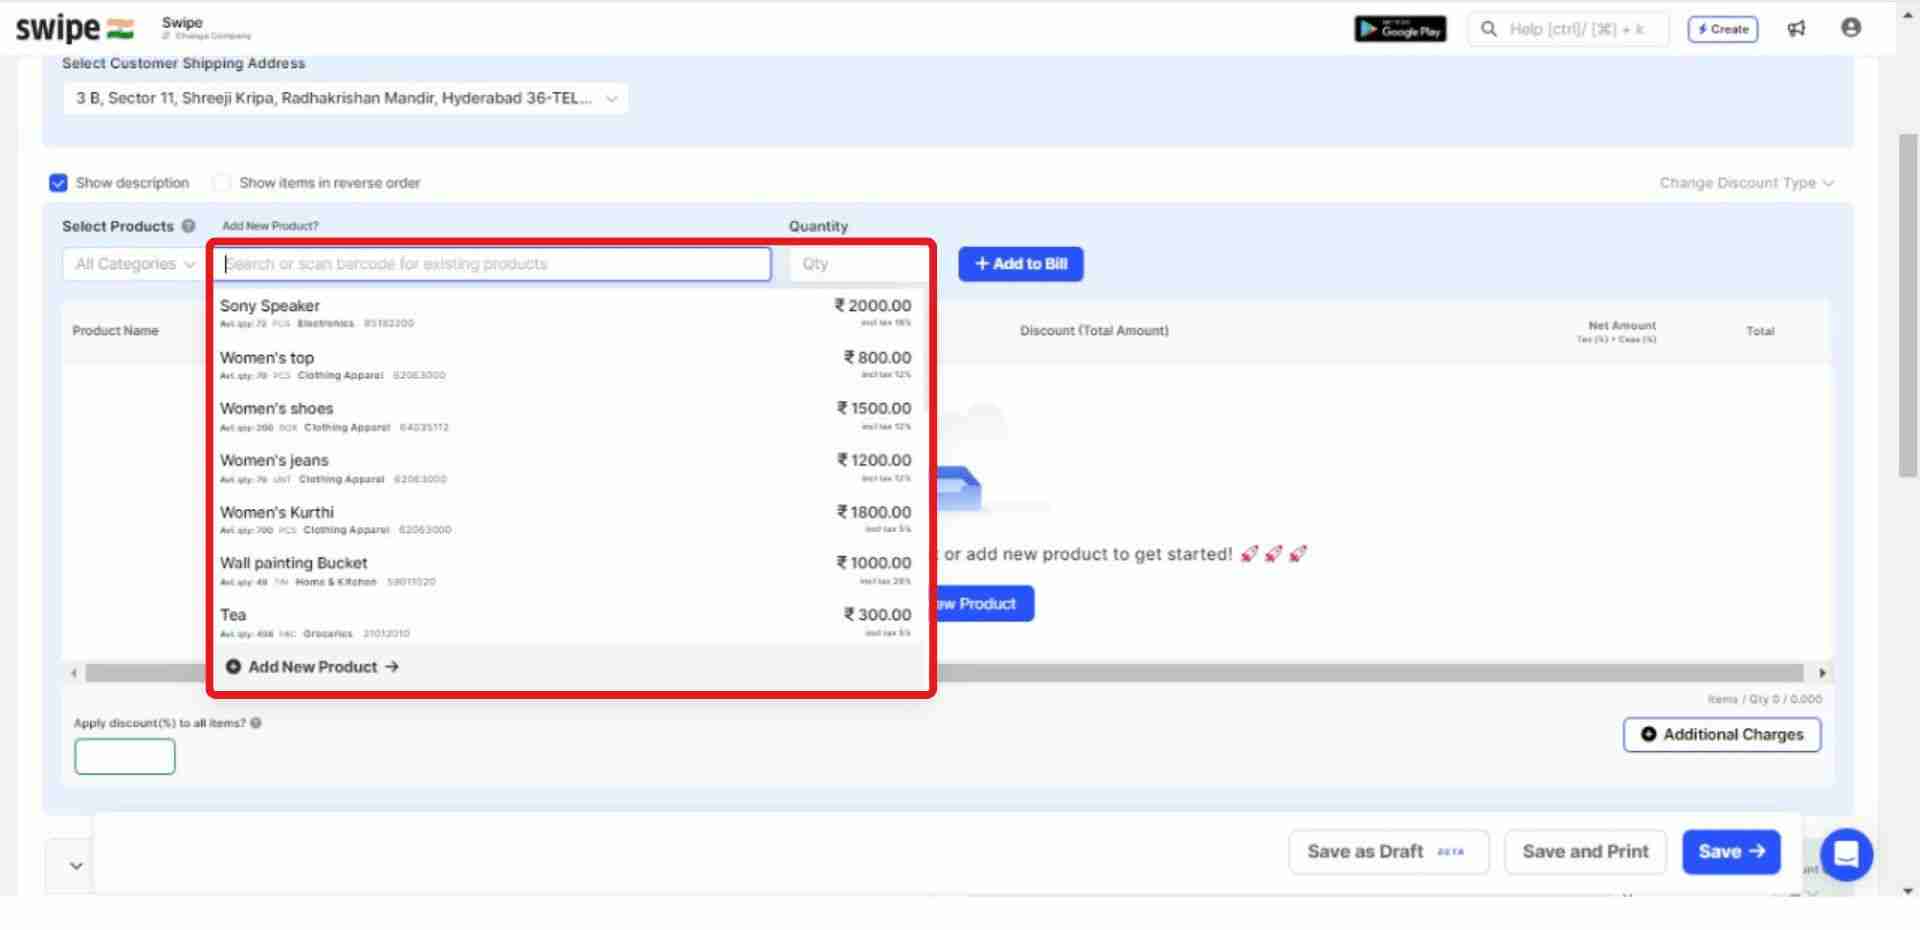
Step 3: Fill in the details of the products.
You can select existing products from the drop-down list or add new products by typing in their details manually.
To add more products, click on ‘+ Add New Product’, which will add new item rows.
Also, Click on ‘+ Add to bill’ and add the rest of the product details like quantity, category, discount, etc.
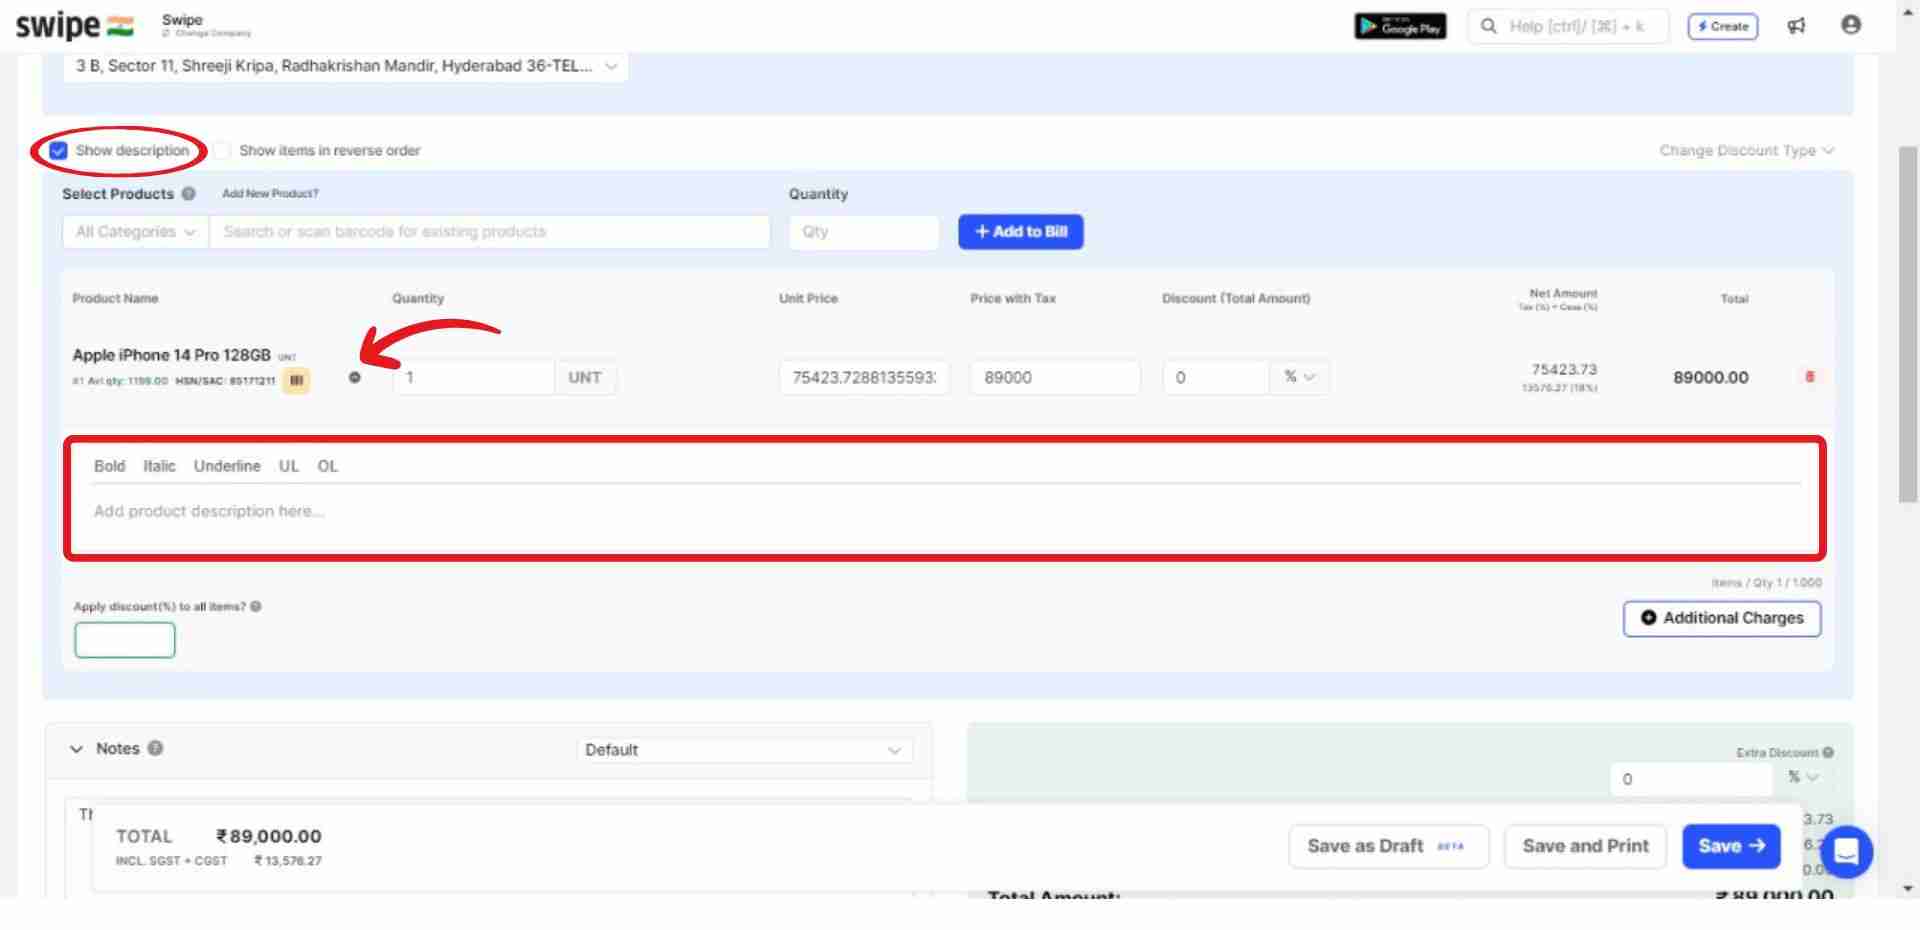
Step 4: Add Description
Select the check box of “Show Description” above the product section.
Now, Click on the description option present beside the product name. A new box appears. Here, enter the description you would like to add.
Note: You can also customize the description's appearance by selecting options like bold, italic, etc.
Step 5: Fill in other required fields
Also, add additional charges (if applicable) and create or edit notes, as well as terms and conditions.
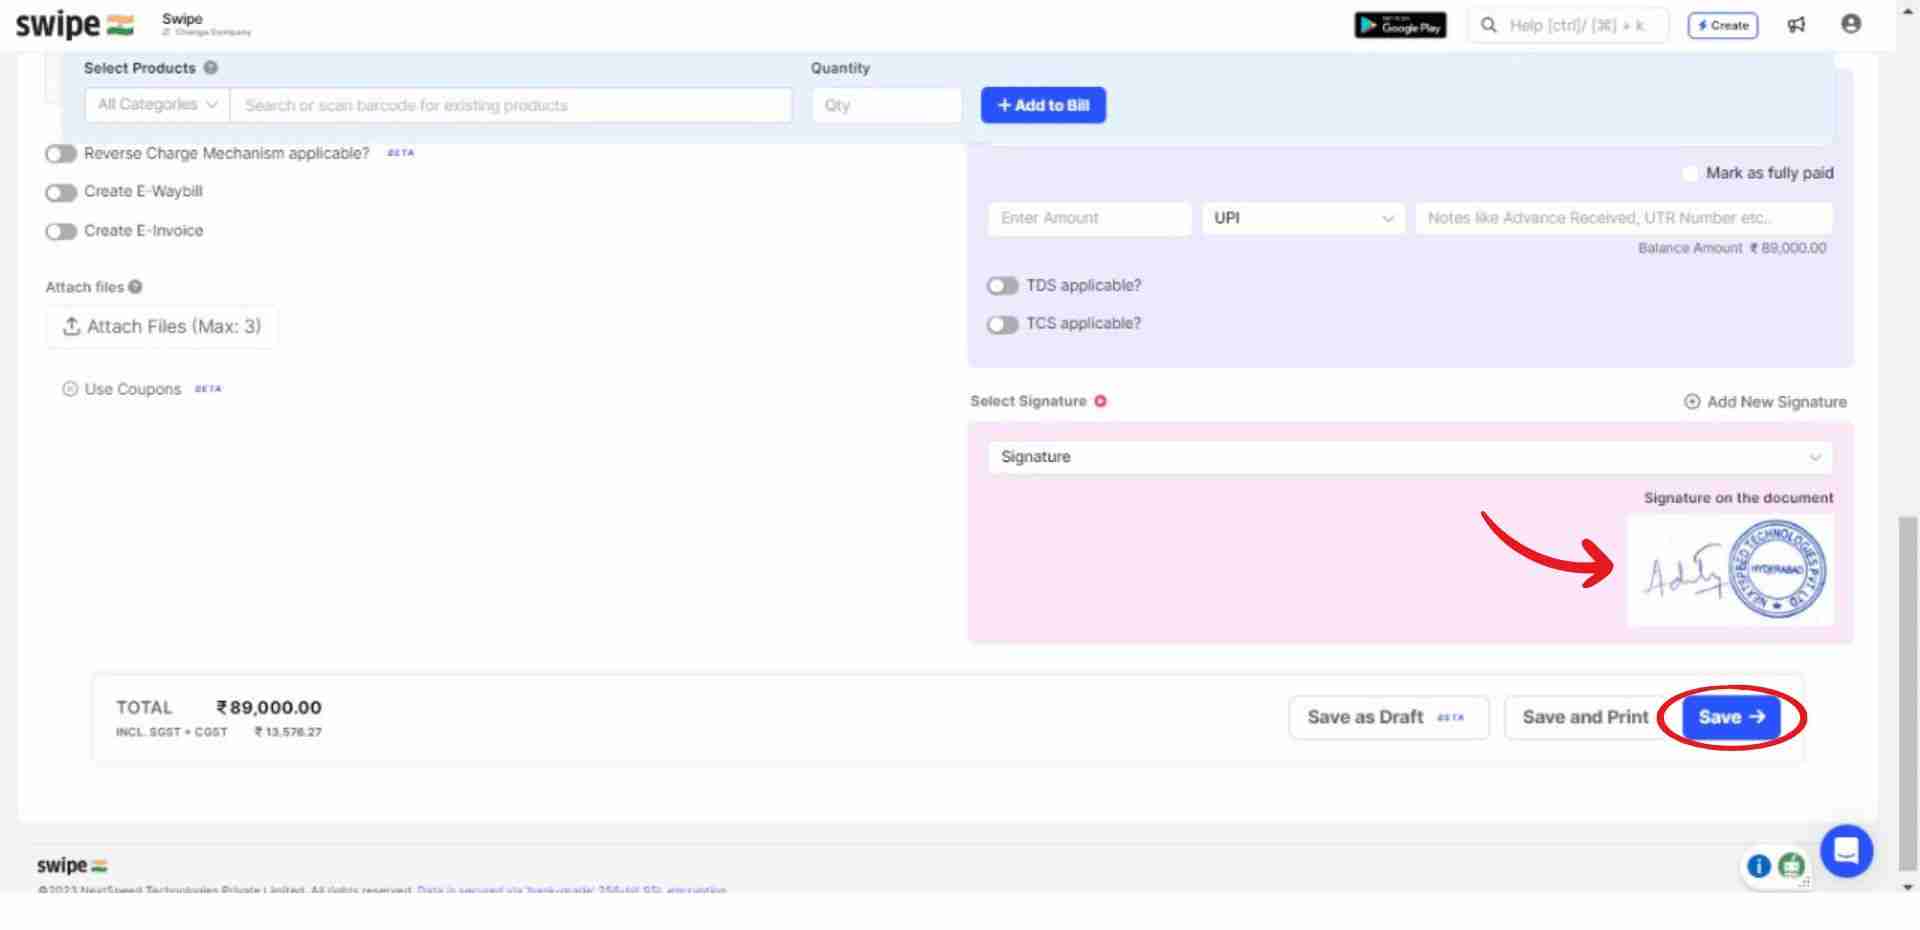
Step 6: Add your signature and click “Save”.
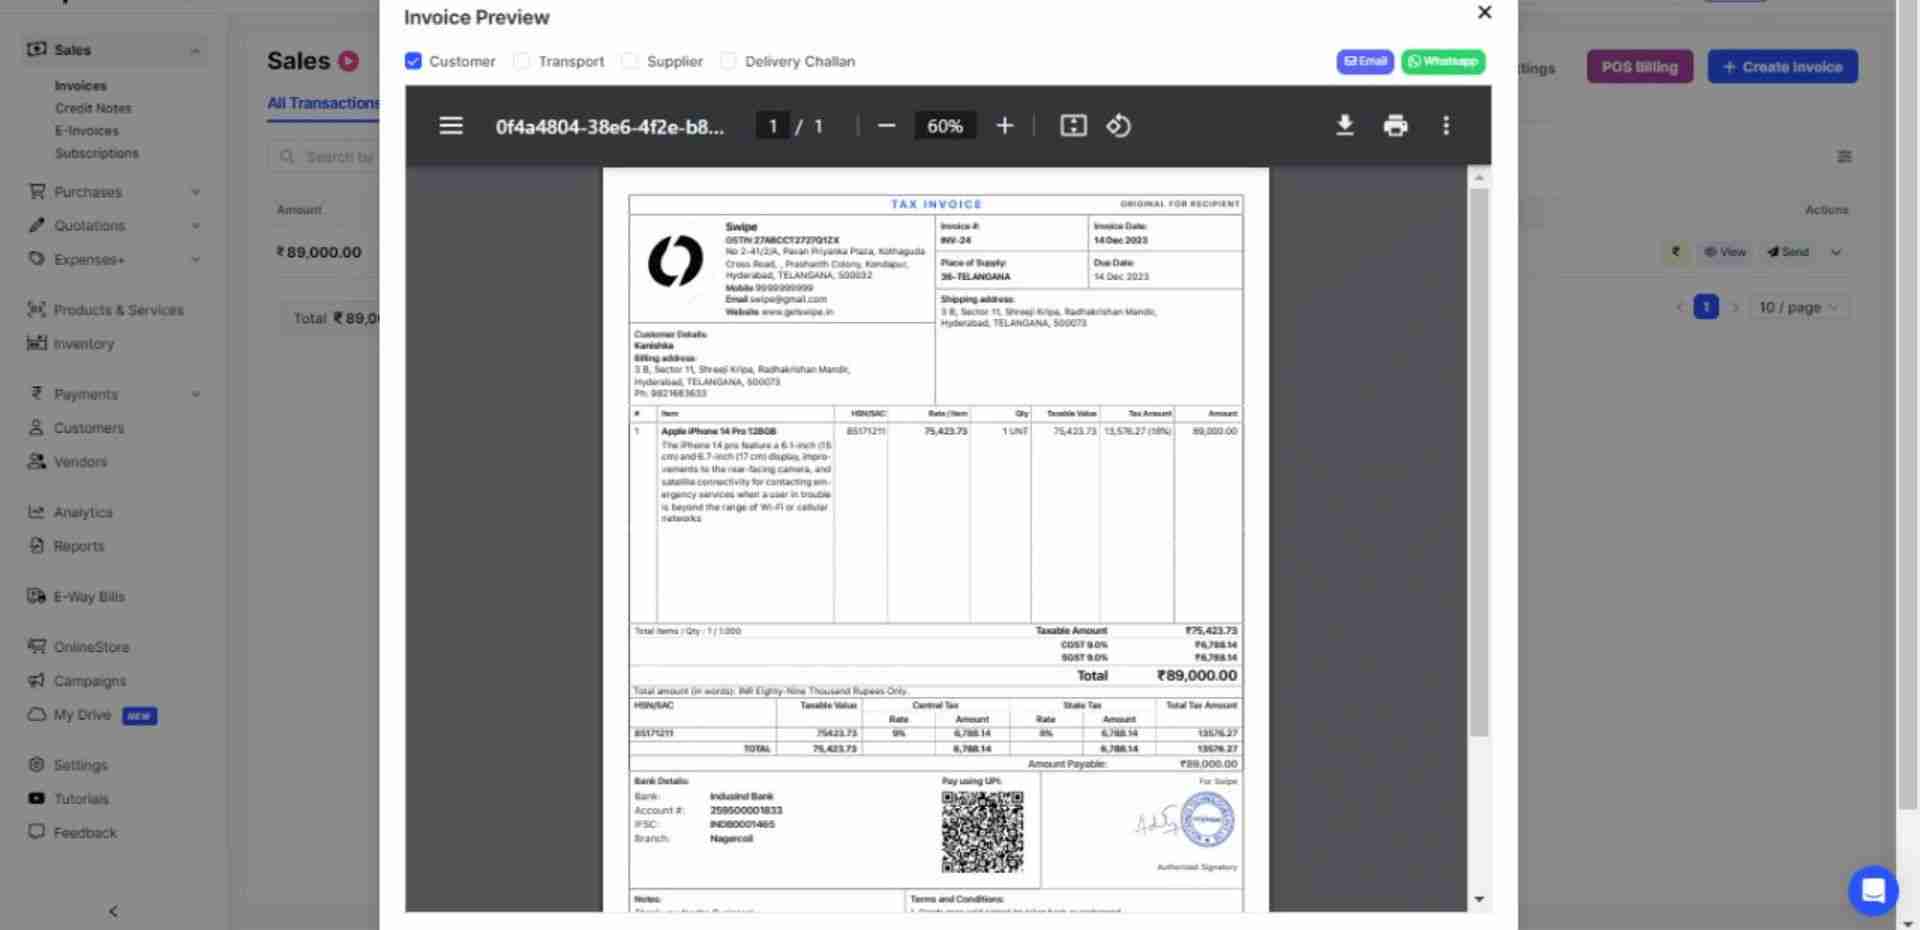
Your Invoice with the description is ready.
You can now share it via WhatsApp, SMS, or email with your customers.


%20(1).png)
%20(1).png)