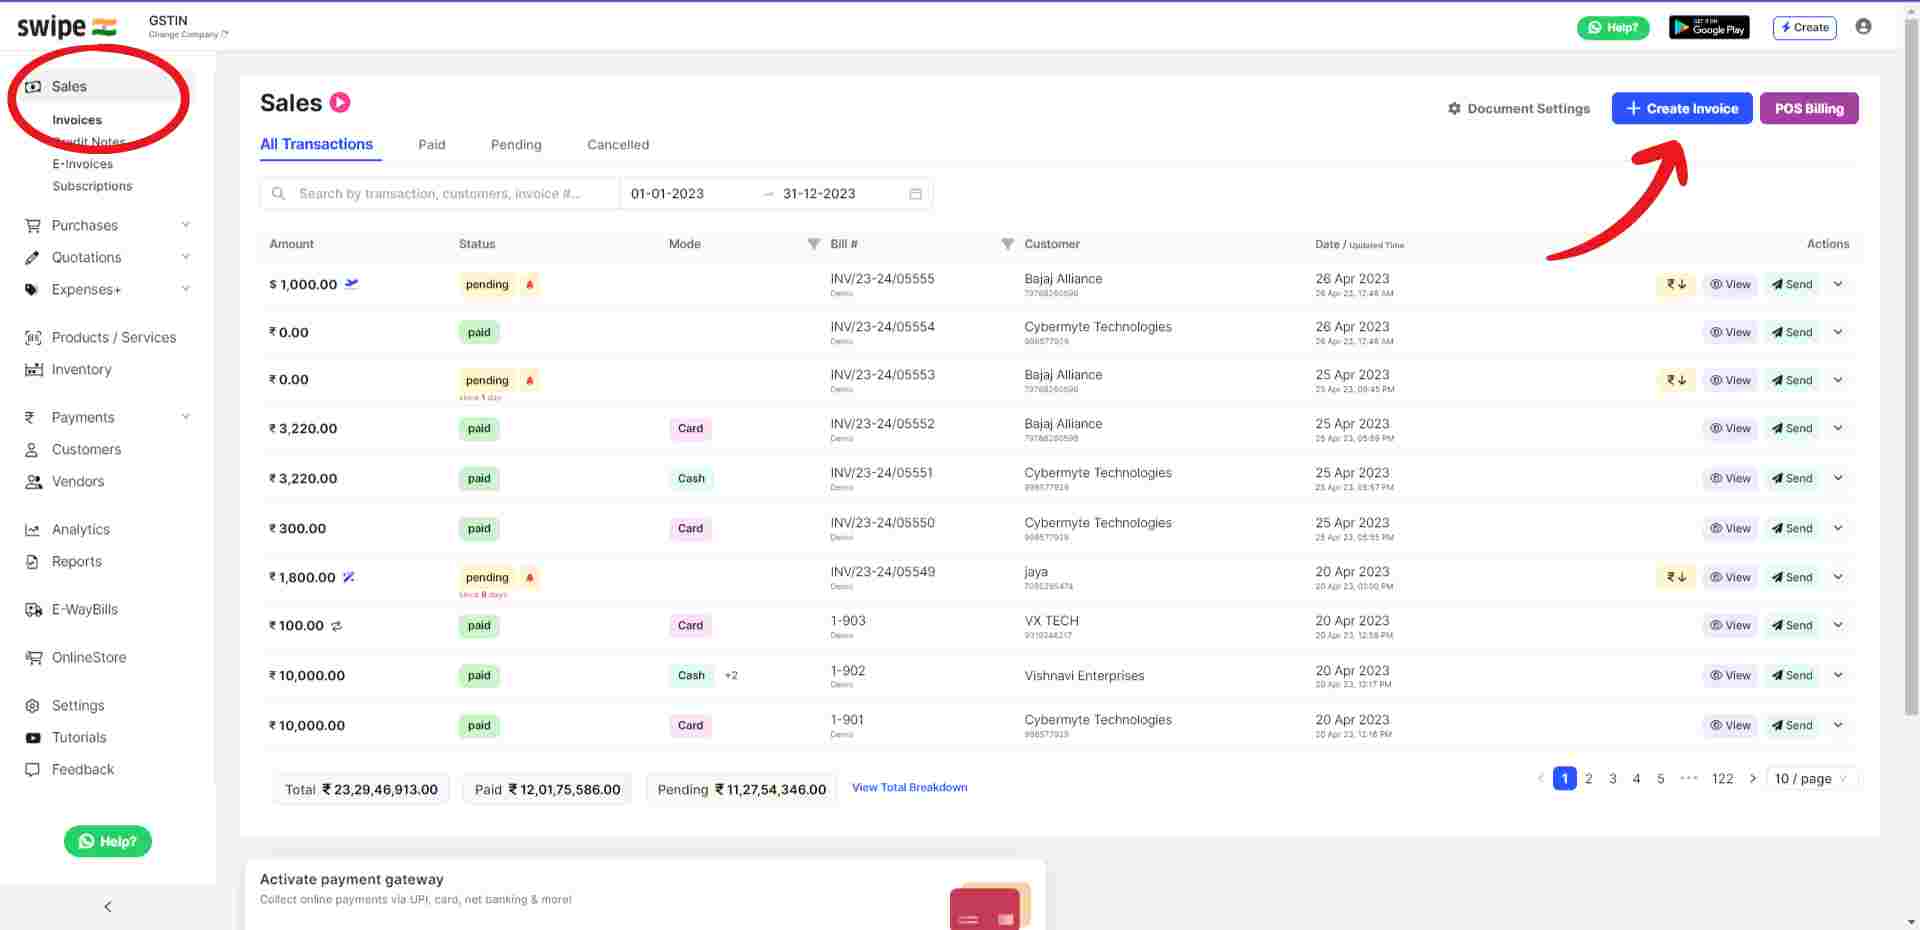
To create your export invoice, click on 'sales' on the left-hand side of the dashboard.
Click on create invoice. You can also select create invoice from the top right-hand corner of the screen.
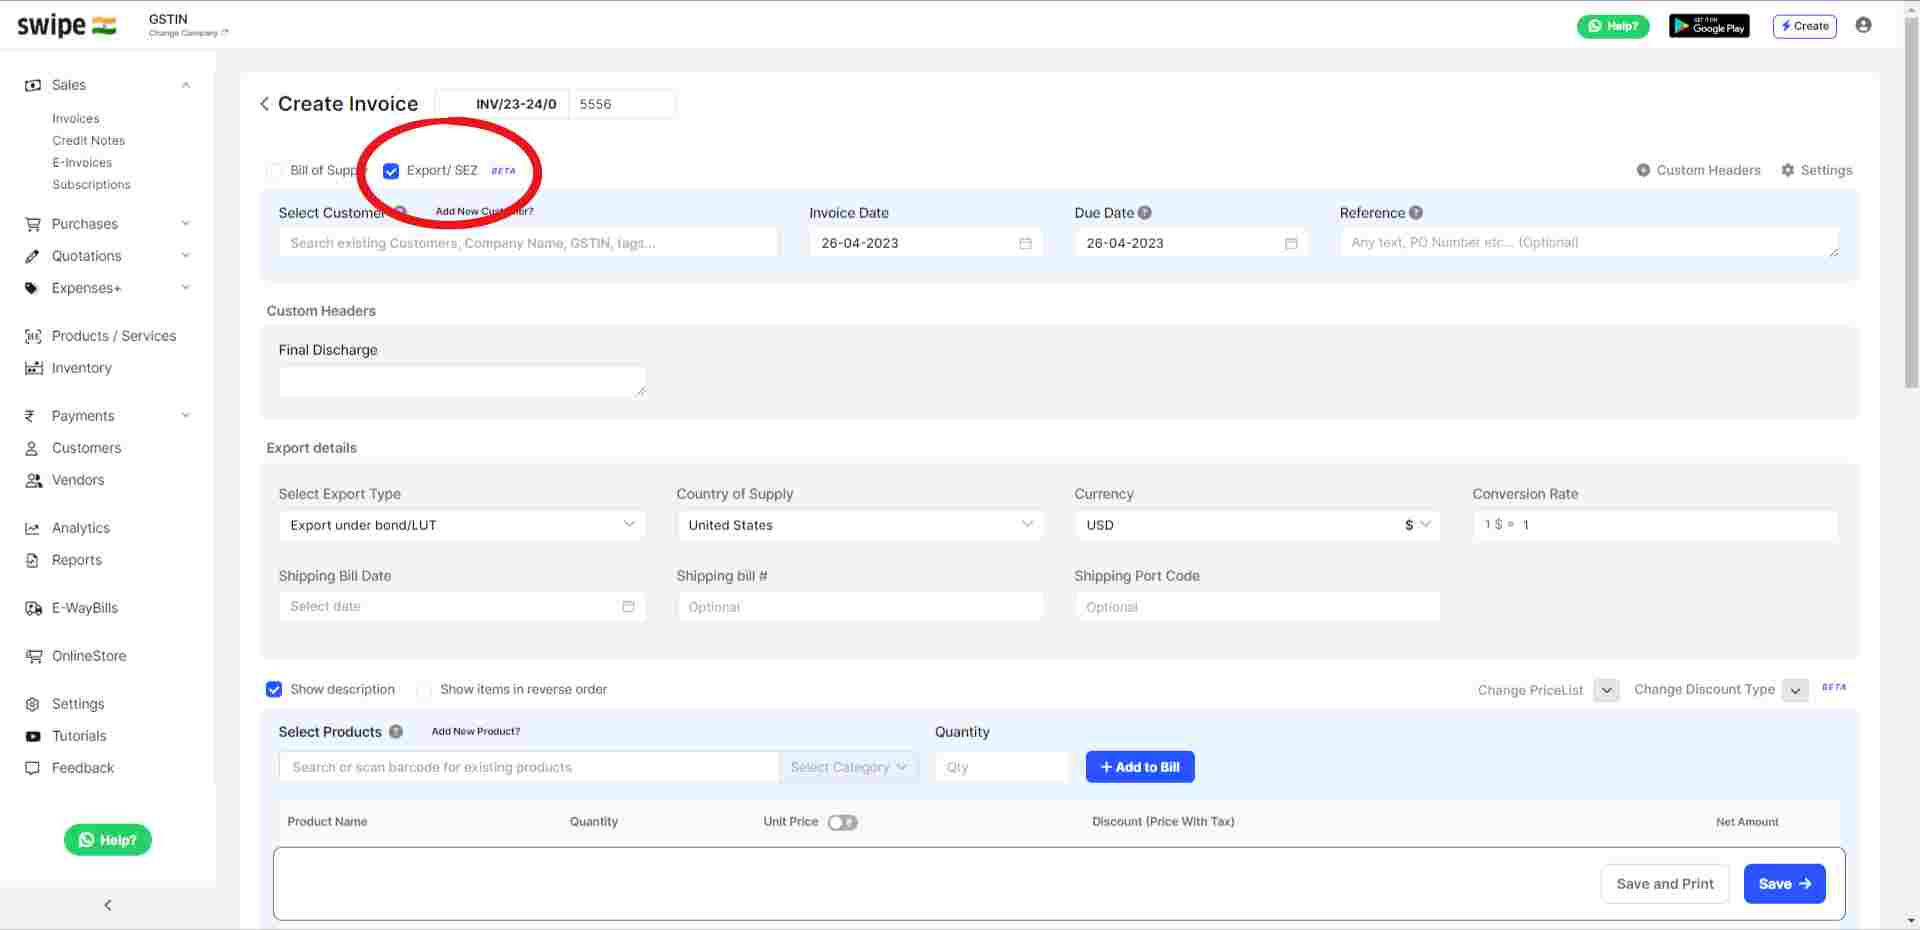
Select the checkbox with Export /SEZ below the "Create Invoice number".
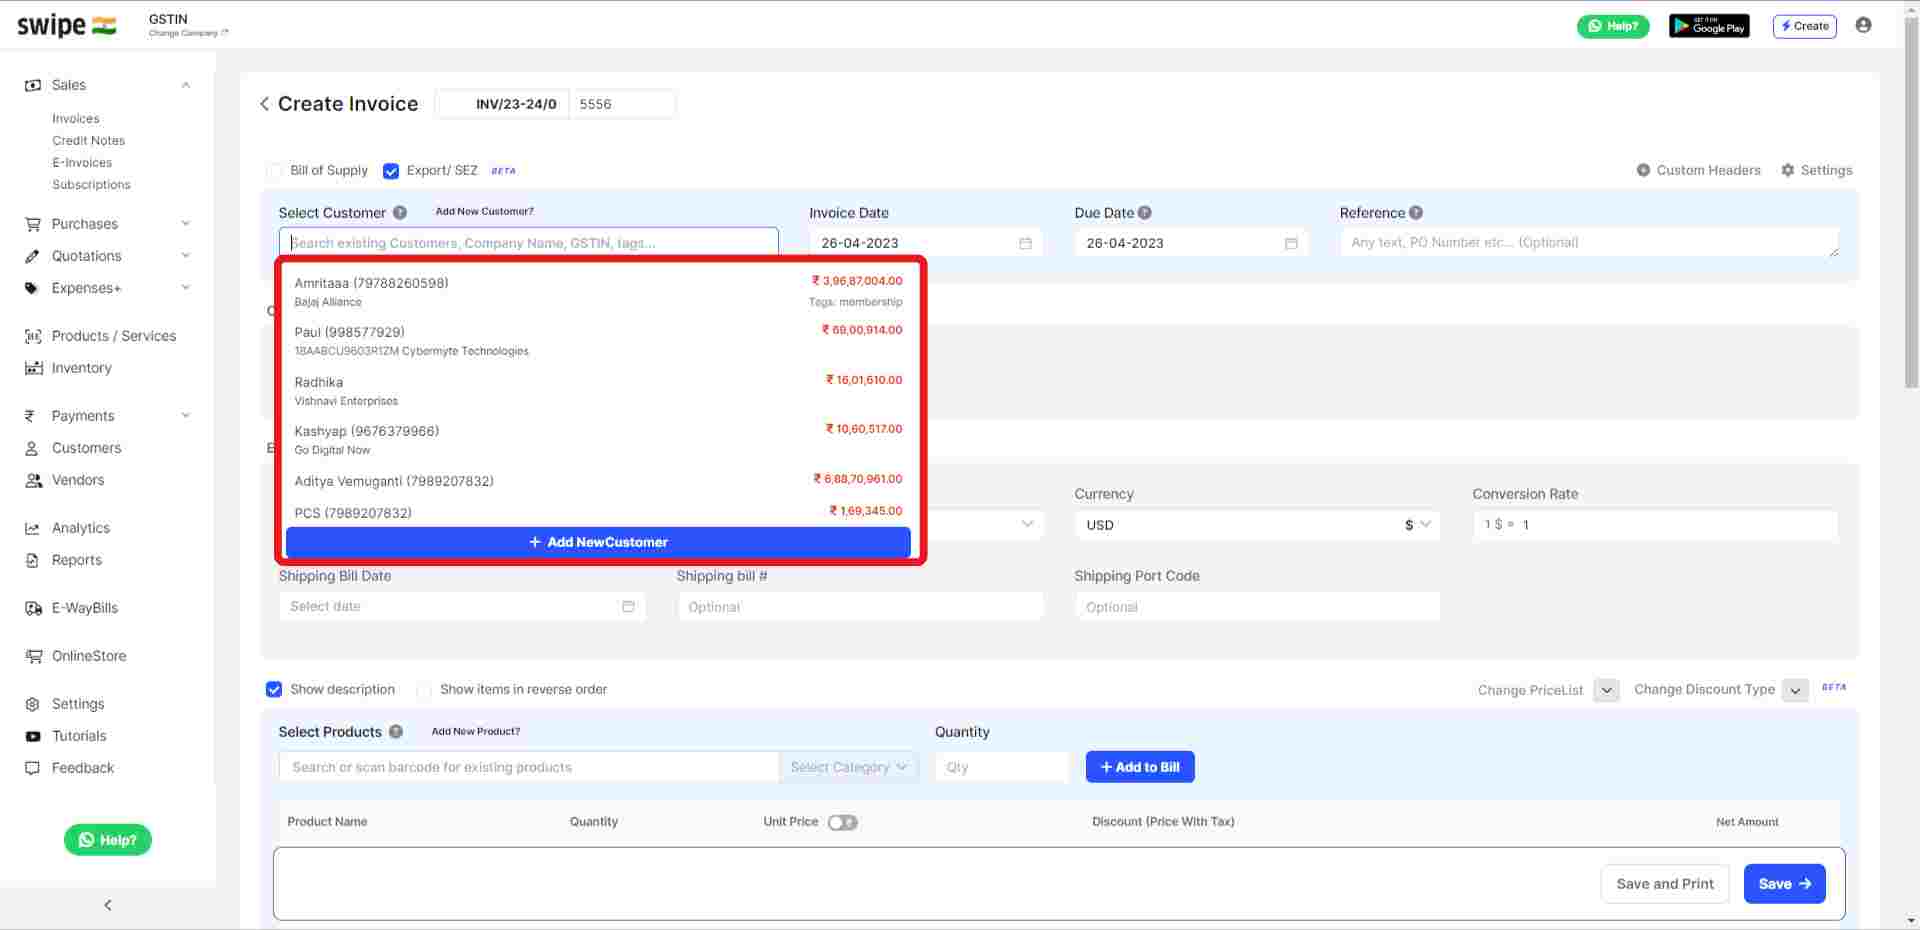
Add your new customer on Swipe by clicking on "Add New Customer" and filling up the customer details. or
You can add an existing customer to the list by simply selecting the customer after searching from the drop-down menu.
(And fill the necessary details like due date, reference number etc.)
Case 1: "Export under bond/LUT" means an export invoice raising without IGST. Businesses need to take a Letter of Undertaking (LUT) from GST department.
Case 2: "Export with IGST" mean businesses can raise an invoice with IGST payment and apply for refund after the payment.
Case 3: "SEZ with IGST payment" apply to businesses who exporting to Special Economic Zones (SEZ). The supply of goods to an SEZ is treated as a zero-rated supply, which means the taxes on the export need not be paid.
Case 4: "SEZ without IGST payment" also apply to businesses who exporting to Special Economic Zones (SEZ) but can take LUT certificate and can raise invoice without GST.
Case 5: "Deemed Export" apply to businesses with future trade agreements. All deemed exports are mandatory for IGST payments. Supply cannot be made under LUT/ Bond for deemed exports.
Click here know in detail about "Export Invoices".
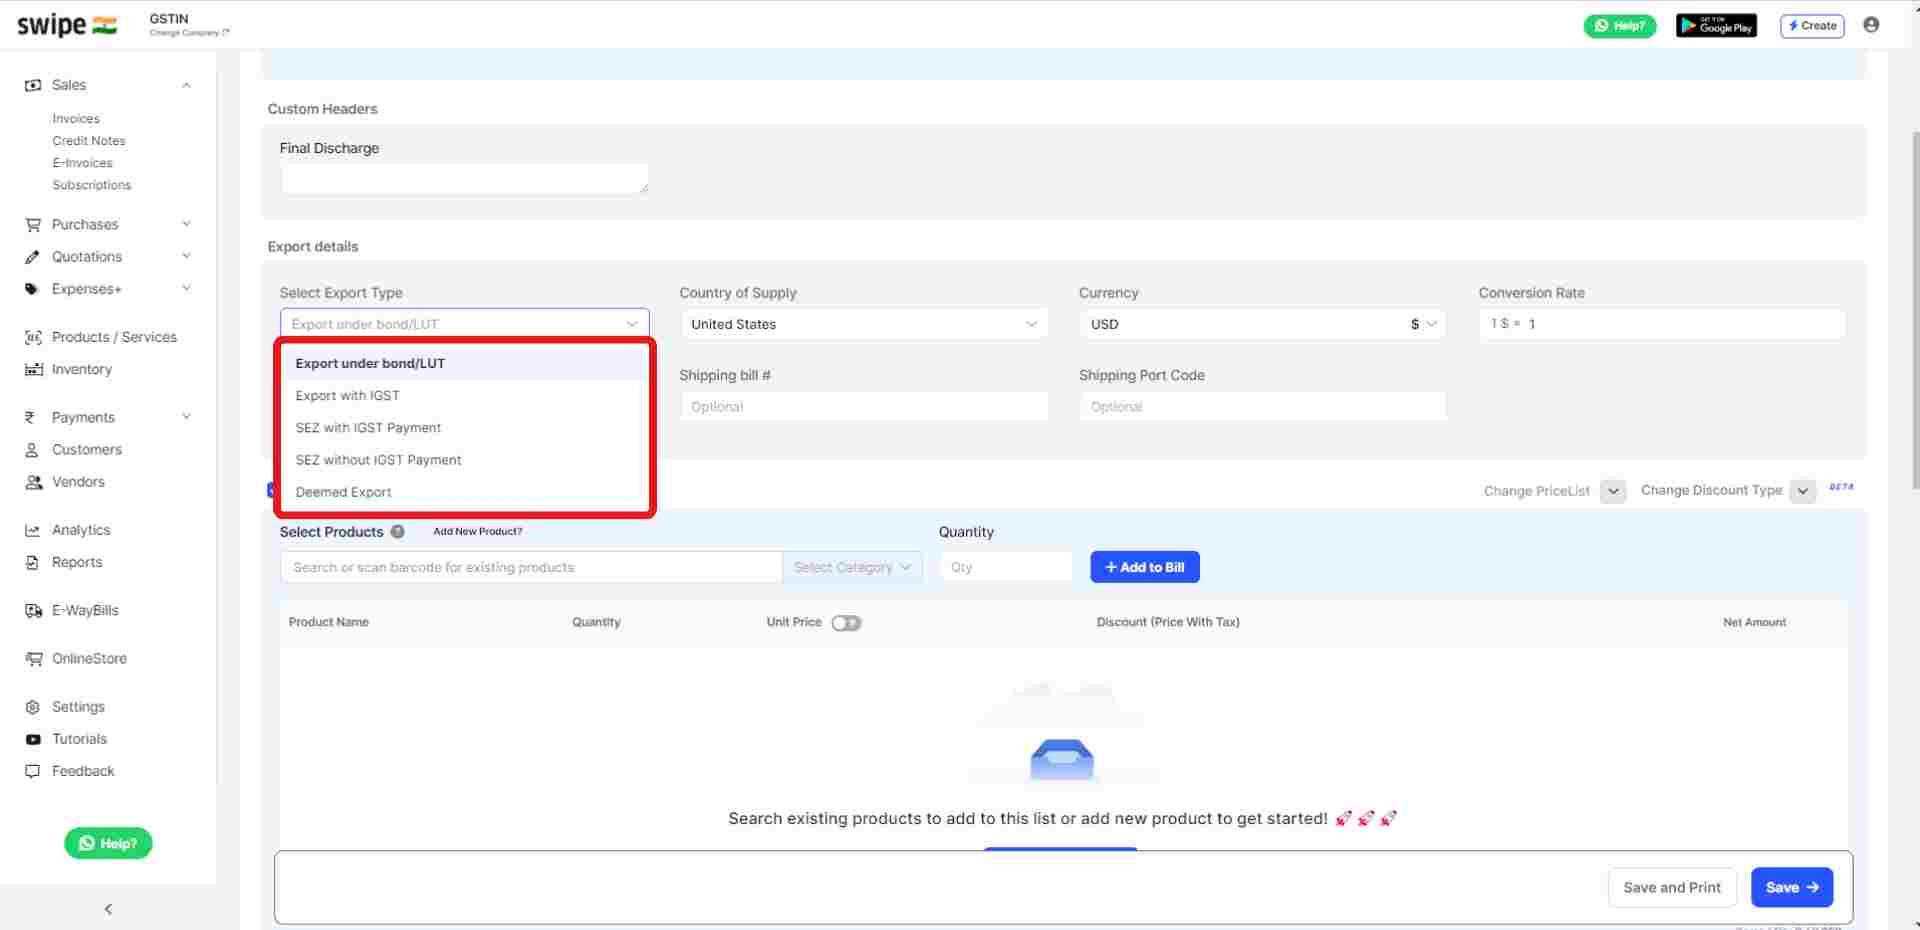
(Fill other required details like Country of Supply, Currency, Conversion rate, Shipping Bill date, Shipping Bill Number, Shipping Port code etc.)
Add your new products on Swipe by clicking on "Add New Product" and filling up the customer details. or
You can add an existing product to the list by simply selecting the product after searching from the drop-down menu.
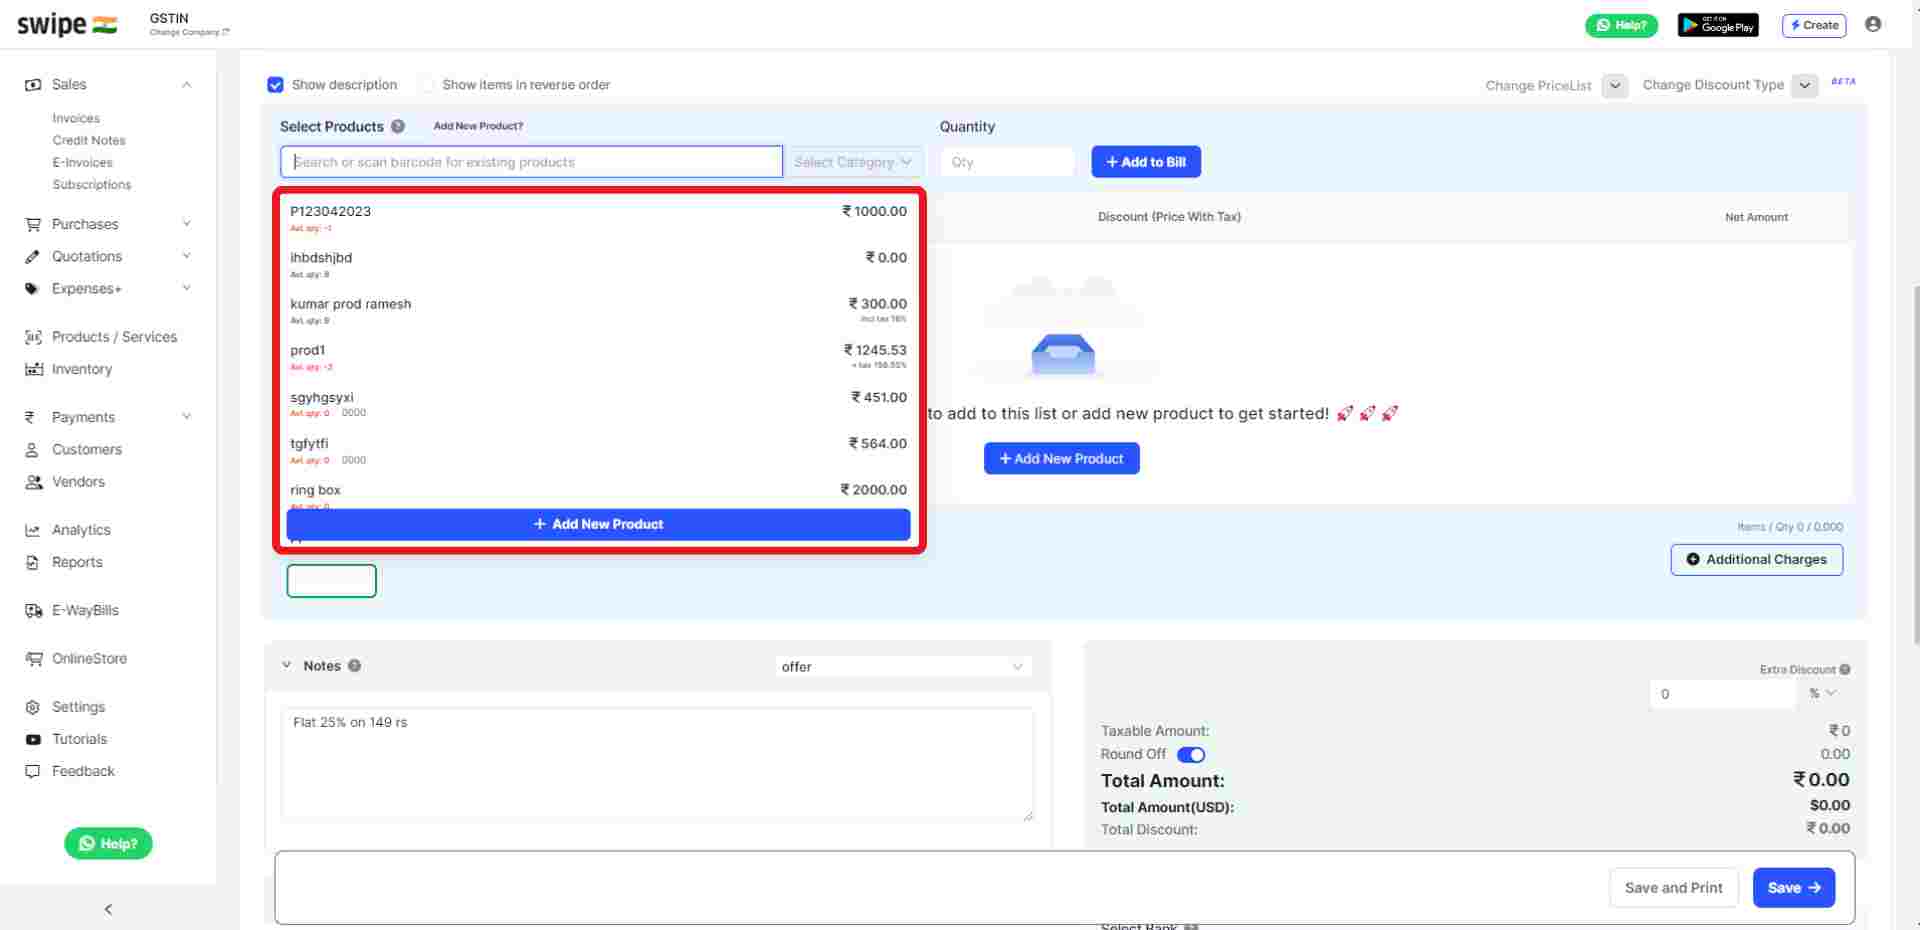
In case you would like to show/hide description of the products in the invoice, you can simply do it by clicking on the check box.
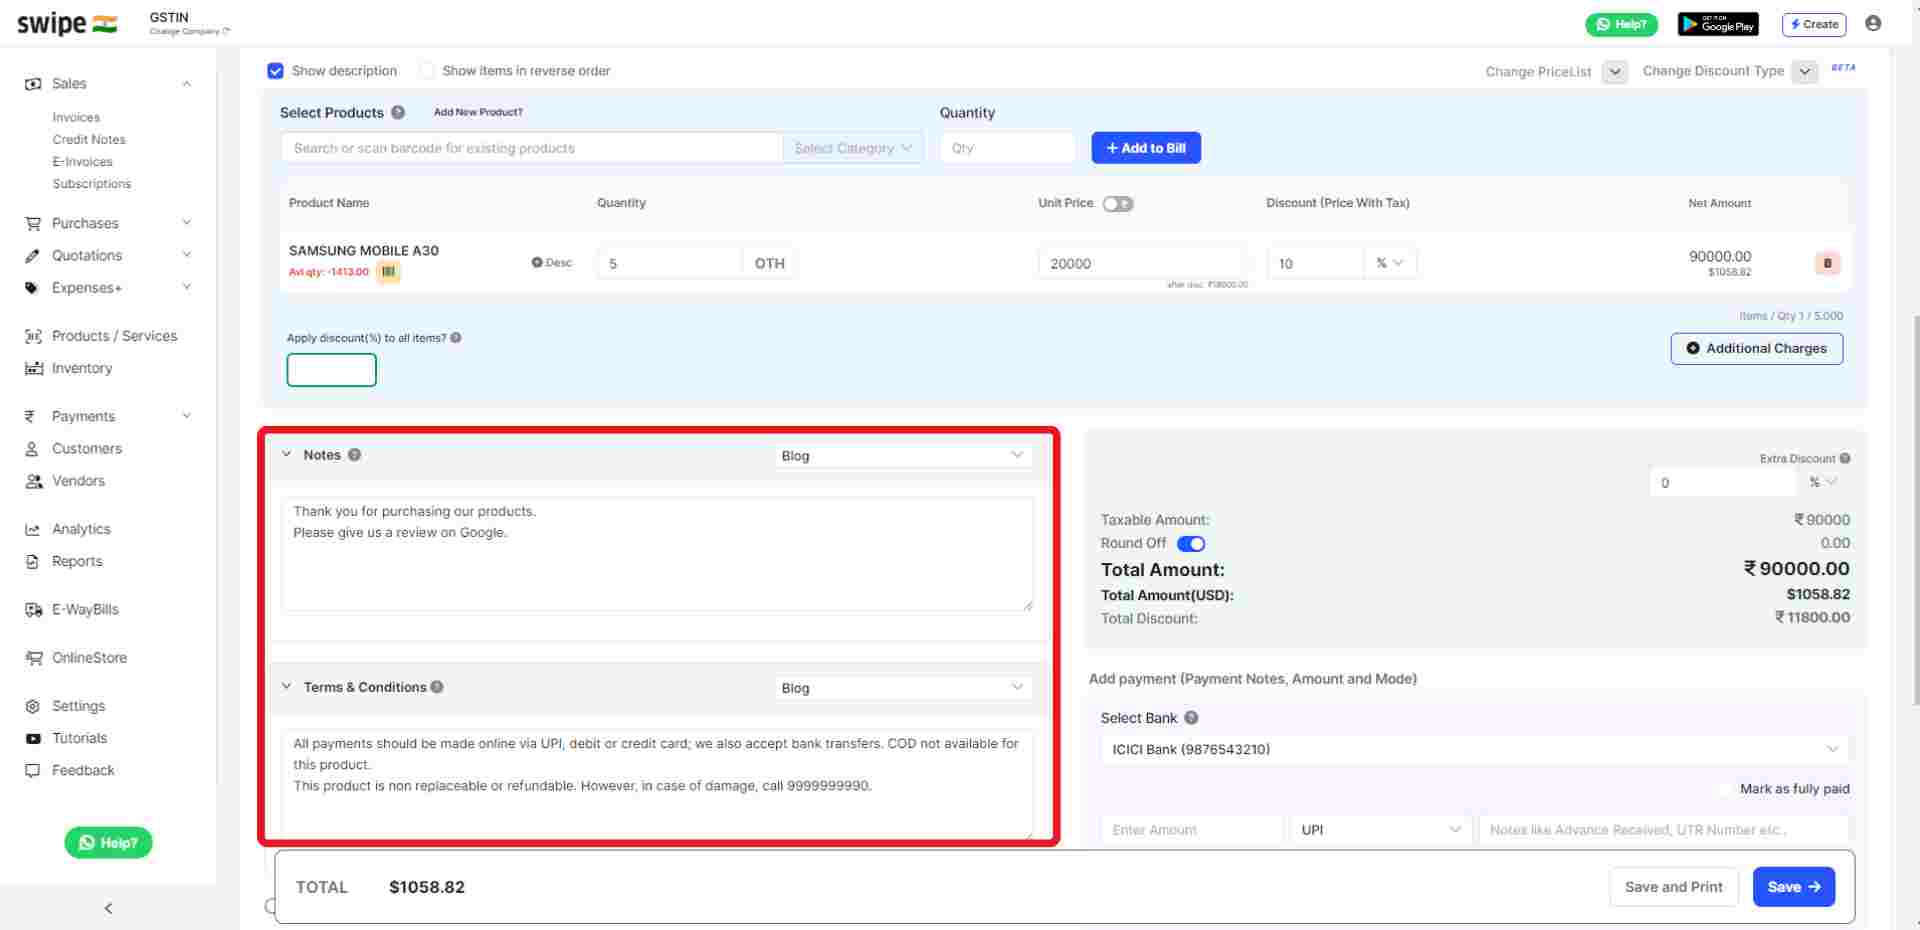
Also fill in other details like quantity, unit price, price with tax and discount in both percentage and rupees.
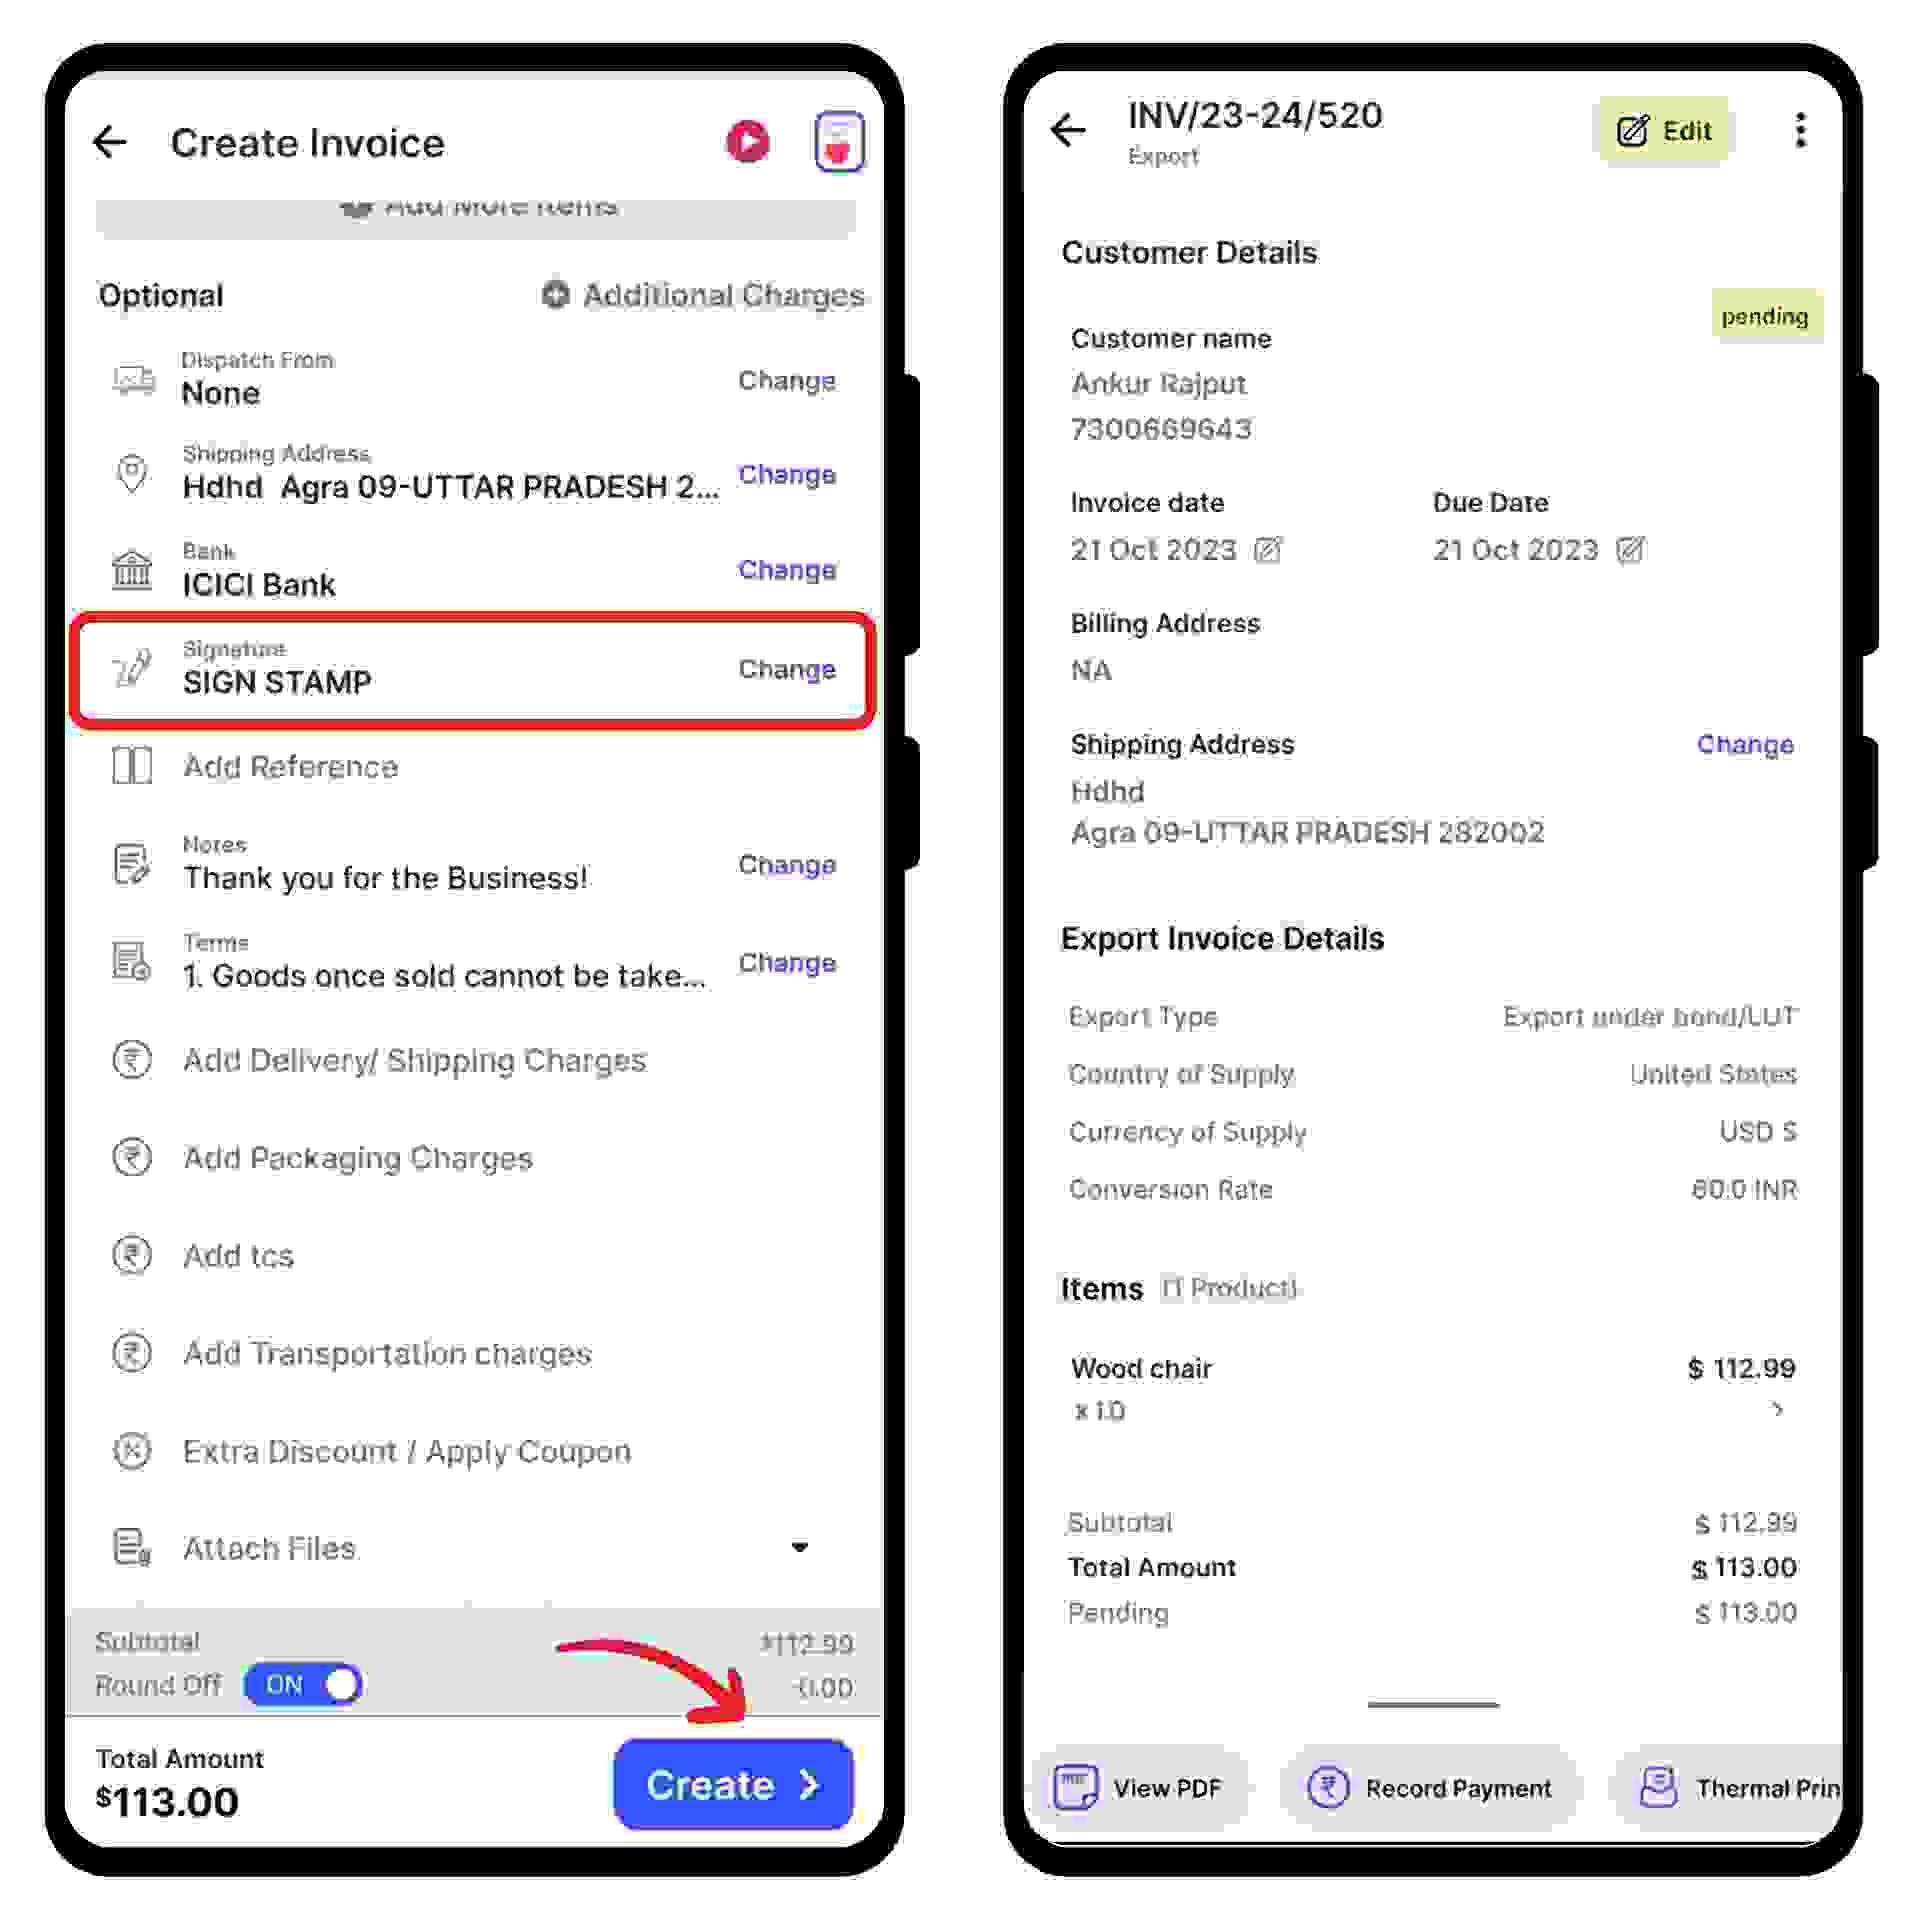
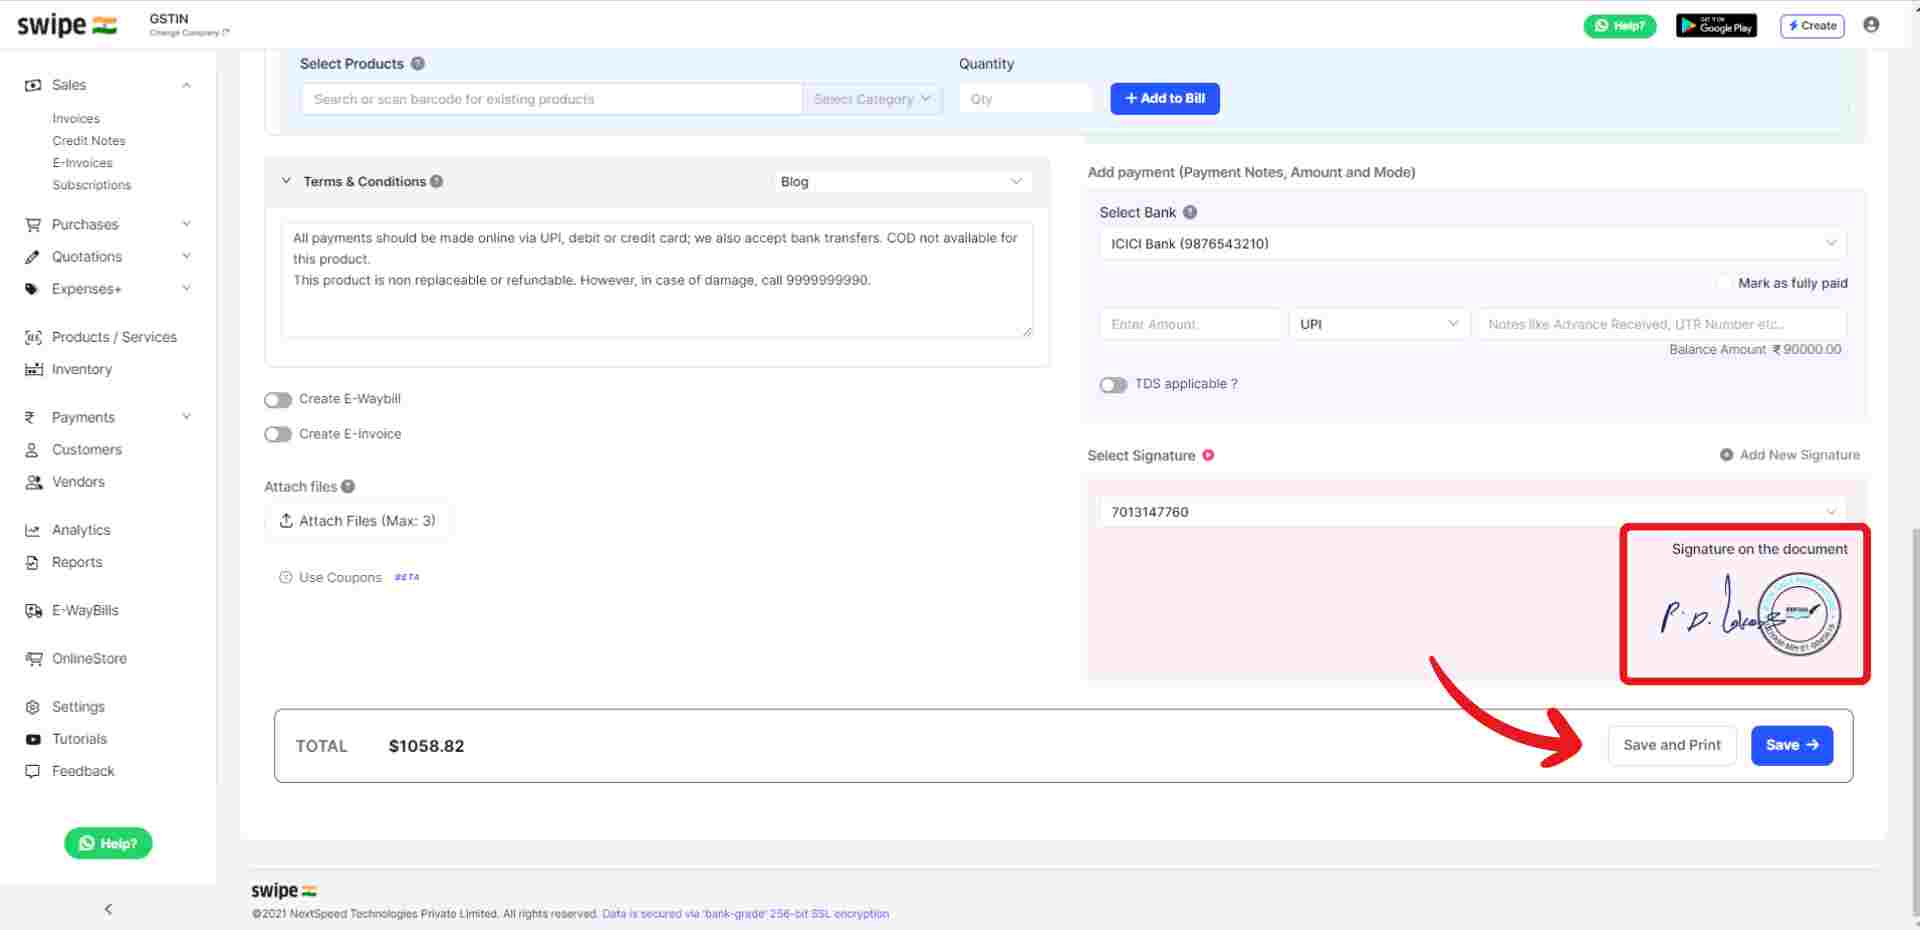
Add your signature to the invoice and click on save. Your invoice will be ready and you can share it via WhatsApp, SMS or E-mail it to your customer.
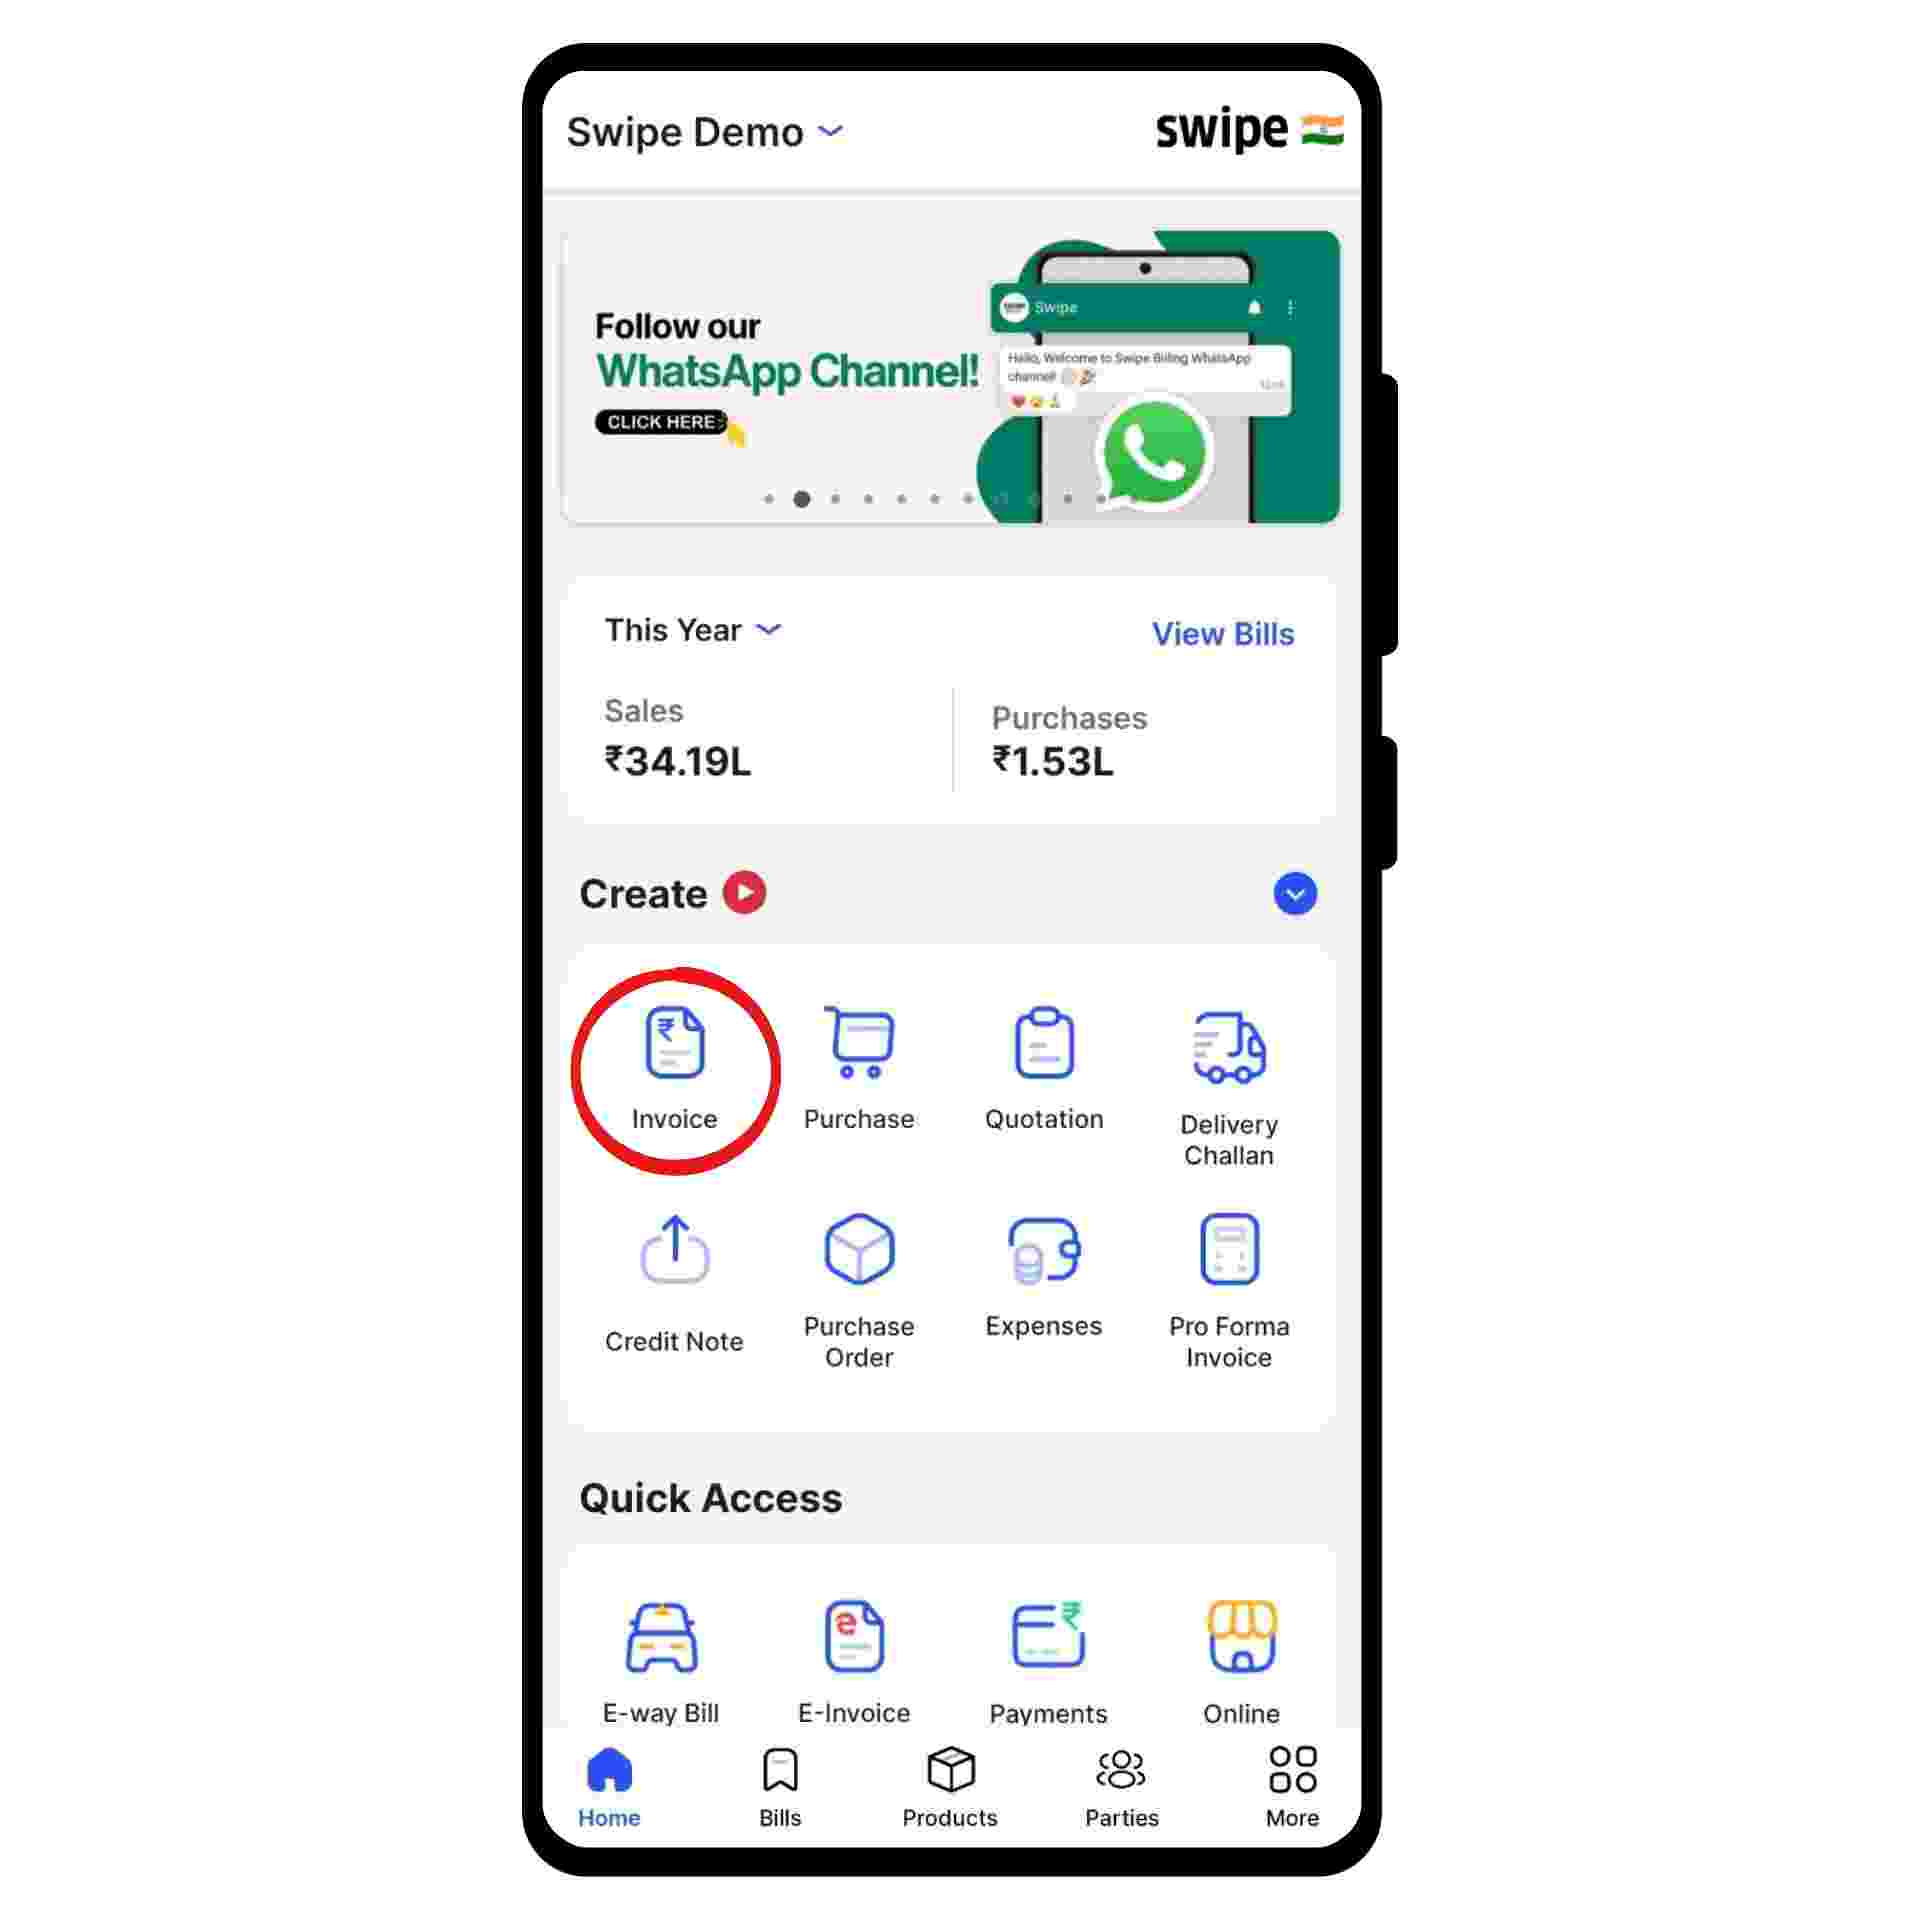
Click on “Invoice” under the Create section.
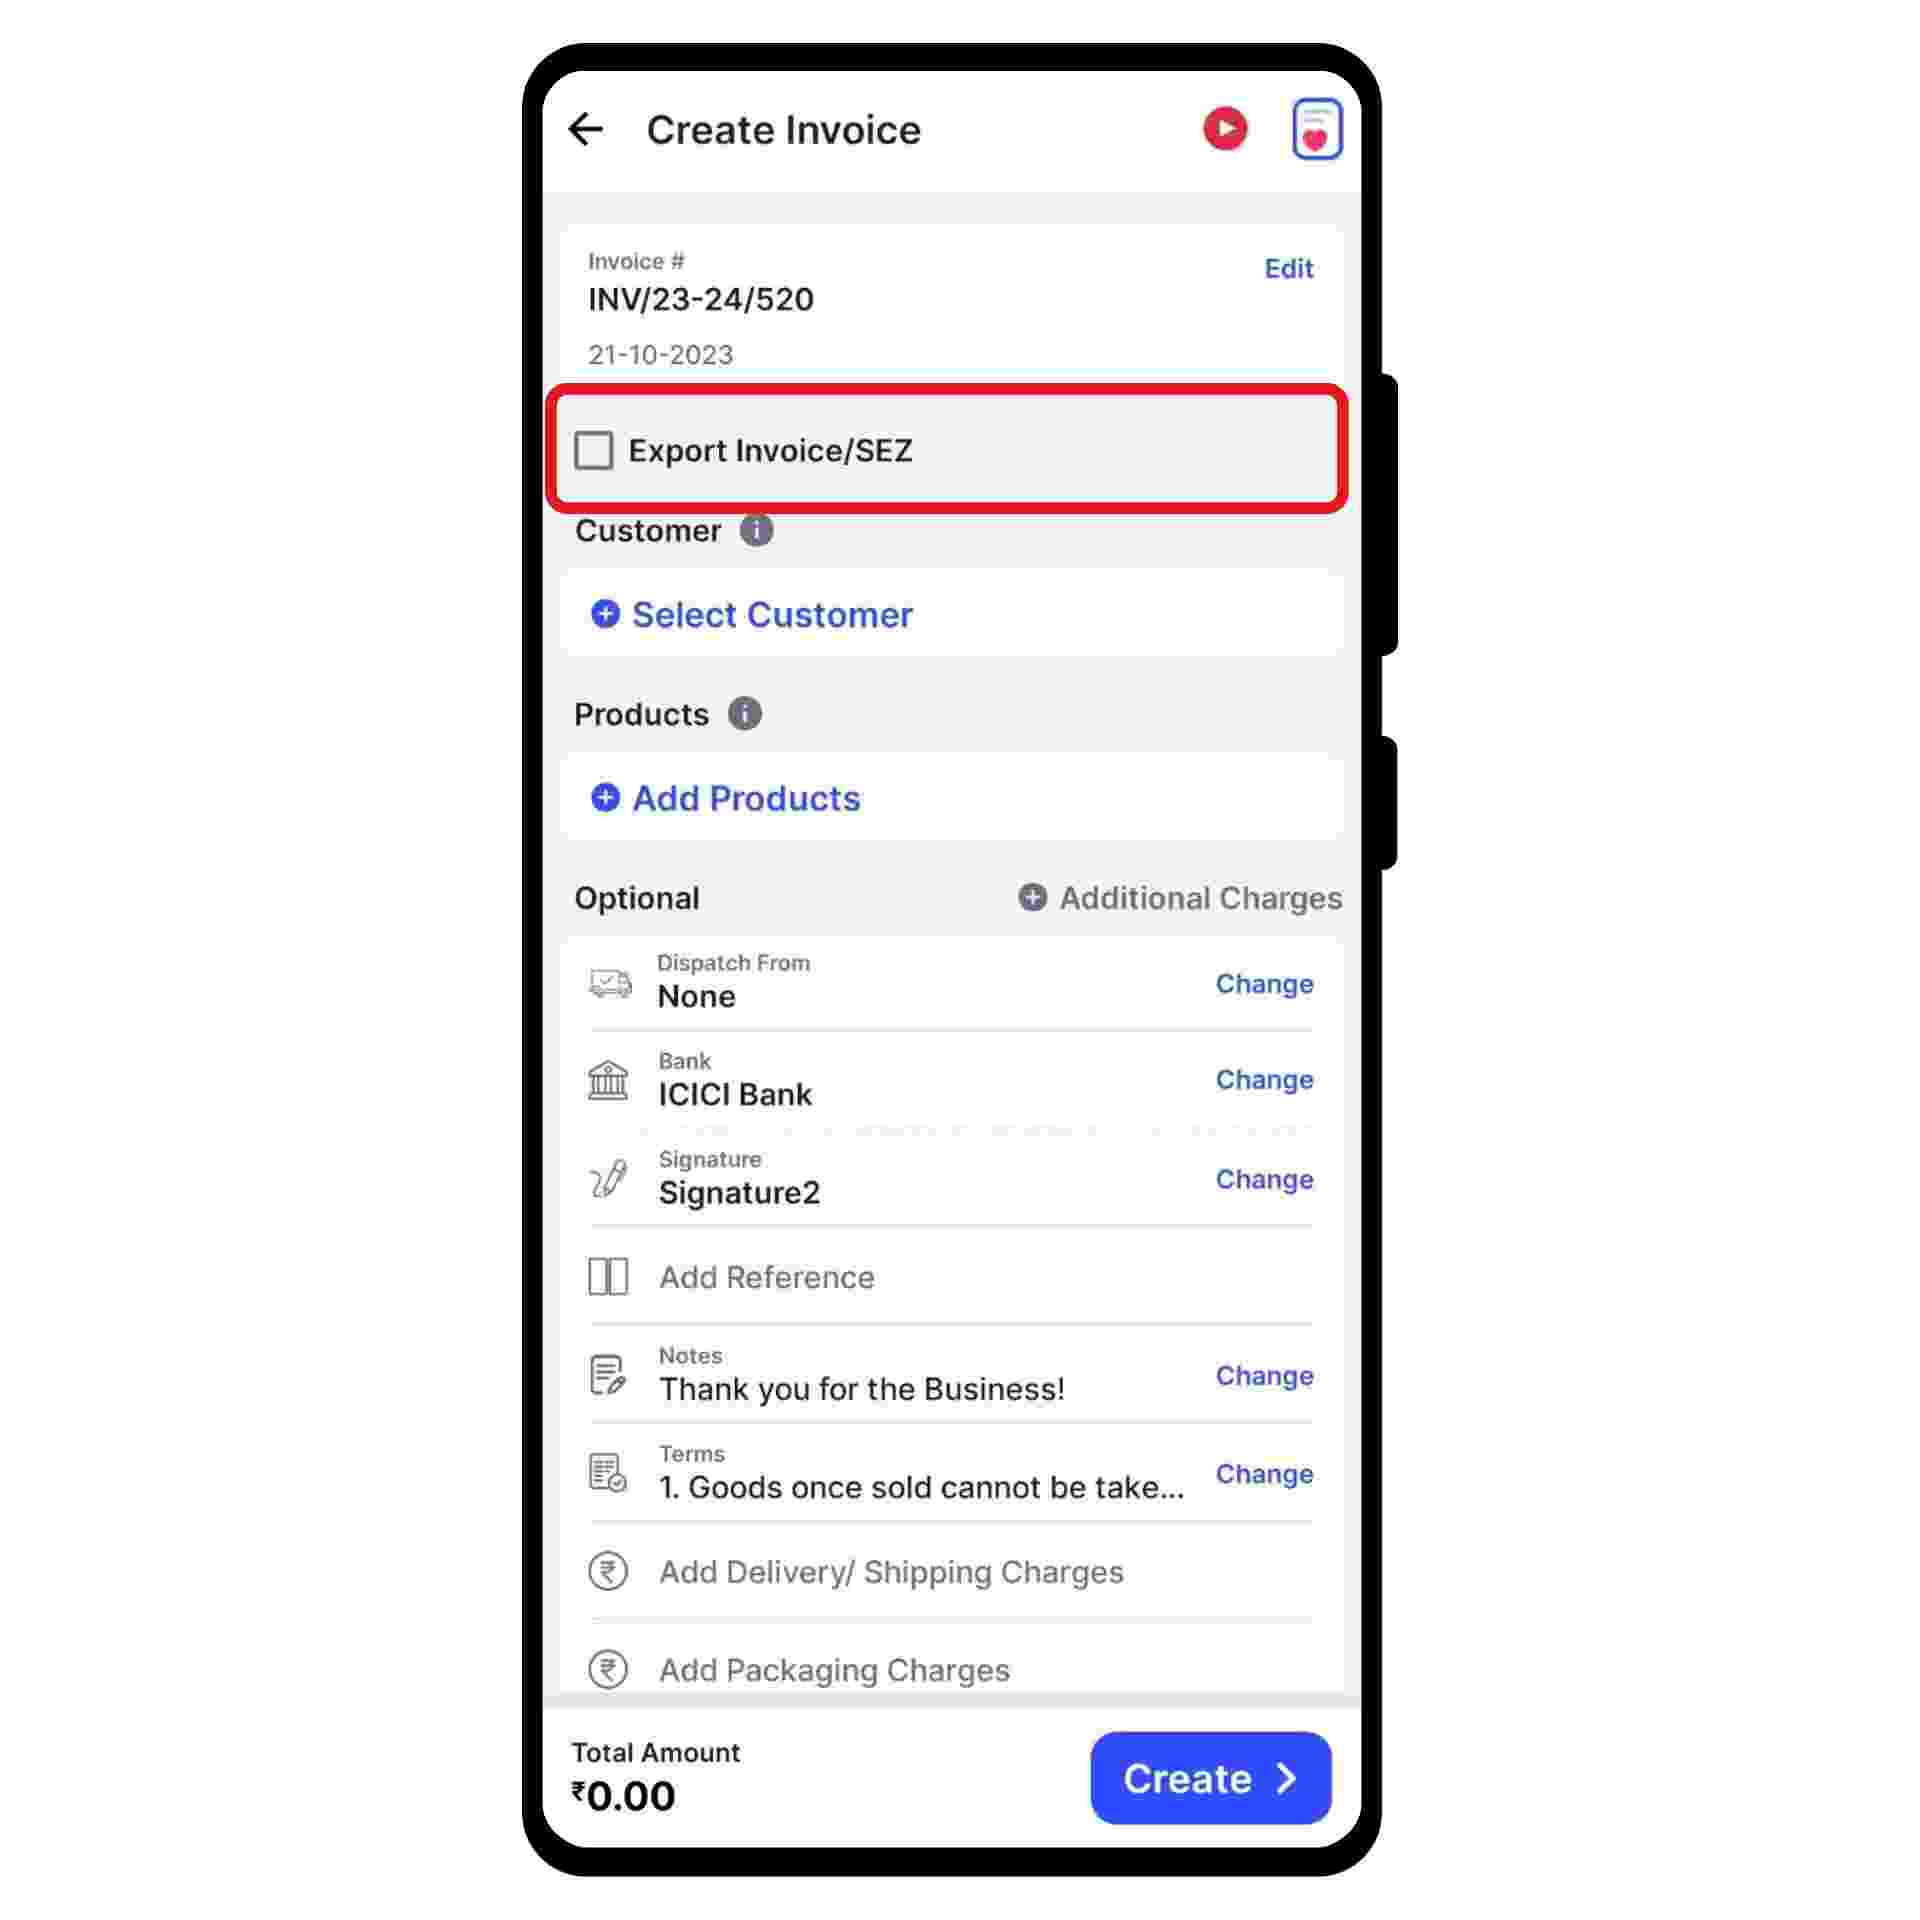
Select the checkbox with Export /SEZ present below the invoice prefix.
A pop-up appears. Here, click on the box below “Select Export Type” and select the export type from the drop-down menu.
Also, Fill in other required details like Shipping Bill date, Shipping Bill Number, Shipping Port code, Country of Supply, Currency, Conversion rate, etc.
Now, click on the “Save” option present at the top right corner of the pop-up.

Note:
Case 1: "Export under bond/LUT" means an export invoice raised without IGST. Businesses need to take a Letter of Undertaking (LUT) from the GST department.
Case 2: "Export with IGST" means businesses can raise an invoice with an IGST payment and apply for a refund after the payment.
Case 3: "SEZ with IGST payment" applies to businesses that export to Special Economic Zones (SEZ). The supply of goods to an SEZ is treated as a zero-rated supply, which means the taxes on the export need not be paid.
Case 4: "SEZ without IGST payment" also applies to businesses that export to Special Economic Zones (SEZ) but can take a LUT certificate and raise invoices without GST.
Case 5: "A deemed export" under GST refers to a transaction in which the goods or services supplied do not leave India but are considered exports under the GST law applies to businesses with future trade agreements. All deemed exports are mandatory for IGST payments. Supply cannot be made under LUT/ Bond for deemed exports.
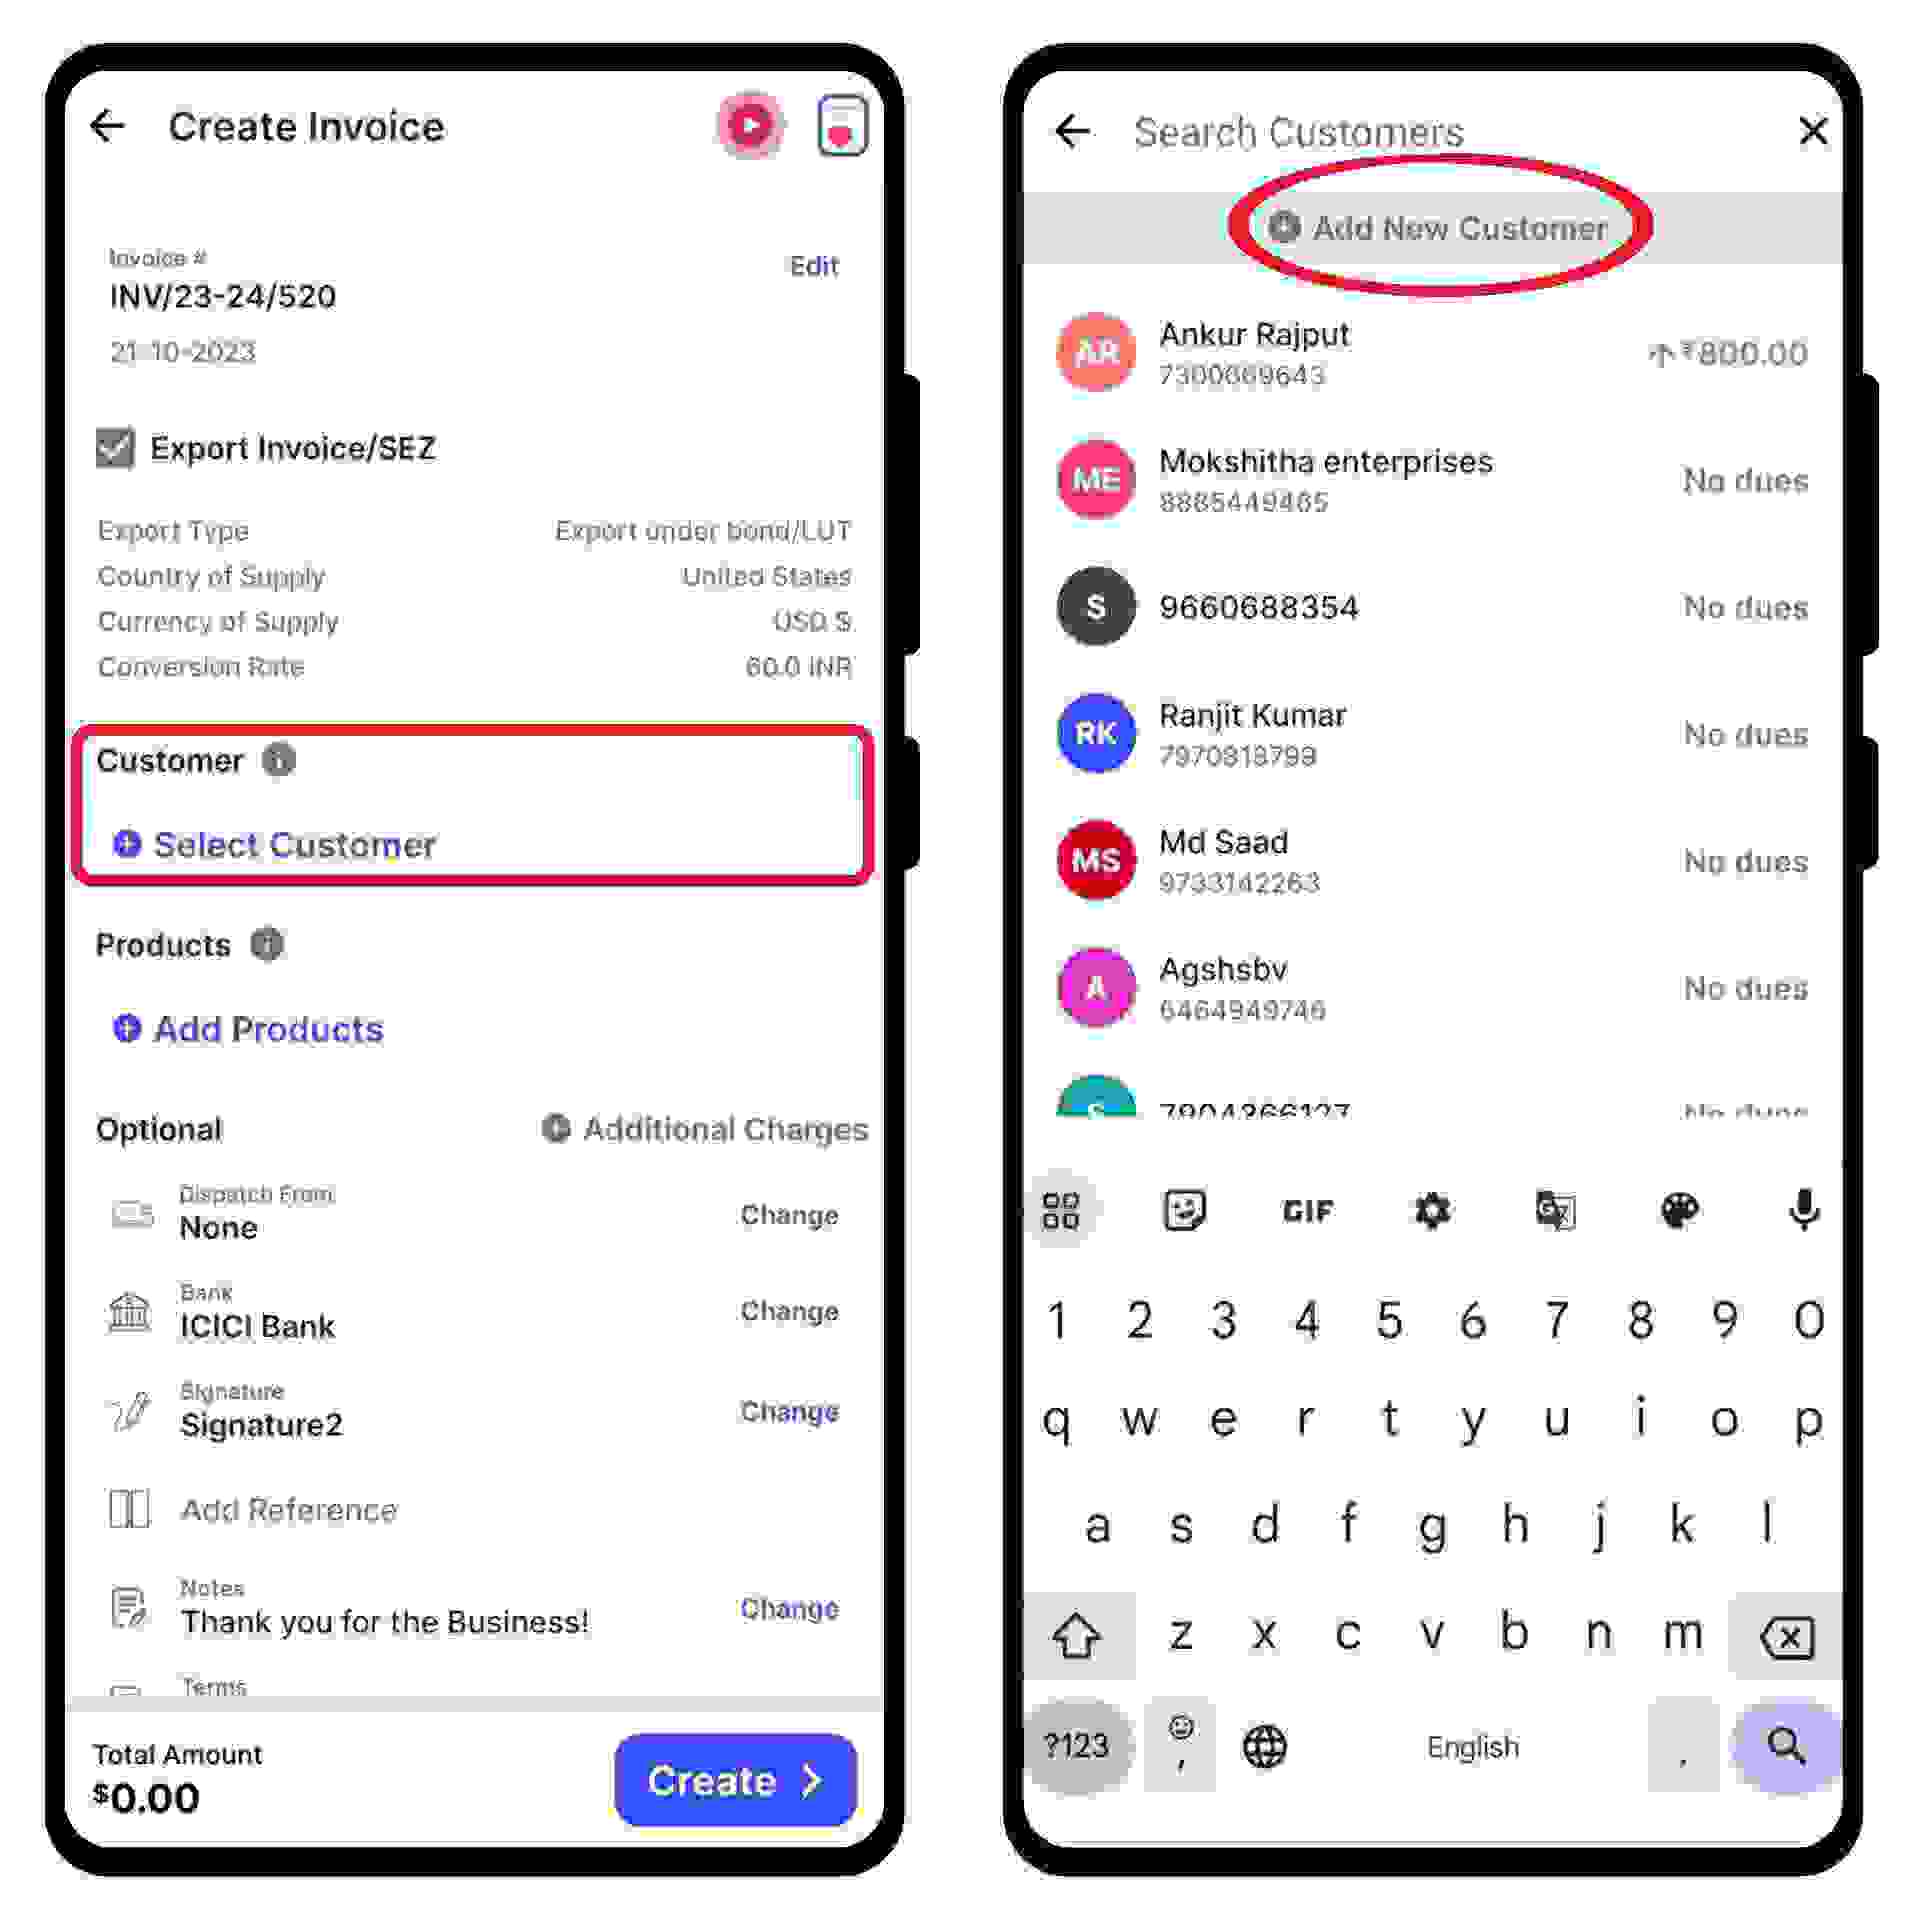
Click on the “Select Customer” option
Now, select or search for the customer you want to create the pro forma invoice.
You can also create a new customer profile by clicking on the “add customer” button.
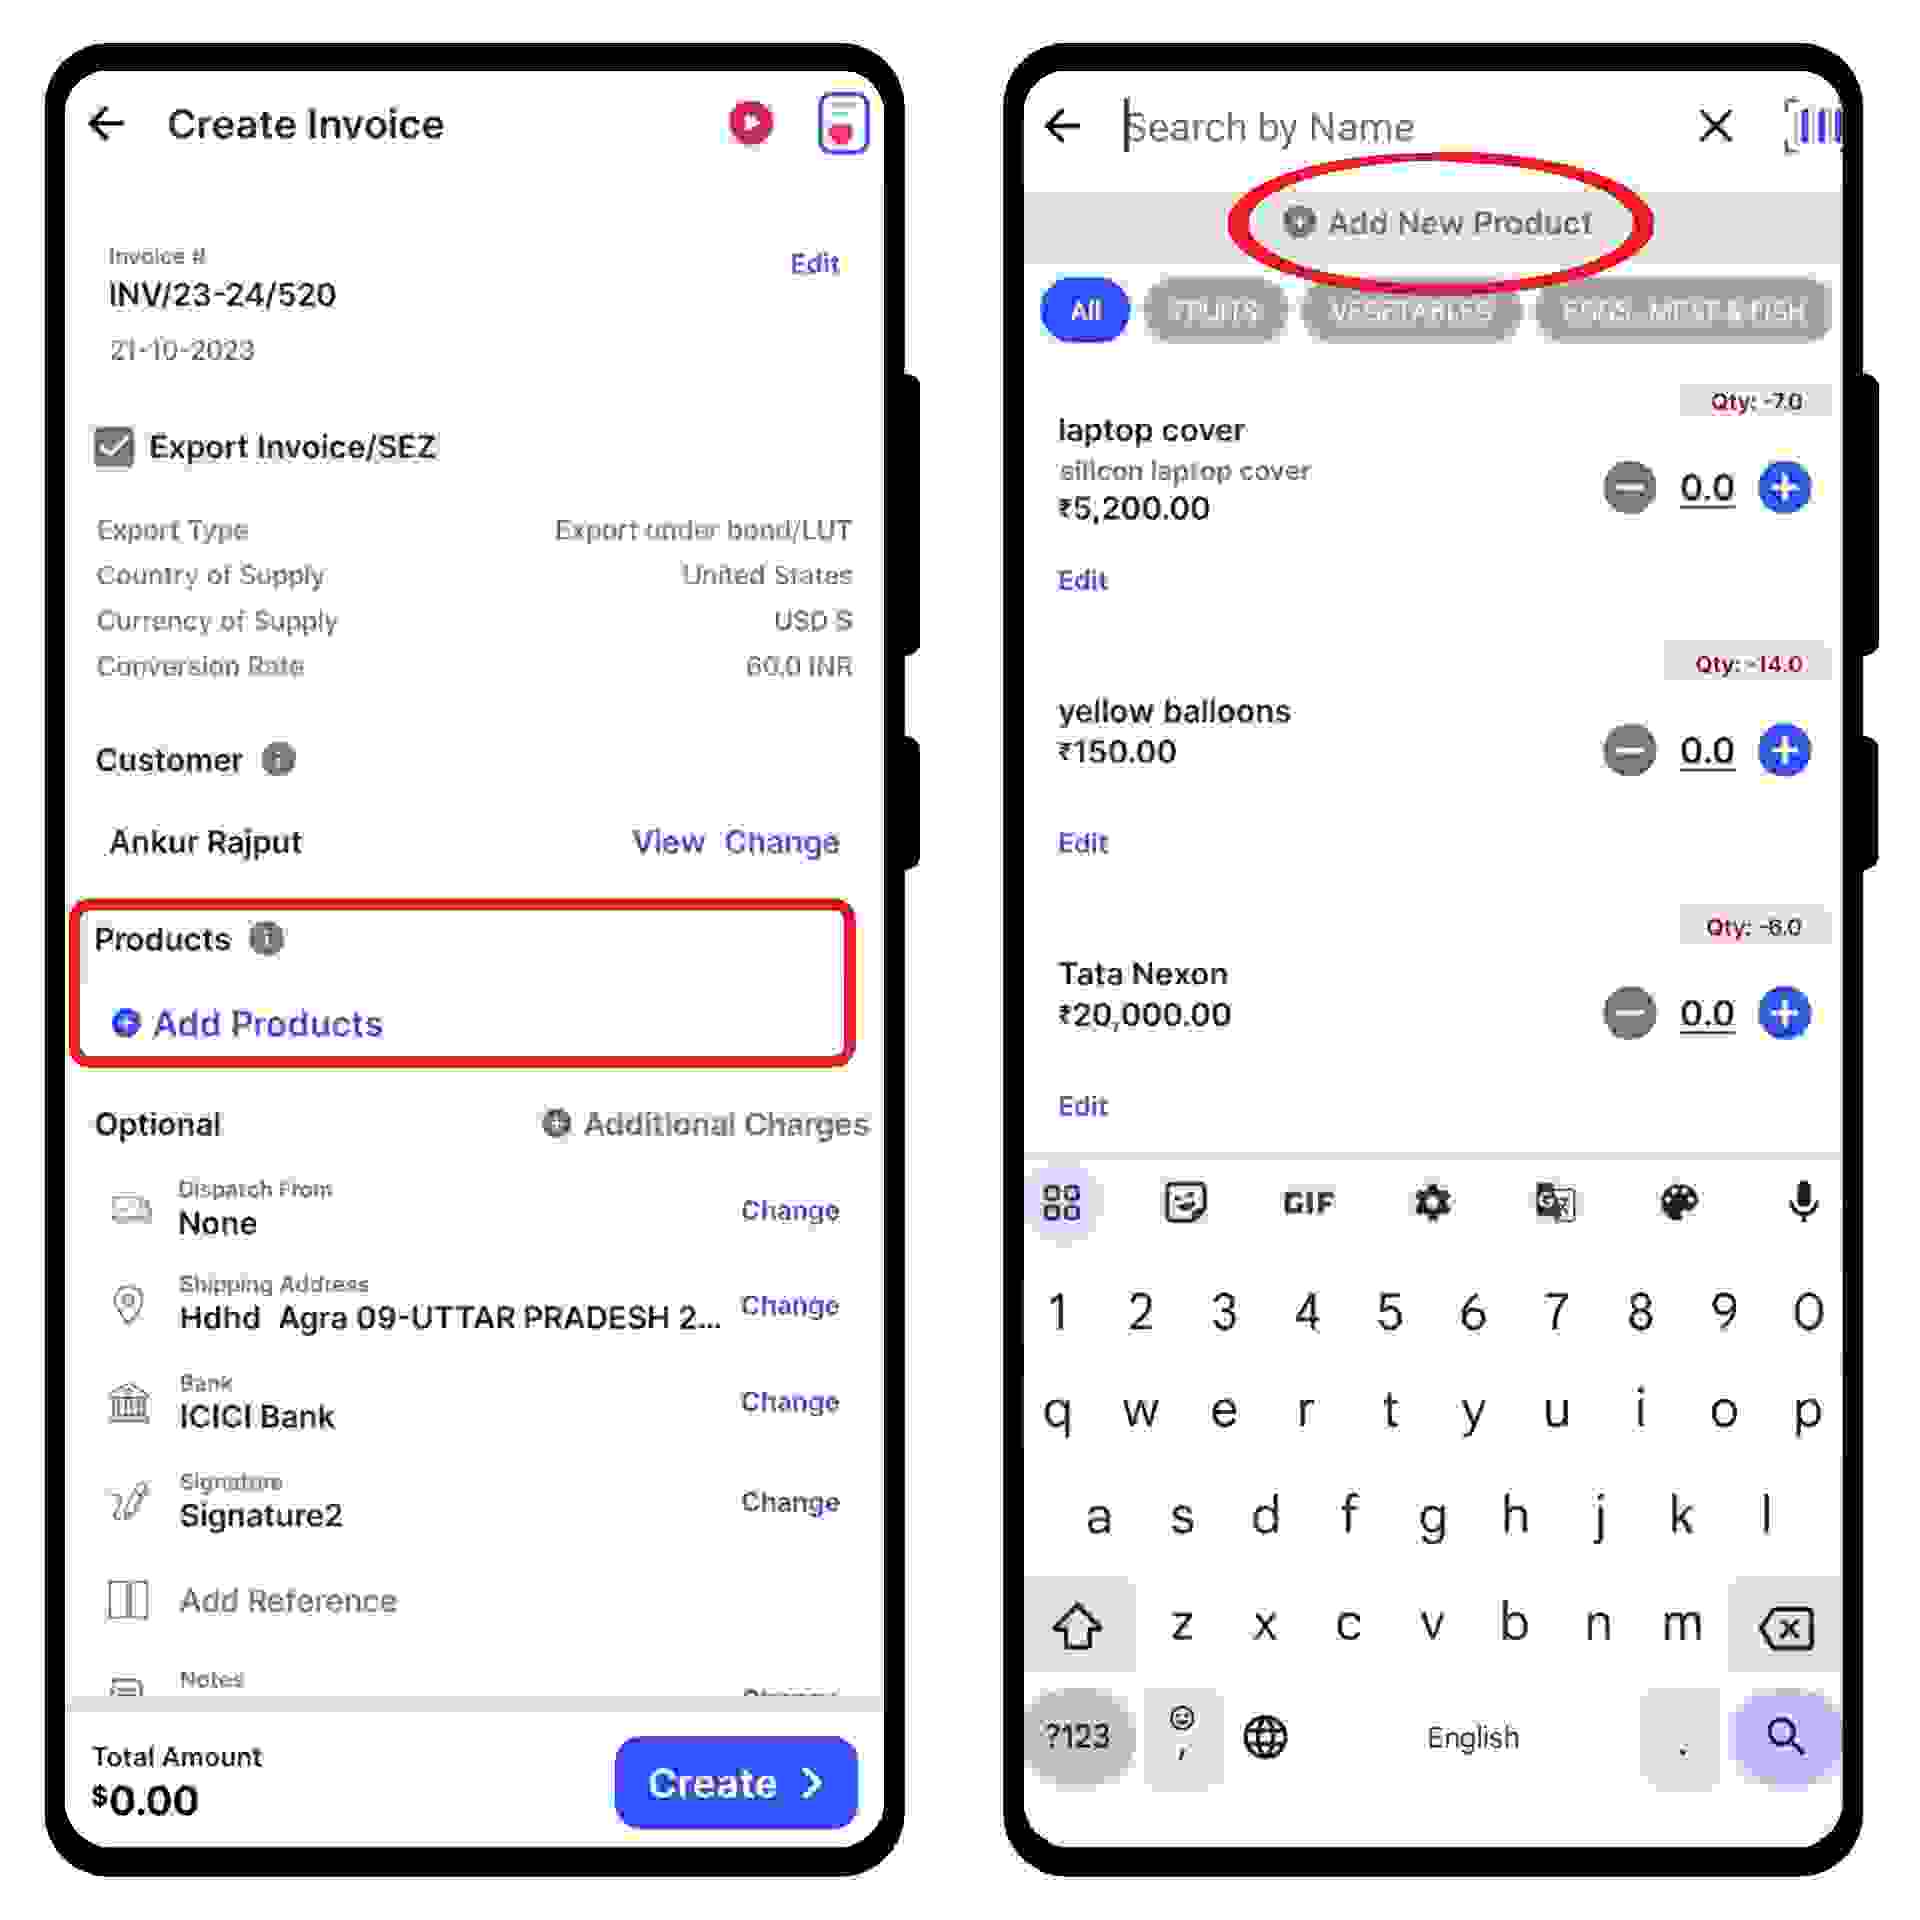
Click on the “Add Products” option and select or search for the product you would like to add. Now click on “+” to add the quantity of the product.
or click on “+ Add New Product" at the top of the screen and type in their details manually.
If applicable, add additional delivery or packaging charges. You can also create or edit the notes as well as the terms and conditions.
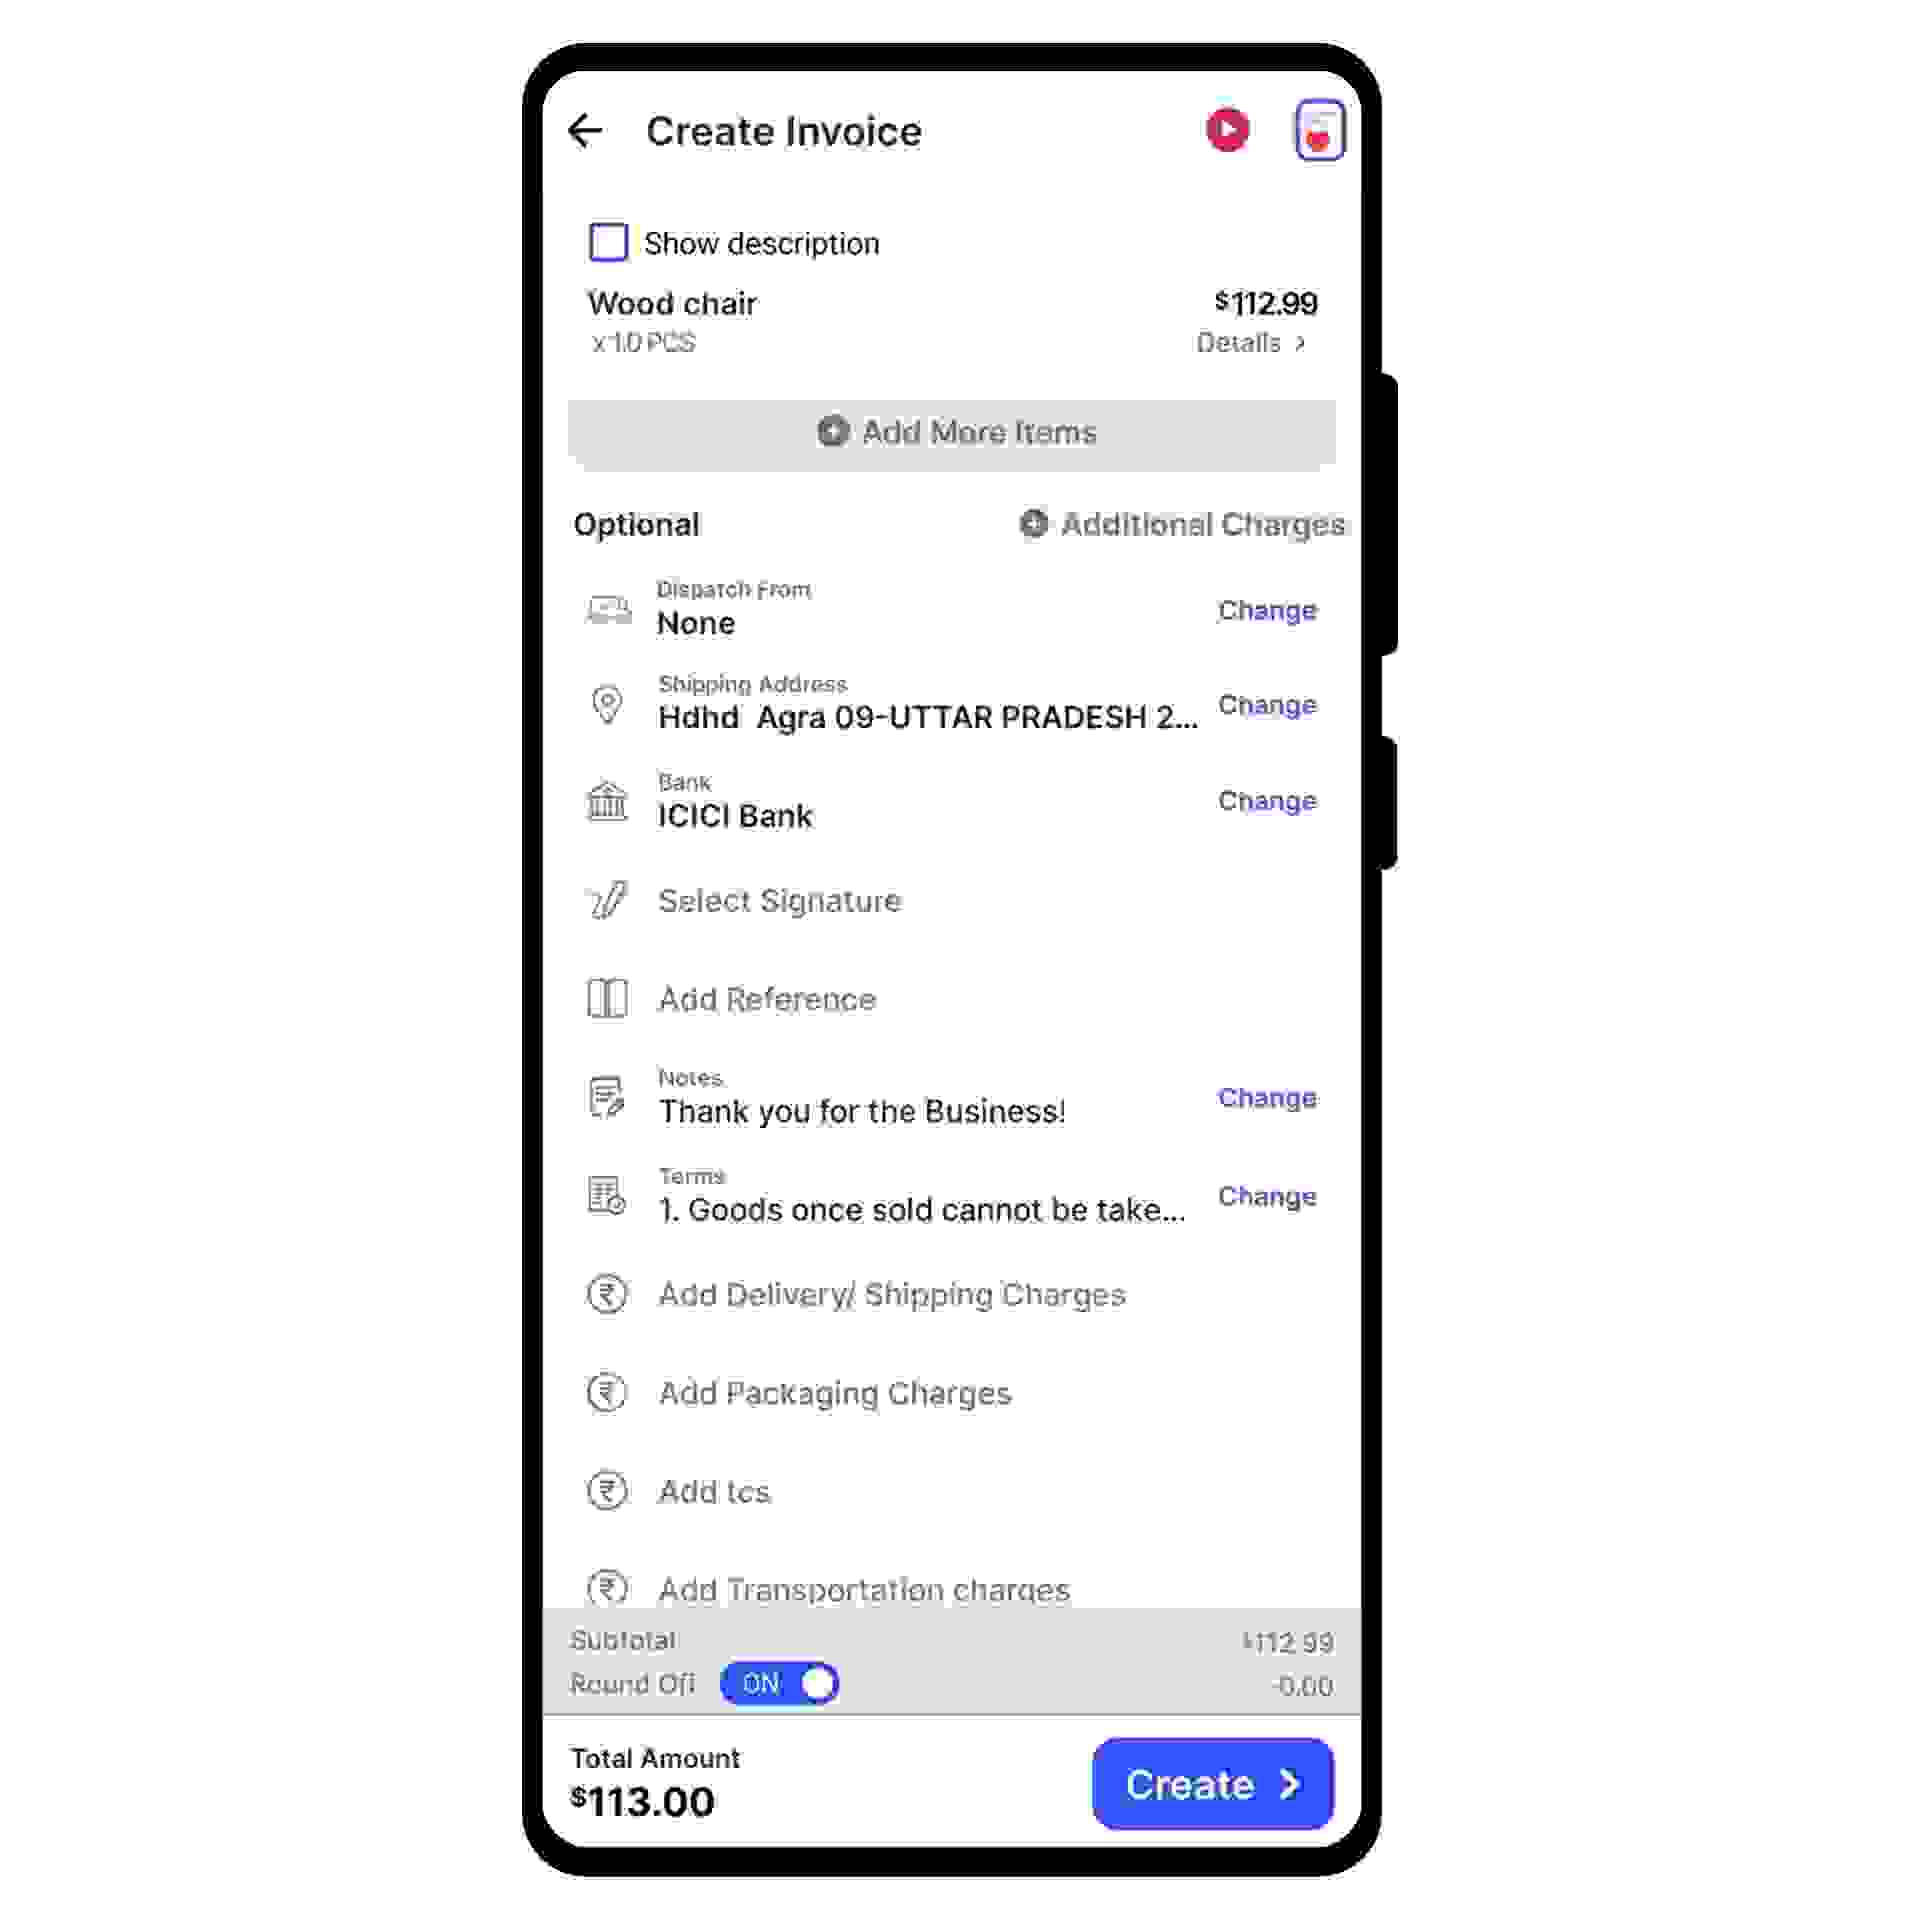
Now, add your signature and click on the “Create” option present at the bottom of the screen.
Congratulations! Your export invoice is ready, and you can share it via WhatsApp, SMS, or email with your customer by clicking on “Send Bill” at the bottom of the page.
