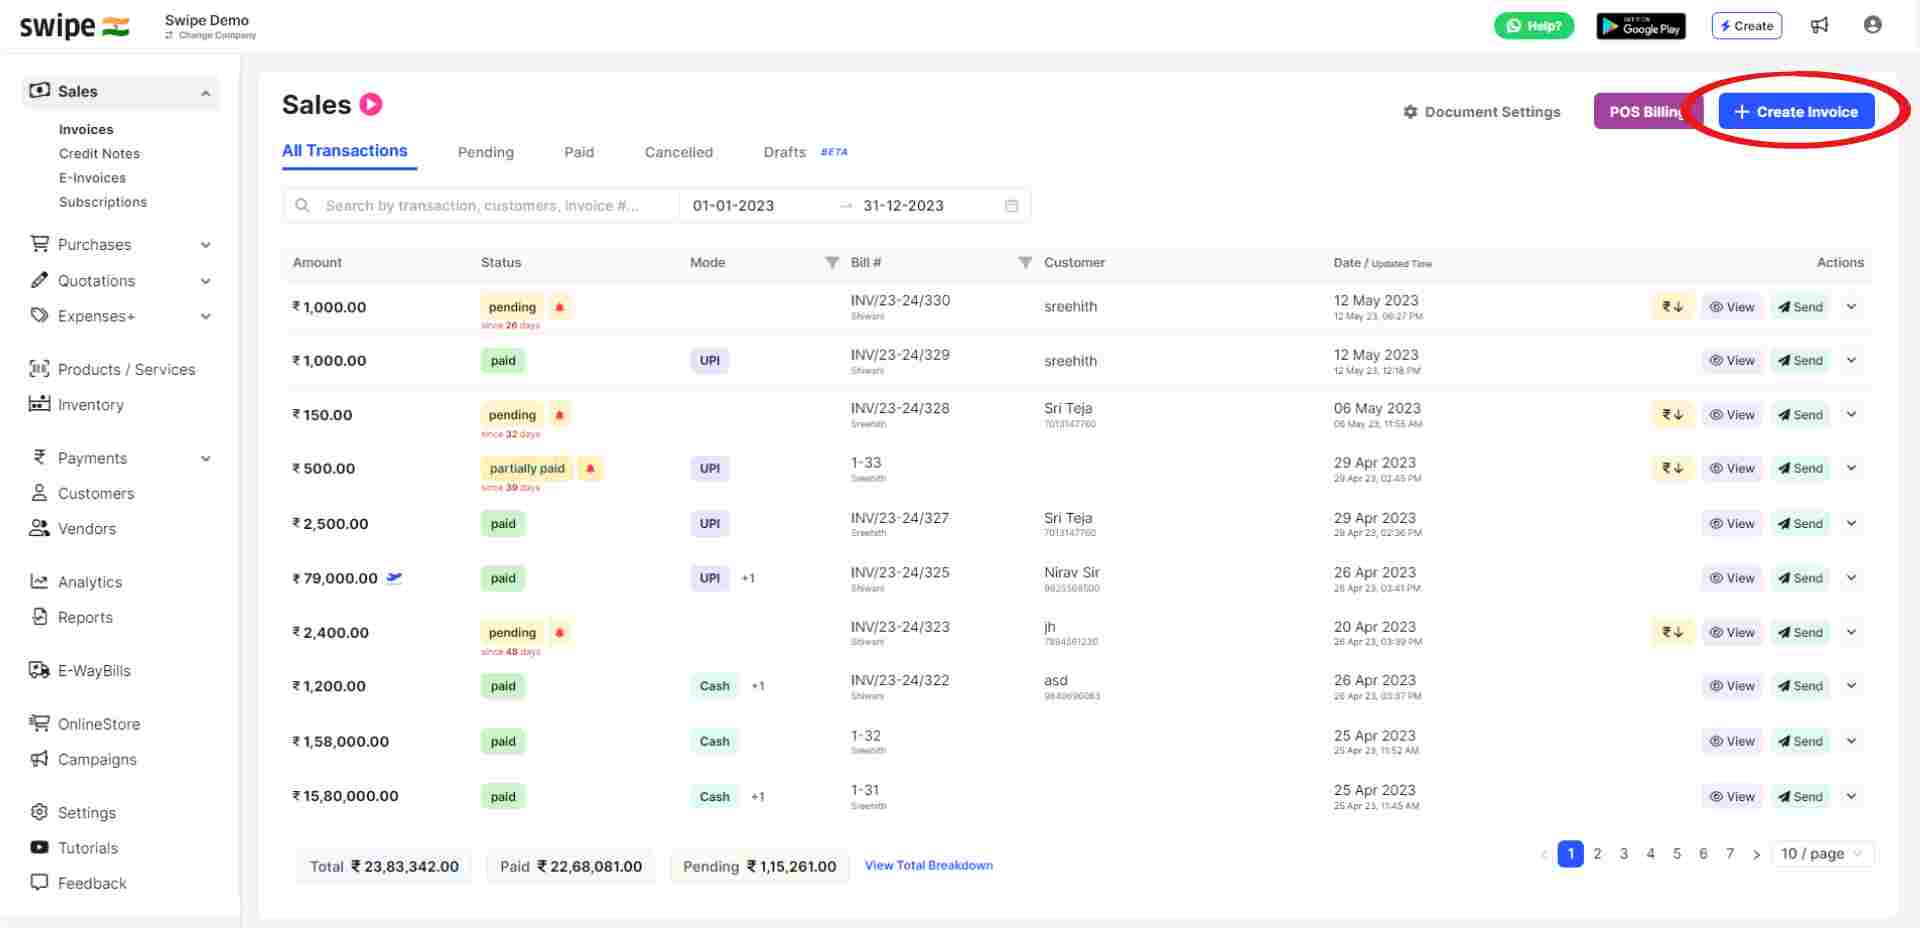
Now, click on create invoice from the top right corner of the screen.
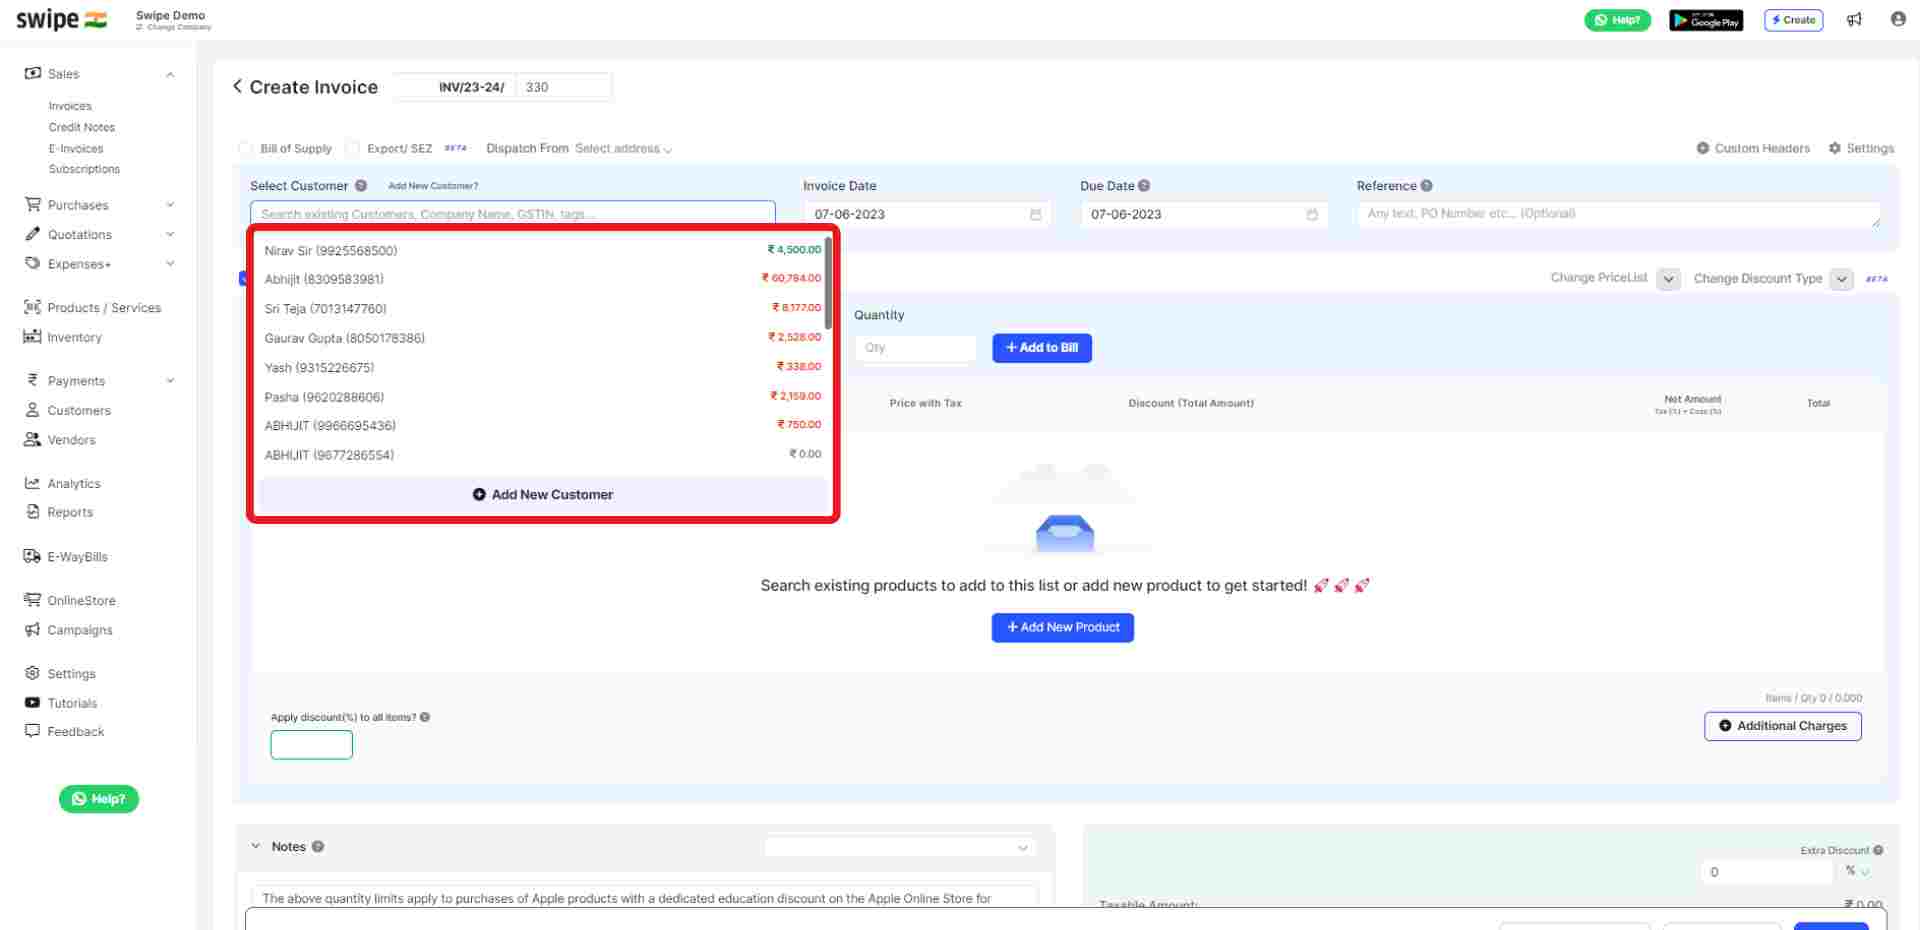
Select the customer you want to create the invoice for or create a new customer profile by clicking on the “add new customer” button.
(And fill in the necessary details like due date, reference number, etc)
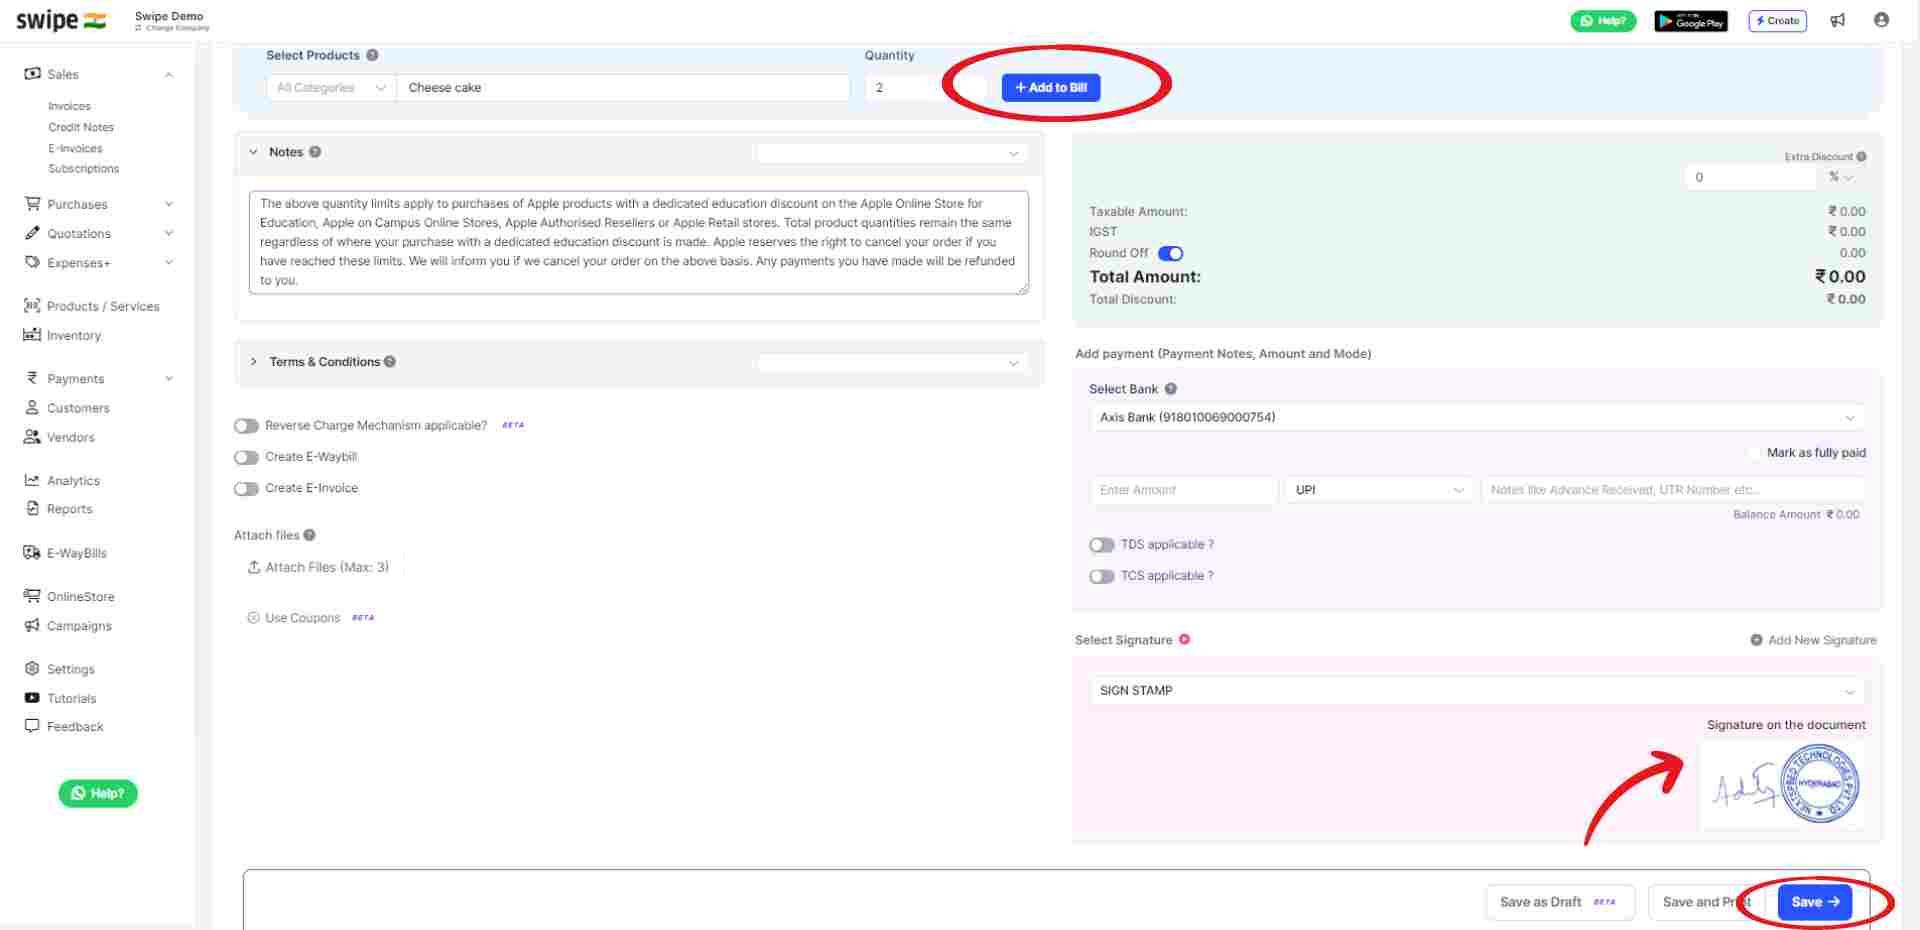
You can select existing products from the drop down list or add new products by typing in their details manually.
To add more products, click on ‘+ Add New Product’, which will add new item rows.

Add any relevant notes or any special instructions to the customer along with the signature and click on “add to bill” and save.
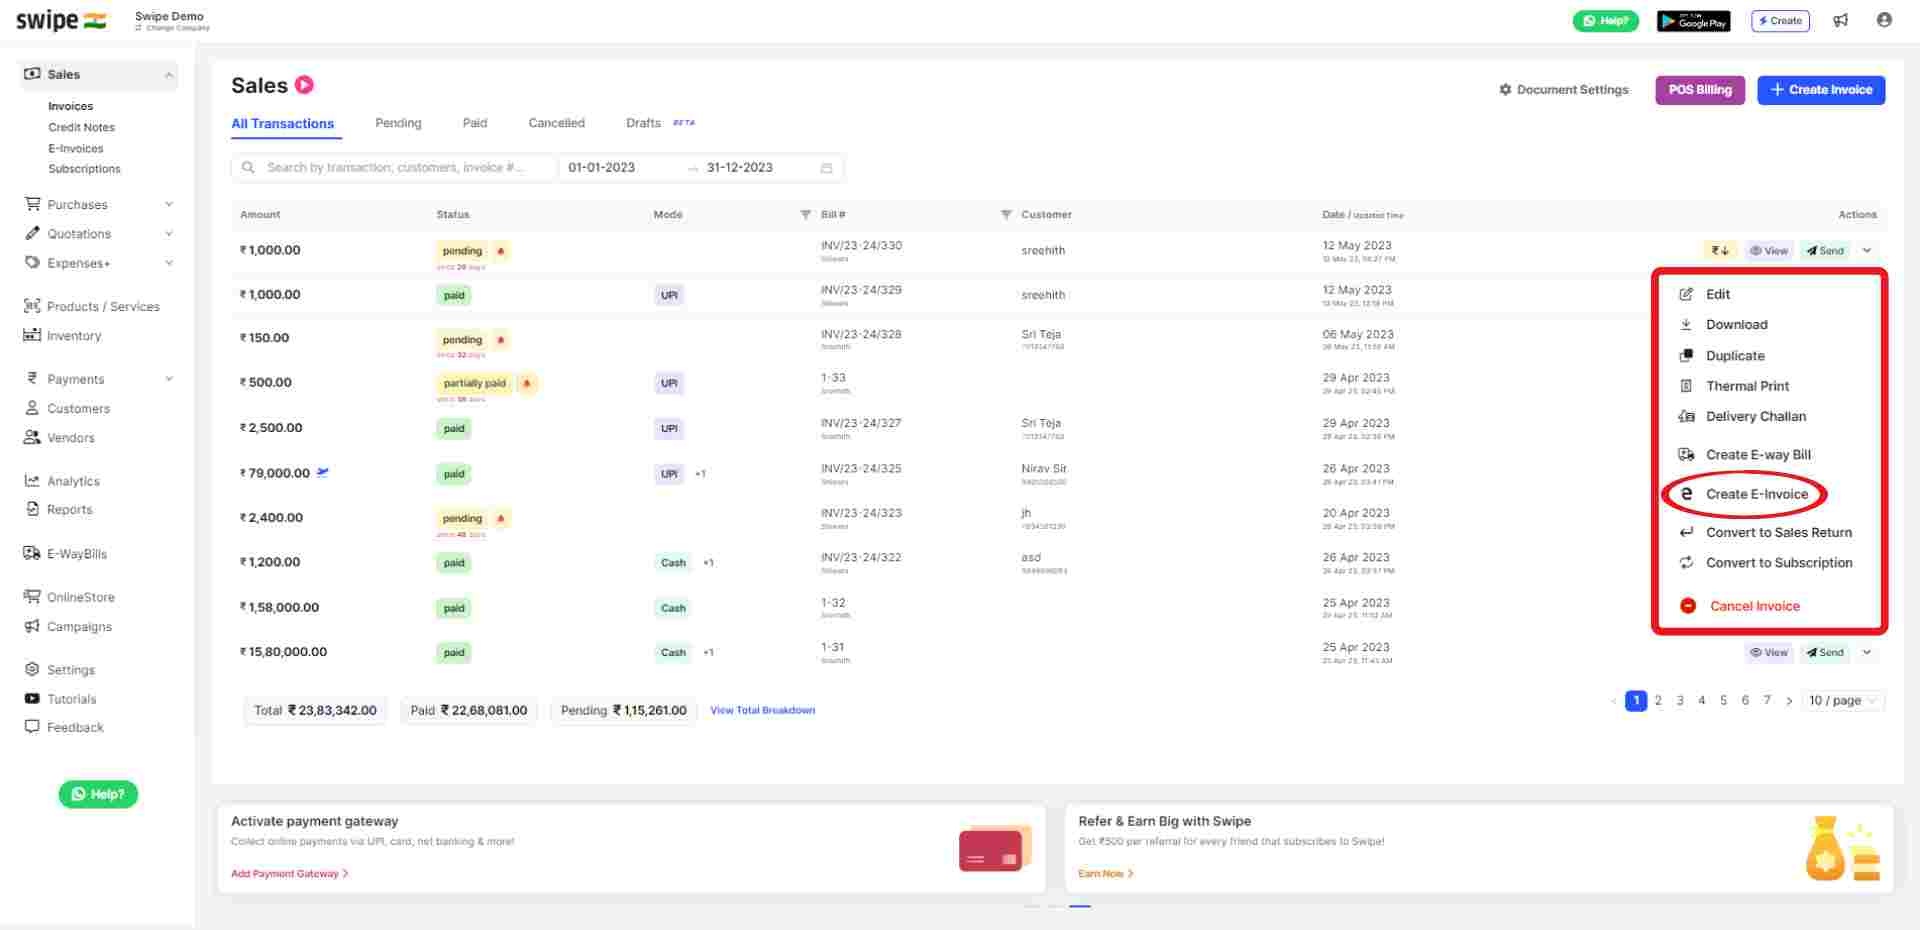
Once saved, click on the drop-down button at the end of the invoice column and select the “Create E-Invoice" option from the drop down menu.
After clicking on the "Create E-Invoice" option, a pop up will appear, with the details of the invoice, such as the document number, HSN codes, seller, and buyer details.
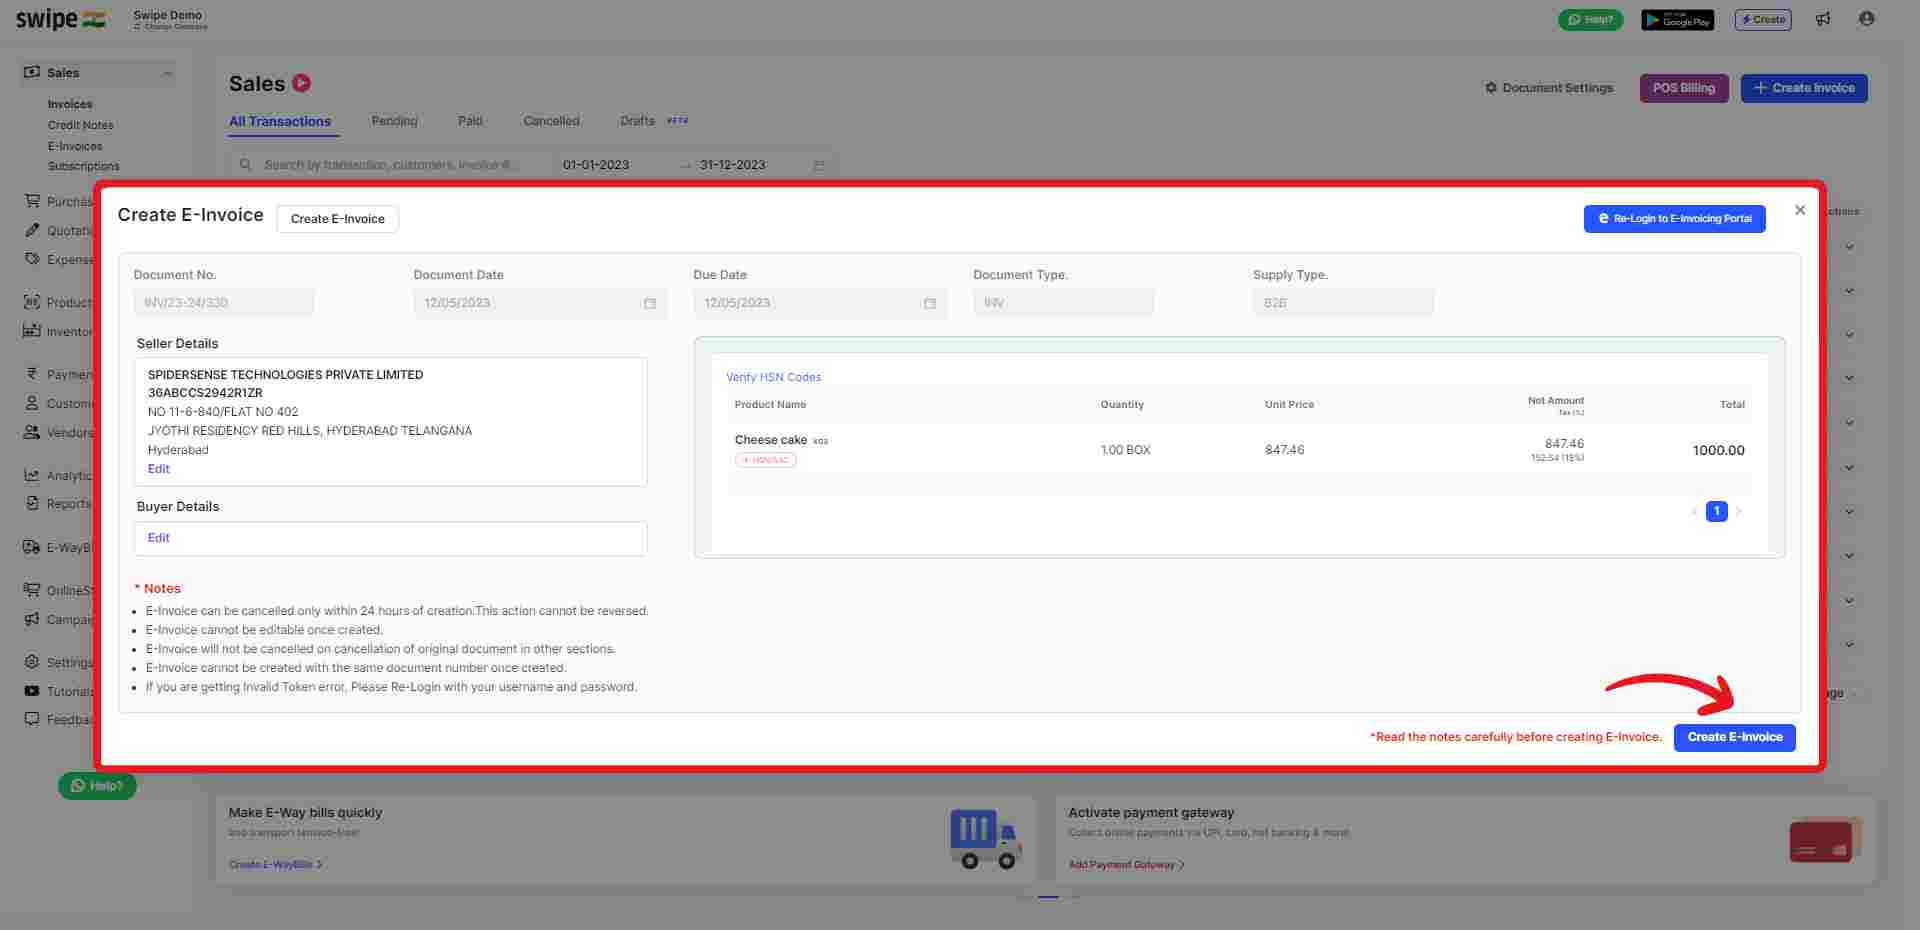
Click on the “create E-Invoice” option from the pop up at the right corner below the screen. Now, your E-invoice is generated and you can share it via WhatsApp, SMS or Email it to your customer.
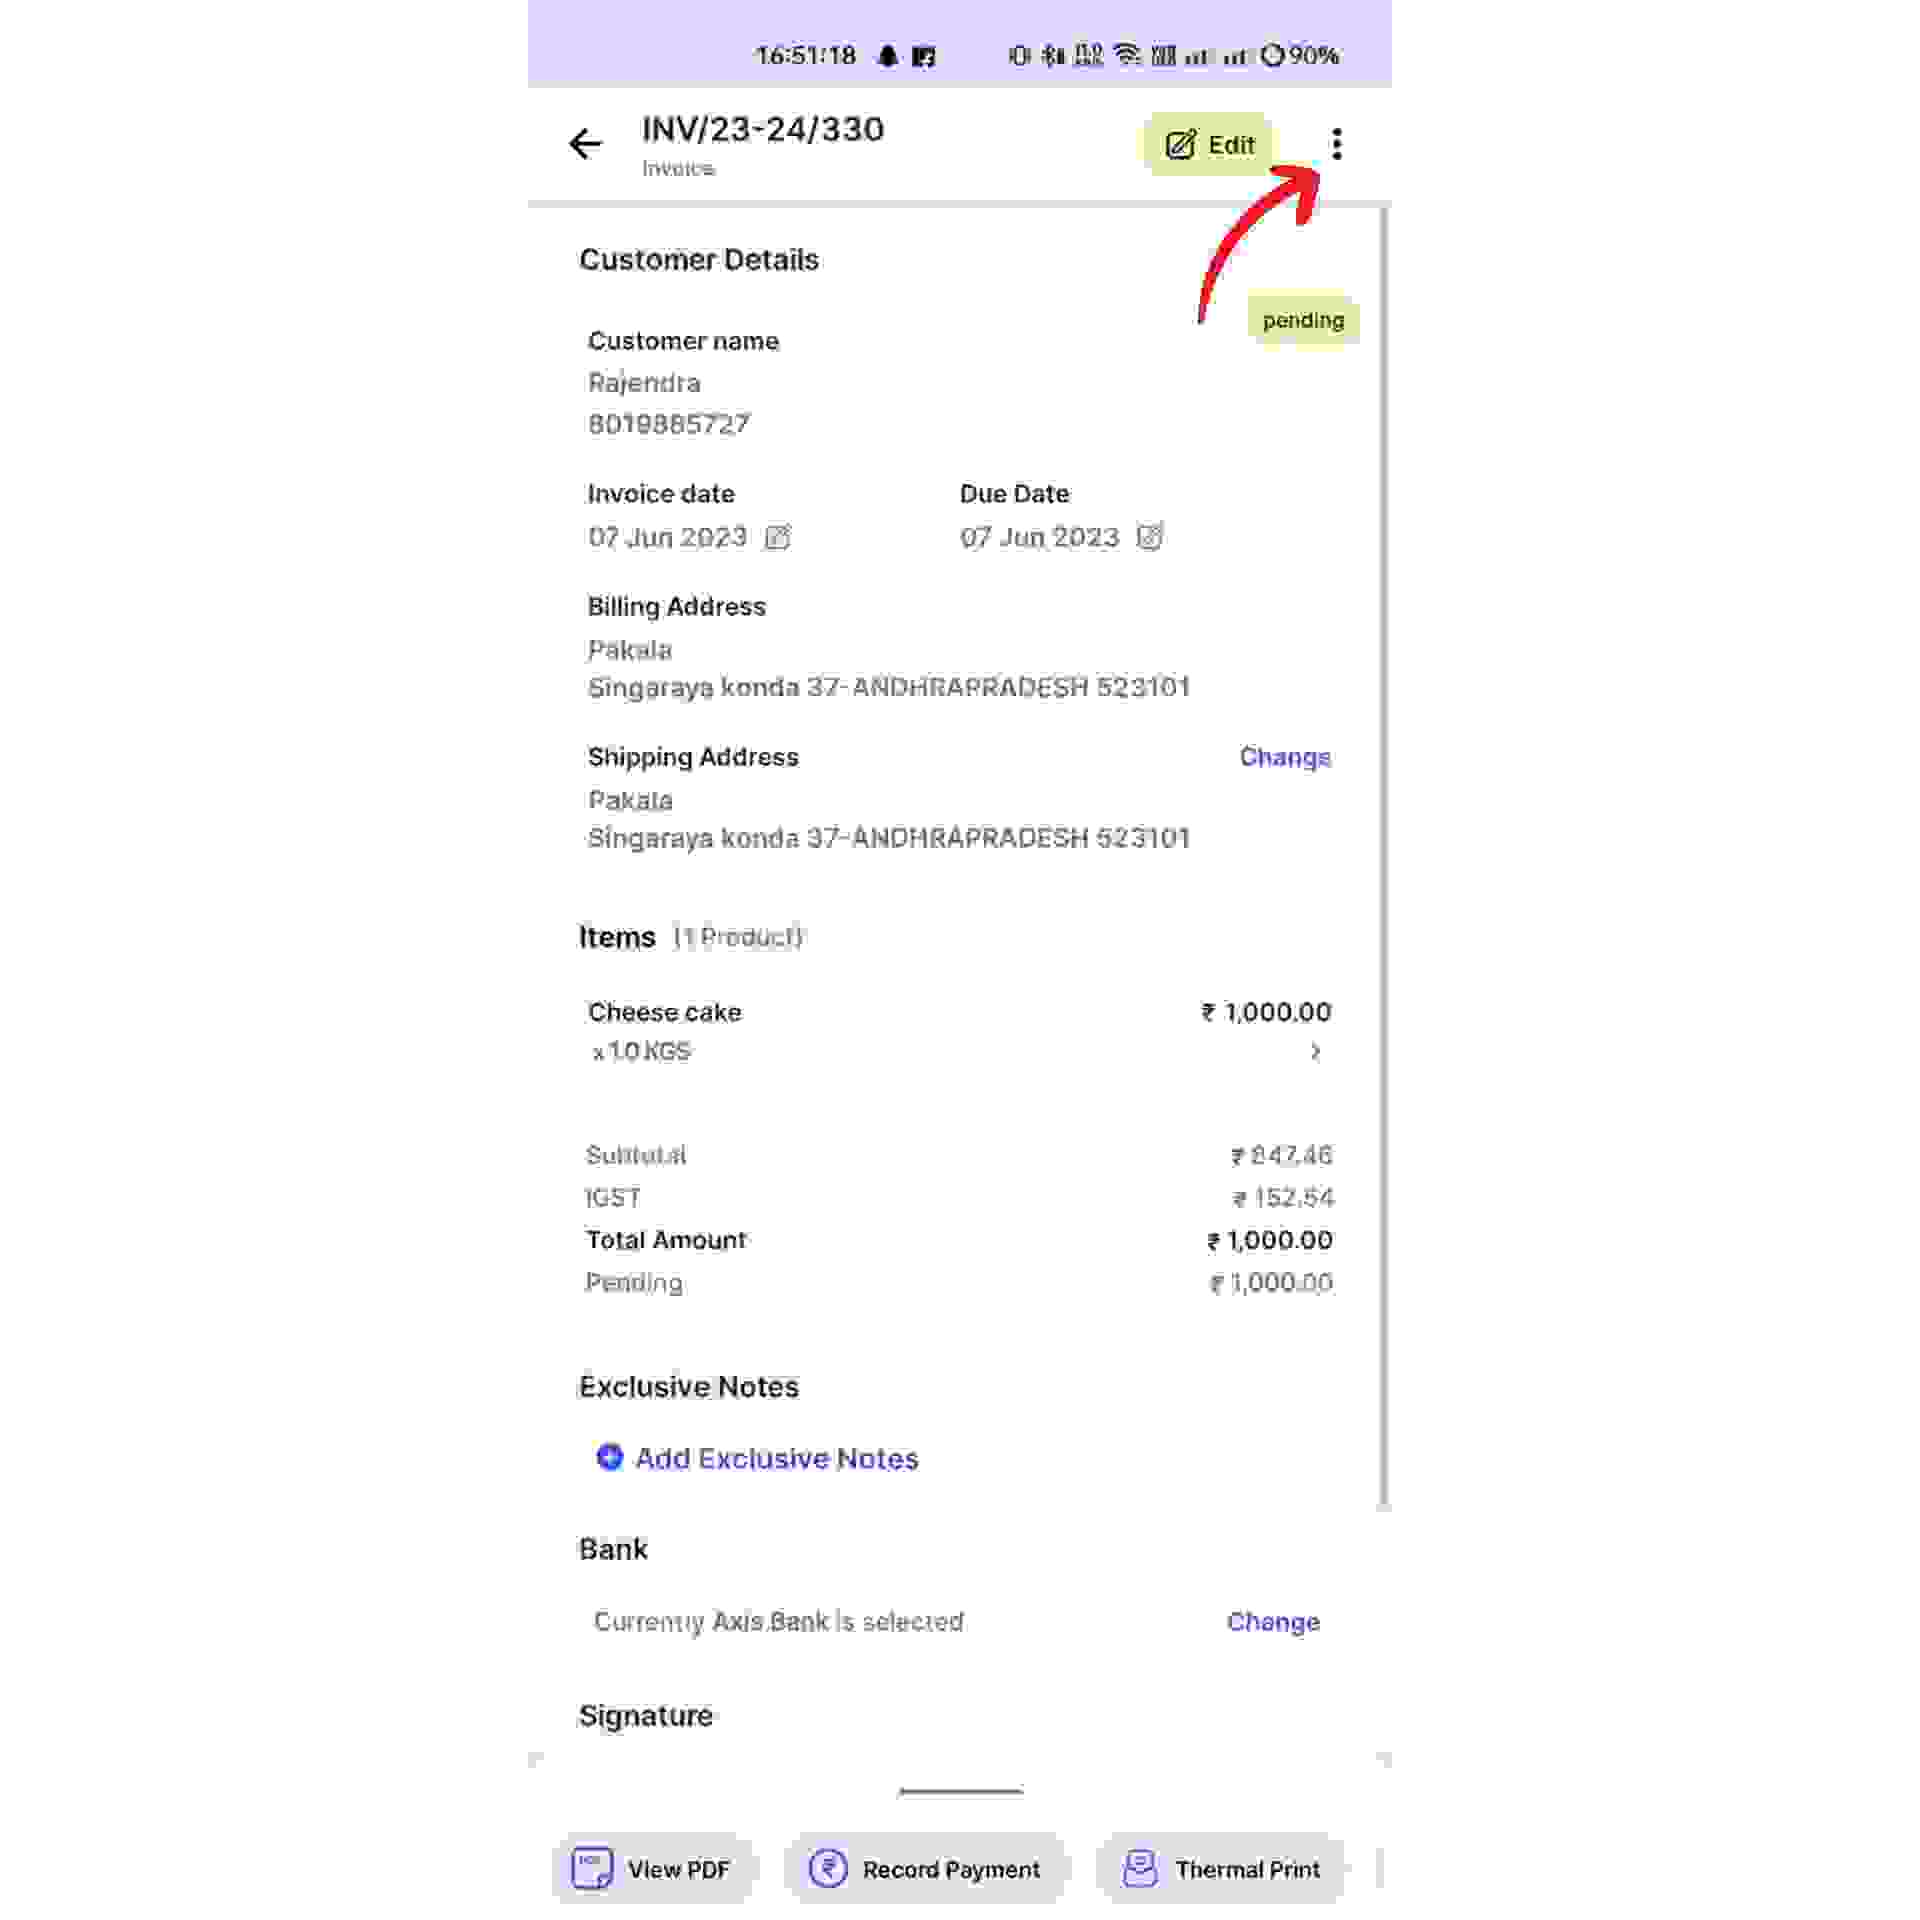
Click on the Invoice you want to create the e-Invoice for under sales section.

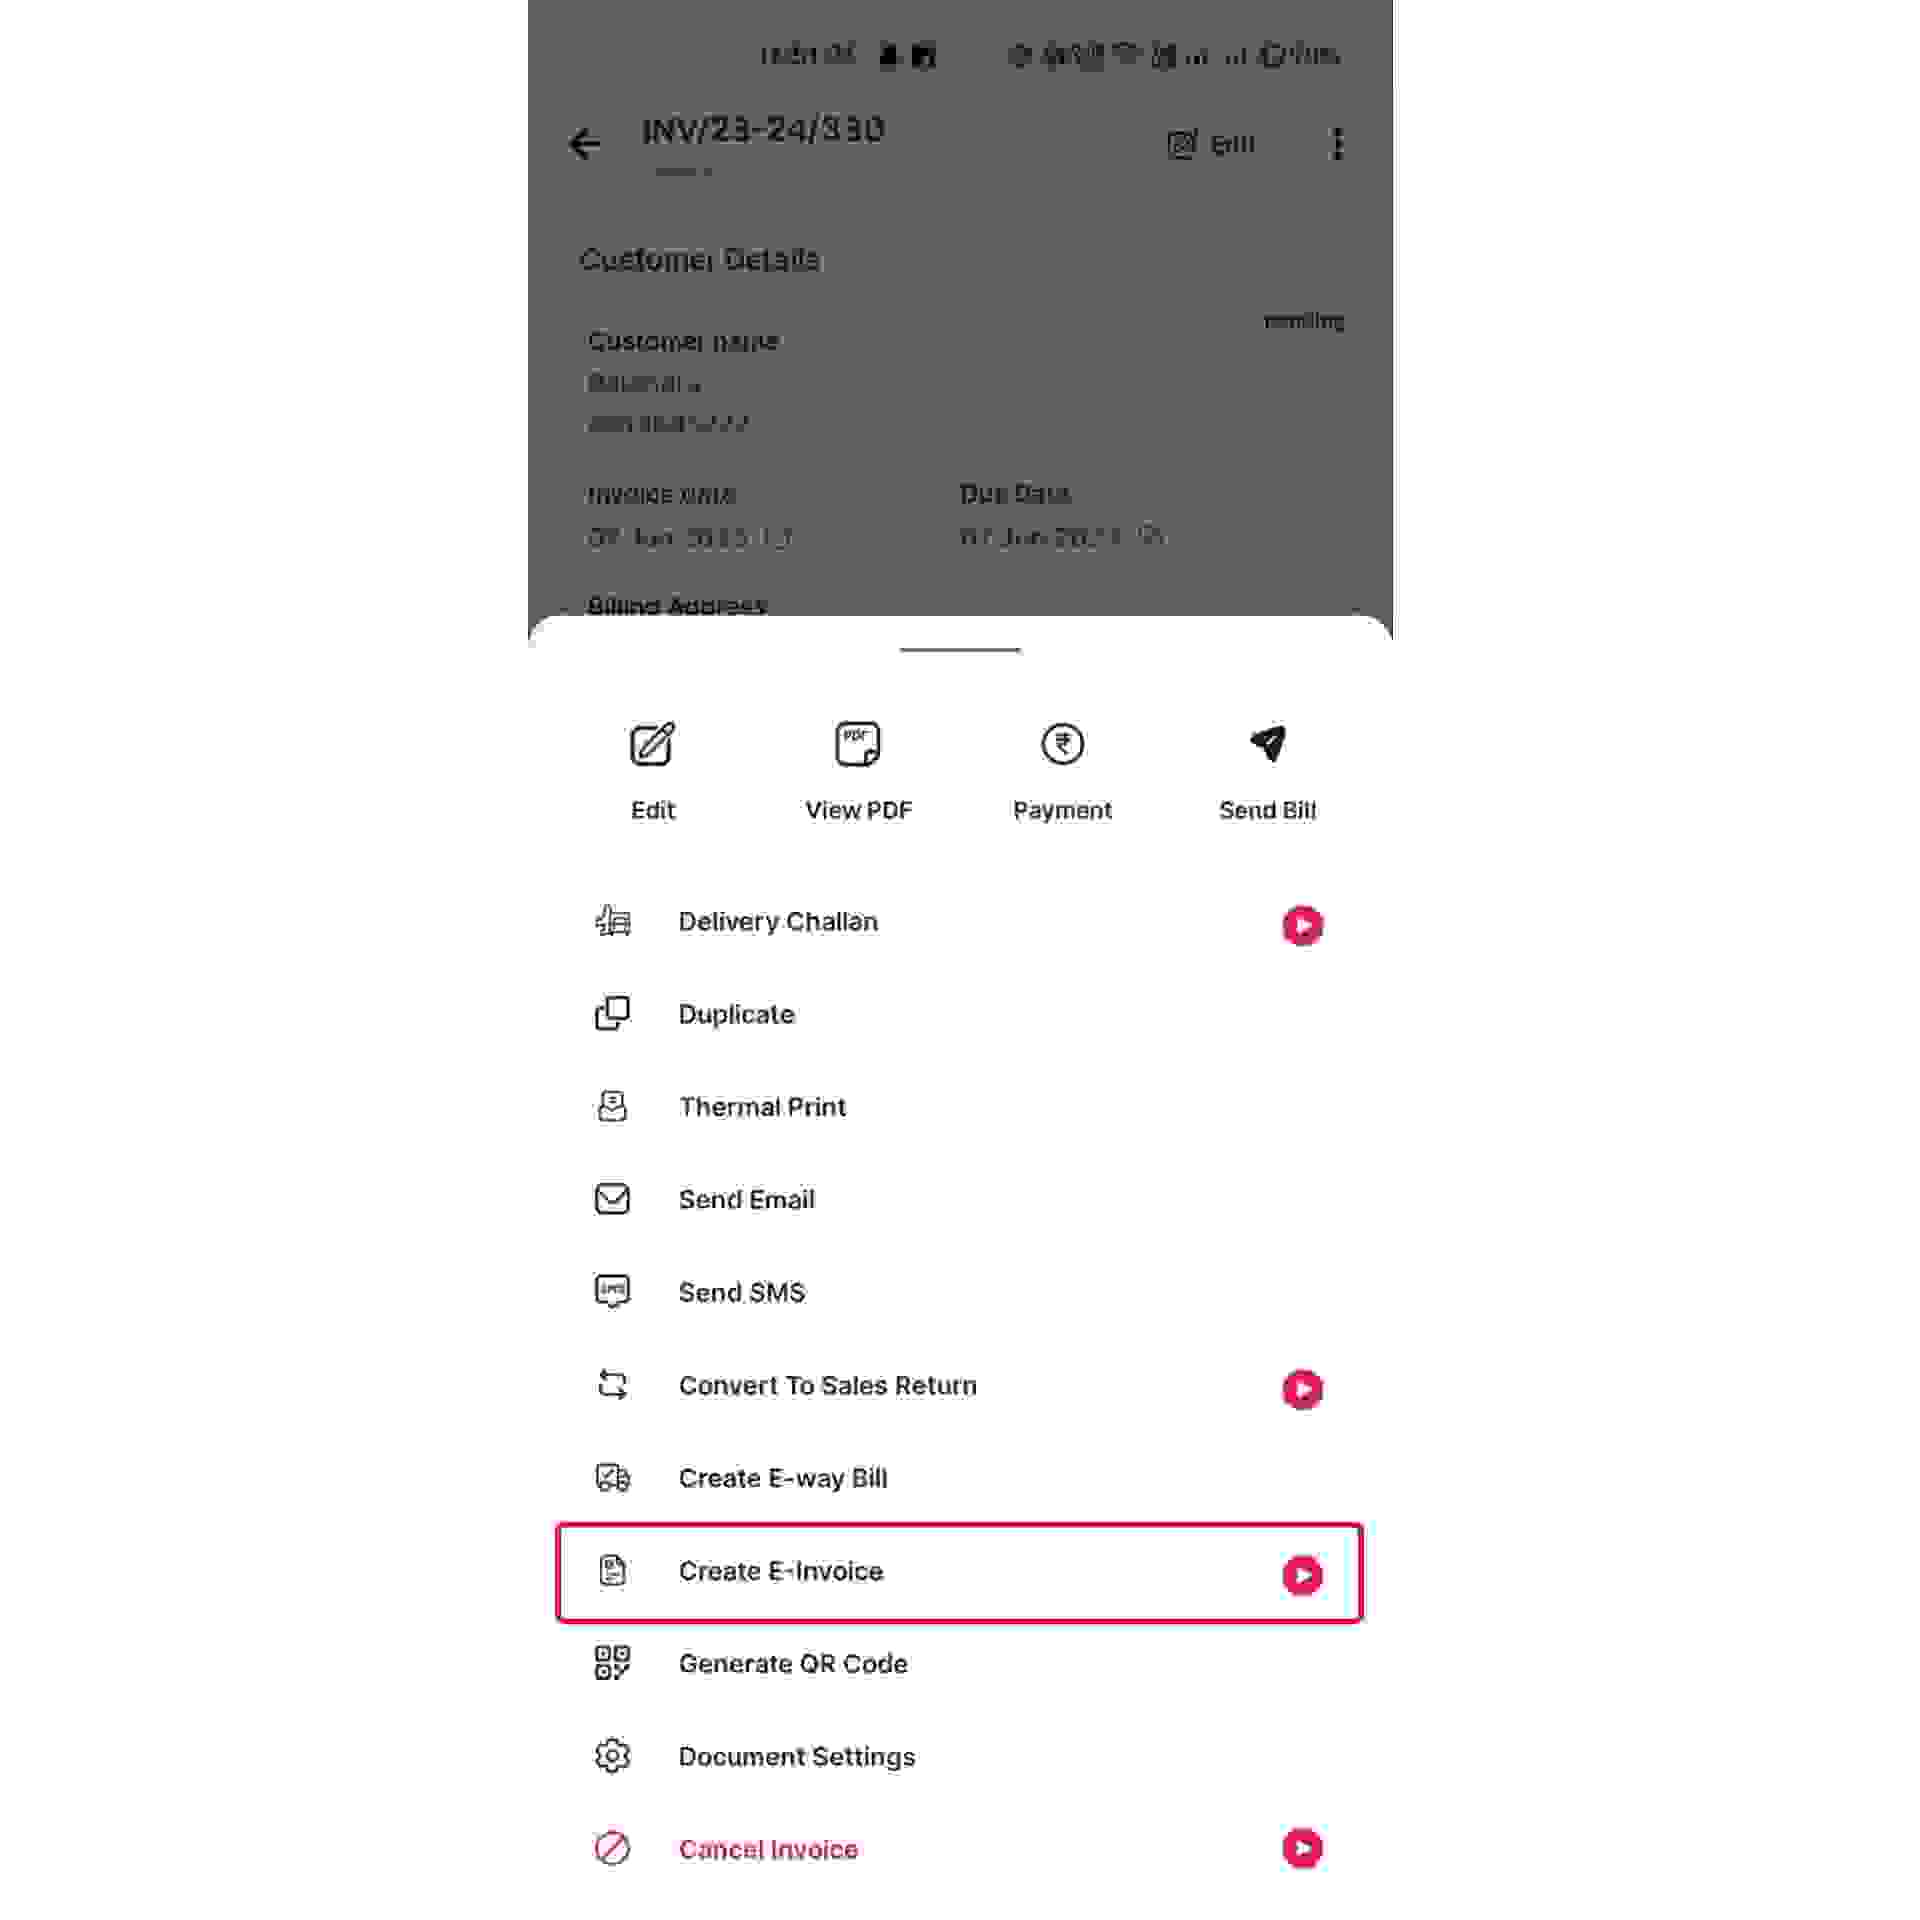
Now, Click on the menu button at the top right hand corner of the screen. Then, a pop up list appears from the bottom of the screen.
Select the “Create E-Invoice” option from the list.
Congratulations, your e-invoice has been generated successfully and a pop up will appear informing the same at the bottom of the screen.