How to add UPI ID to invoices on Web
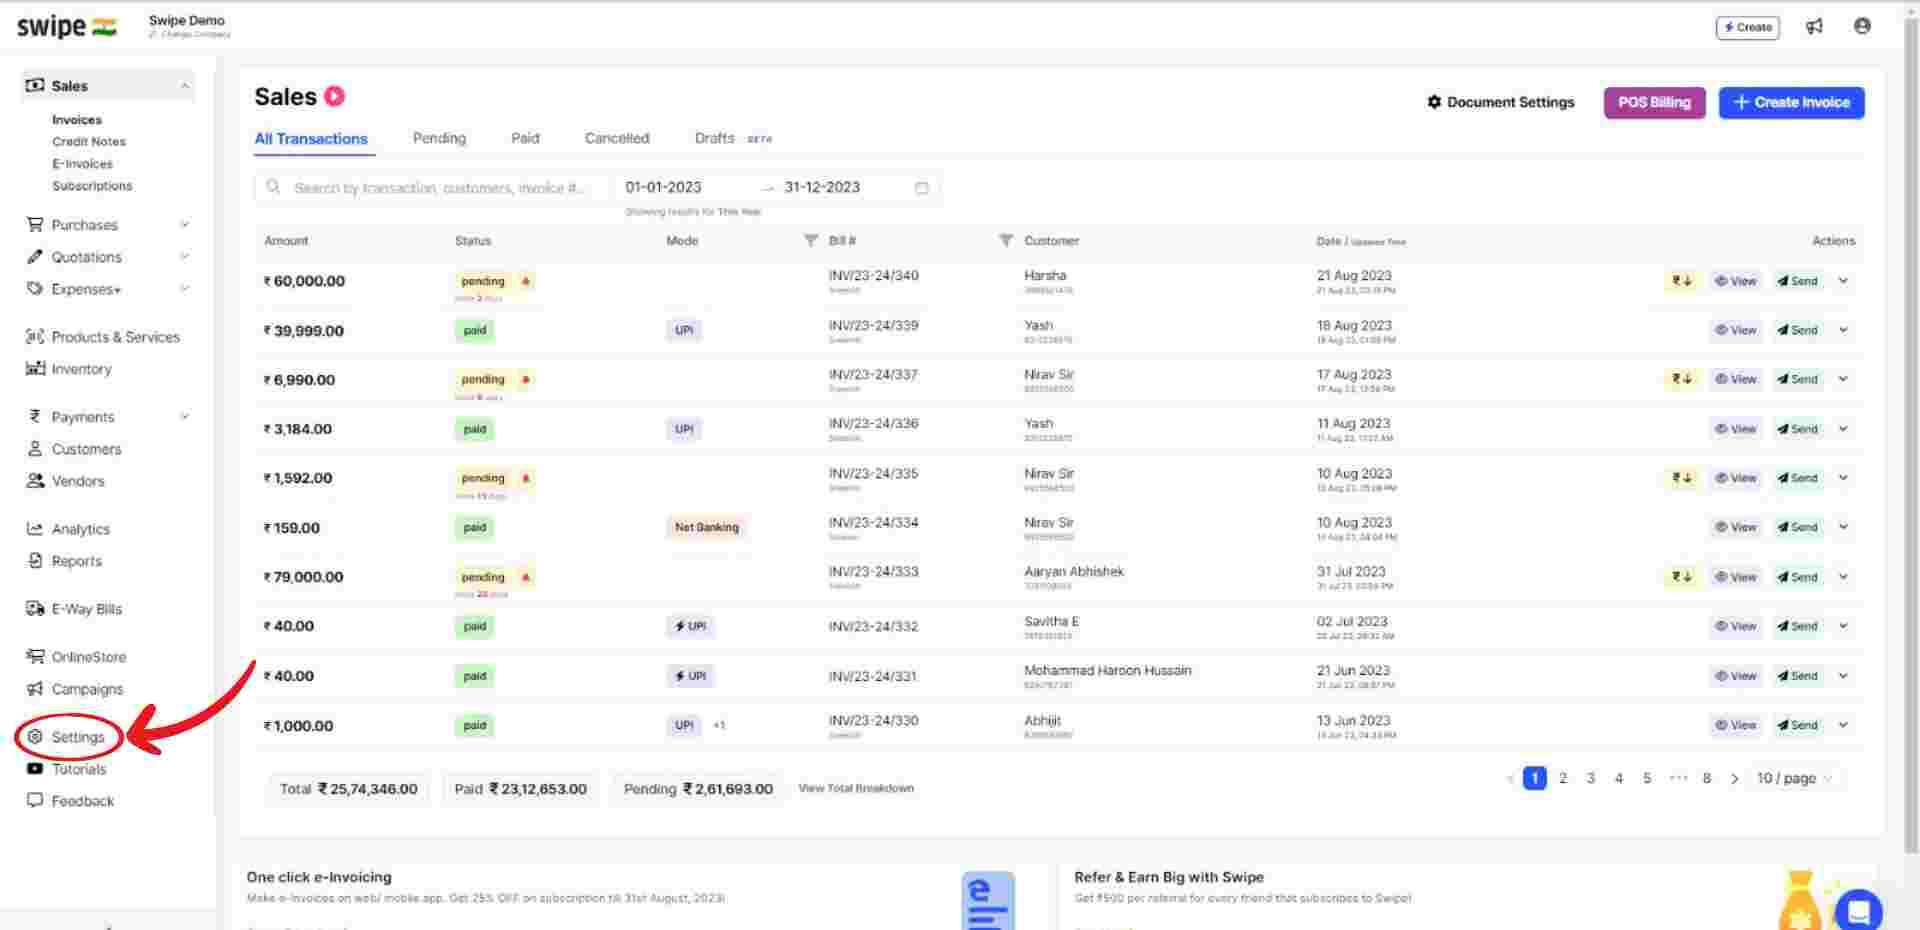
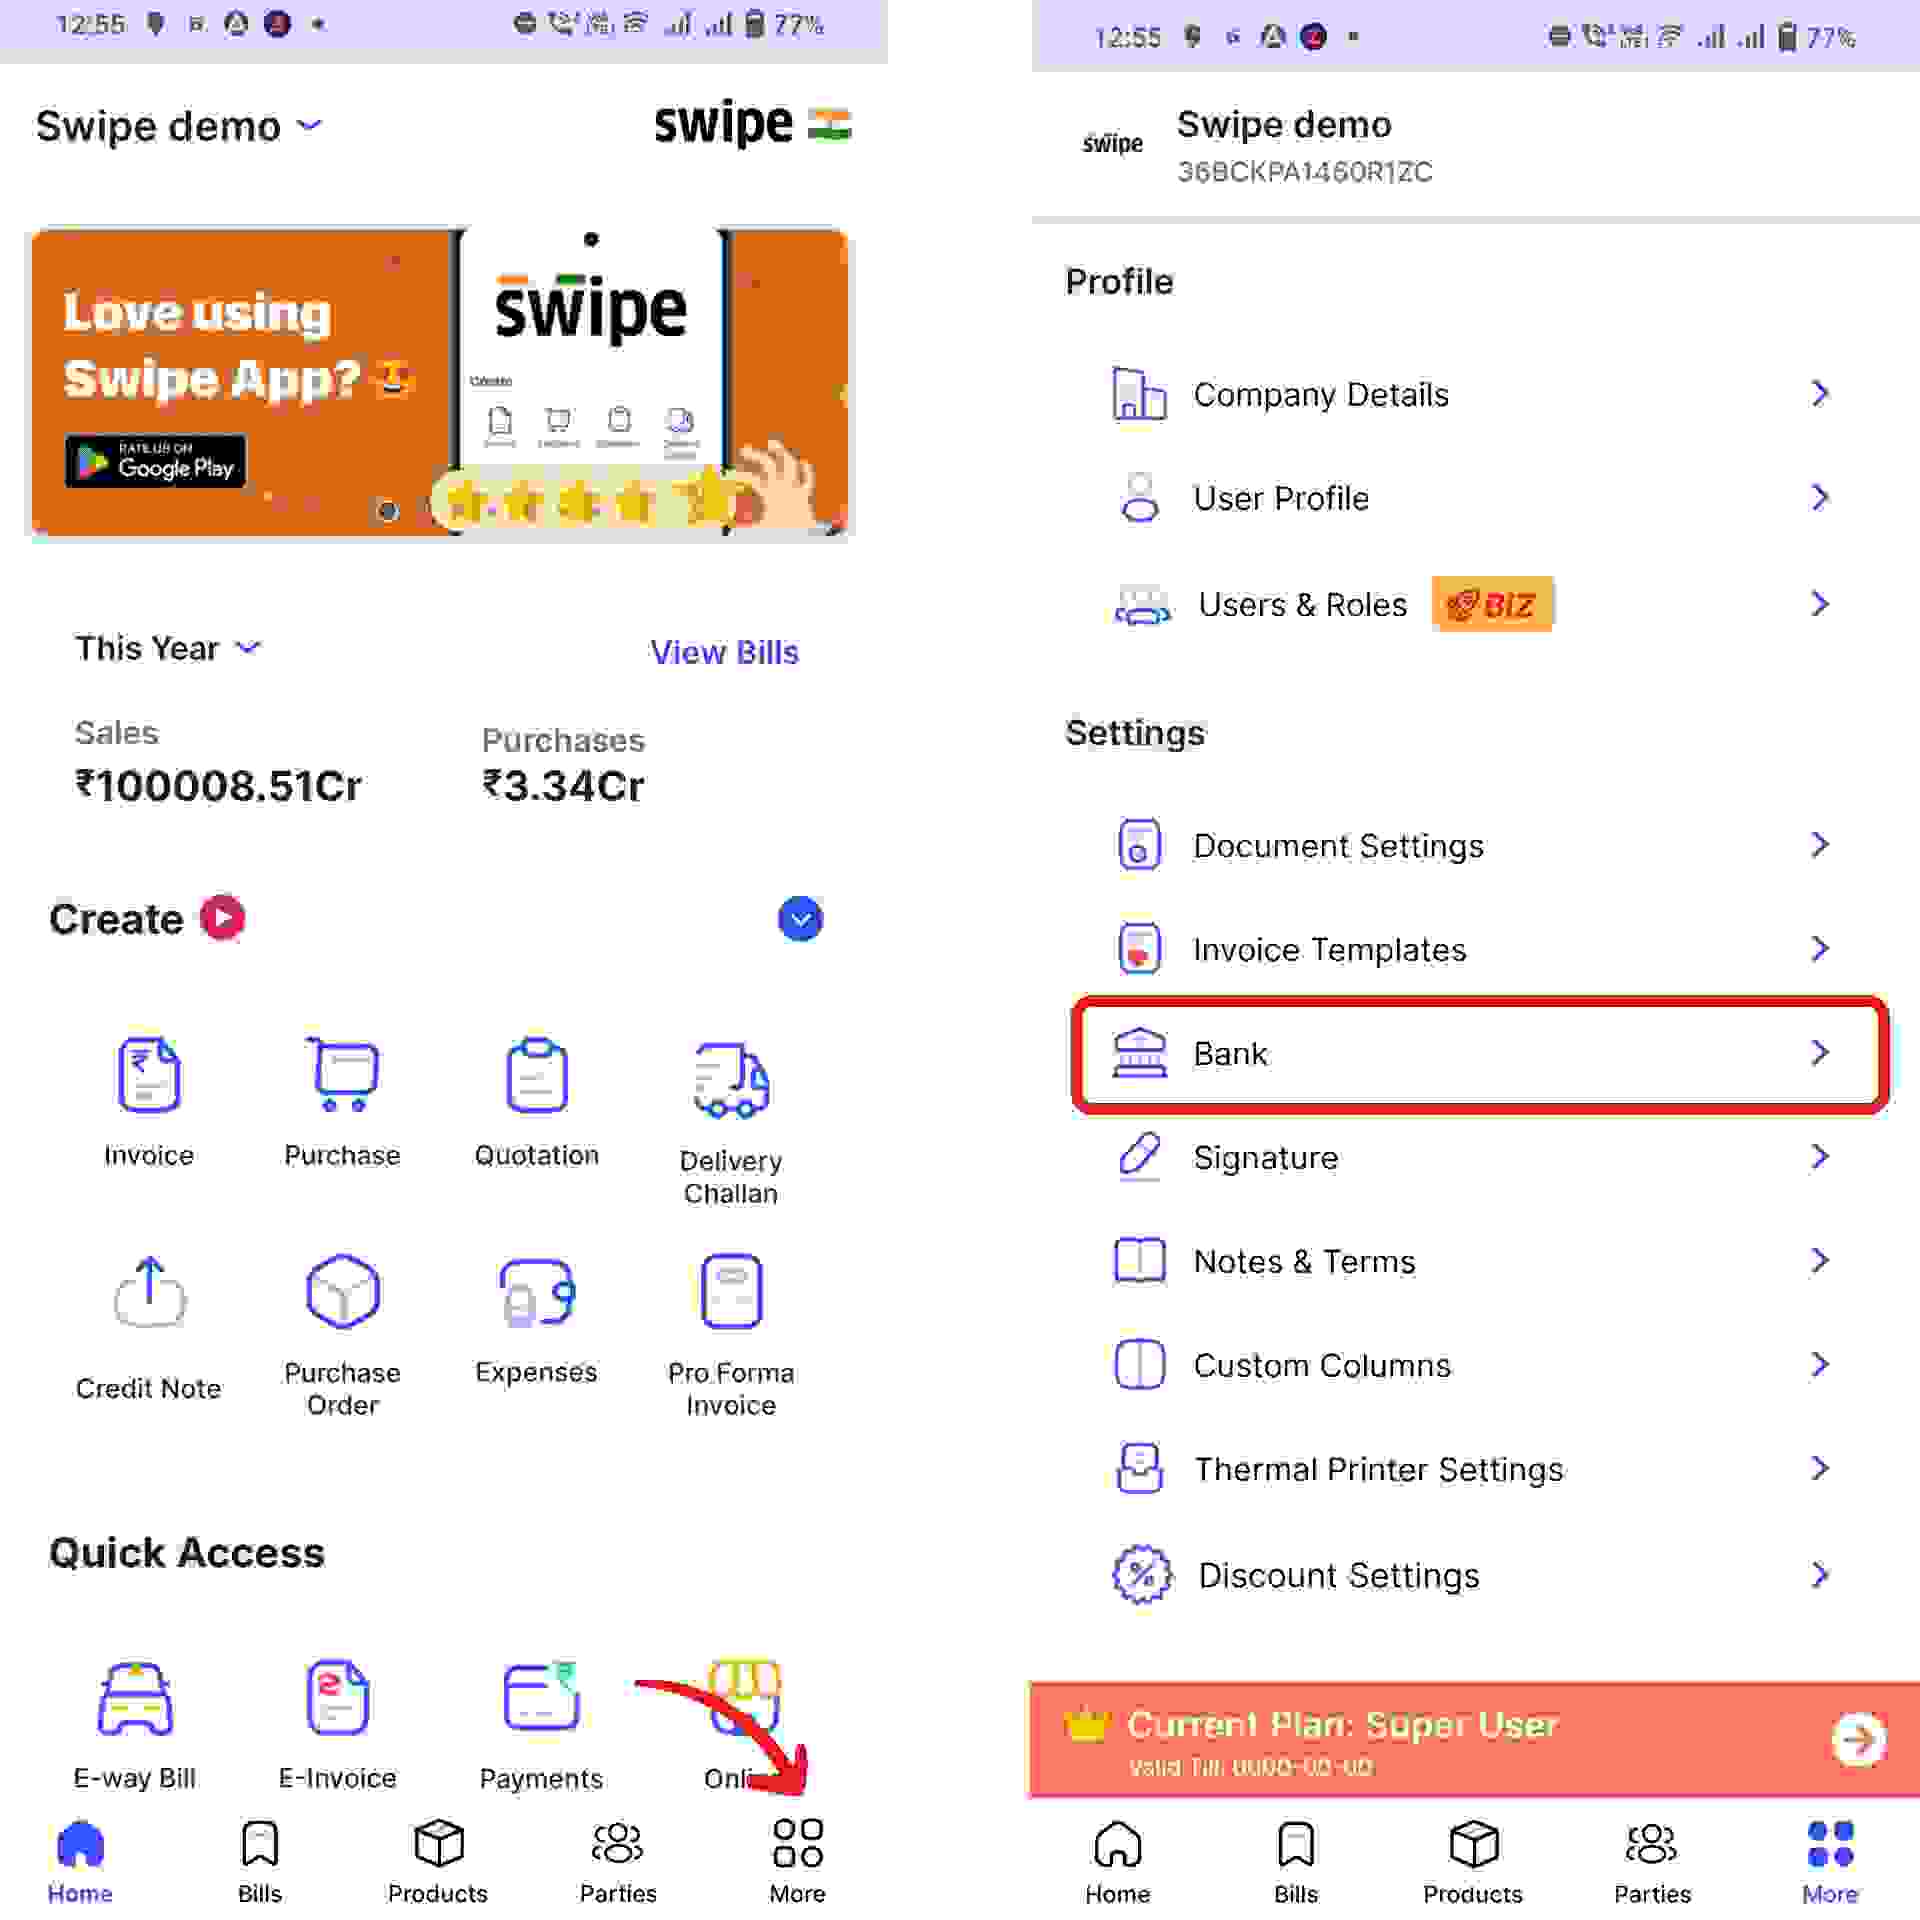
Step 1: Go to "Settings".
Click on the “Settings” icon on the left dashboard and Select the “Bank Details” option from the menu.
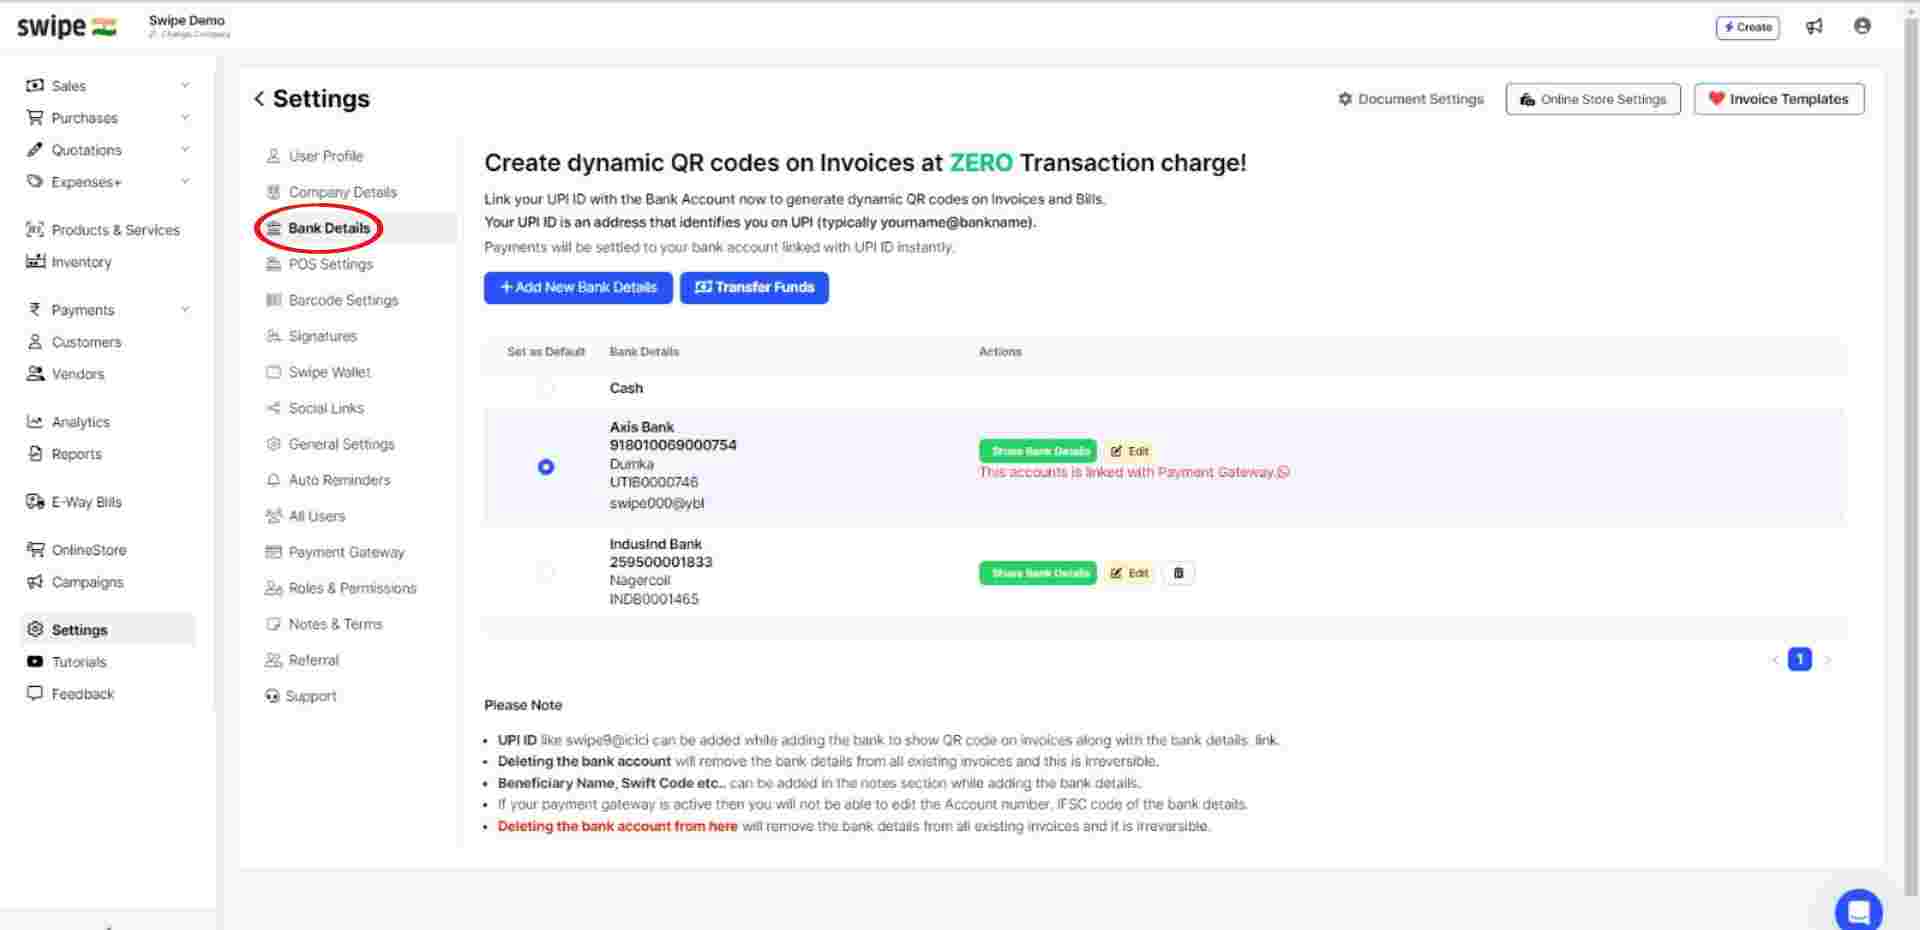
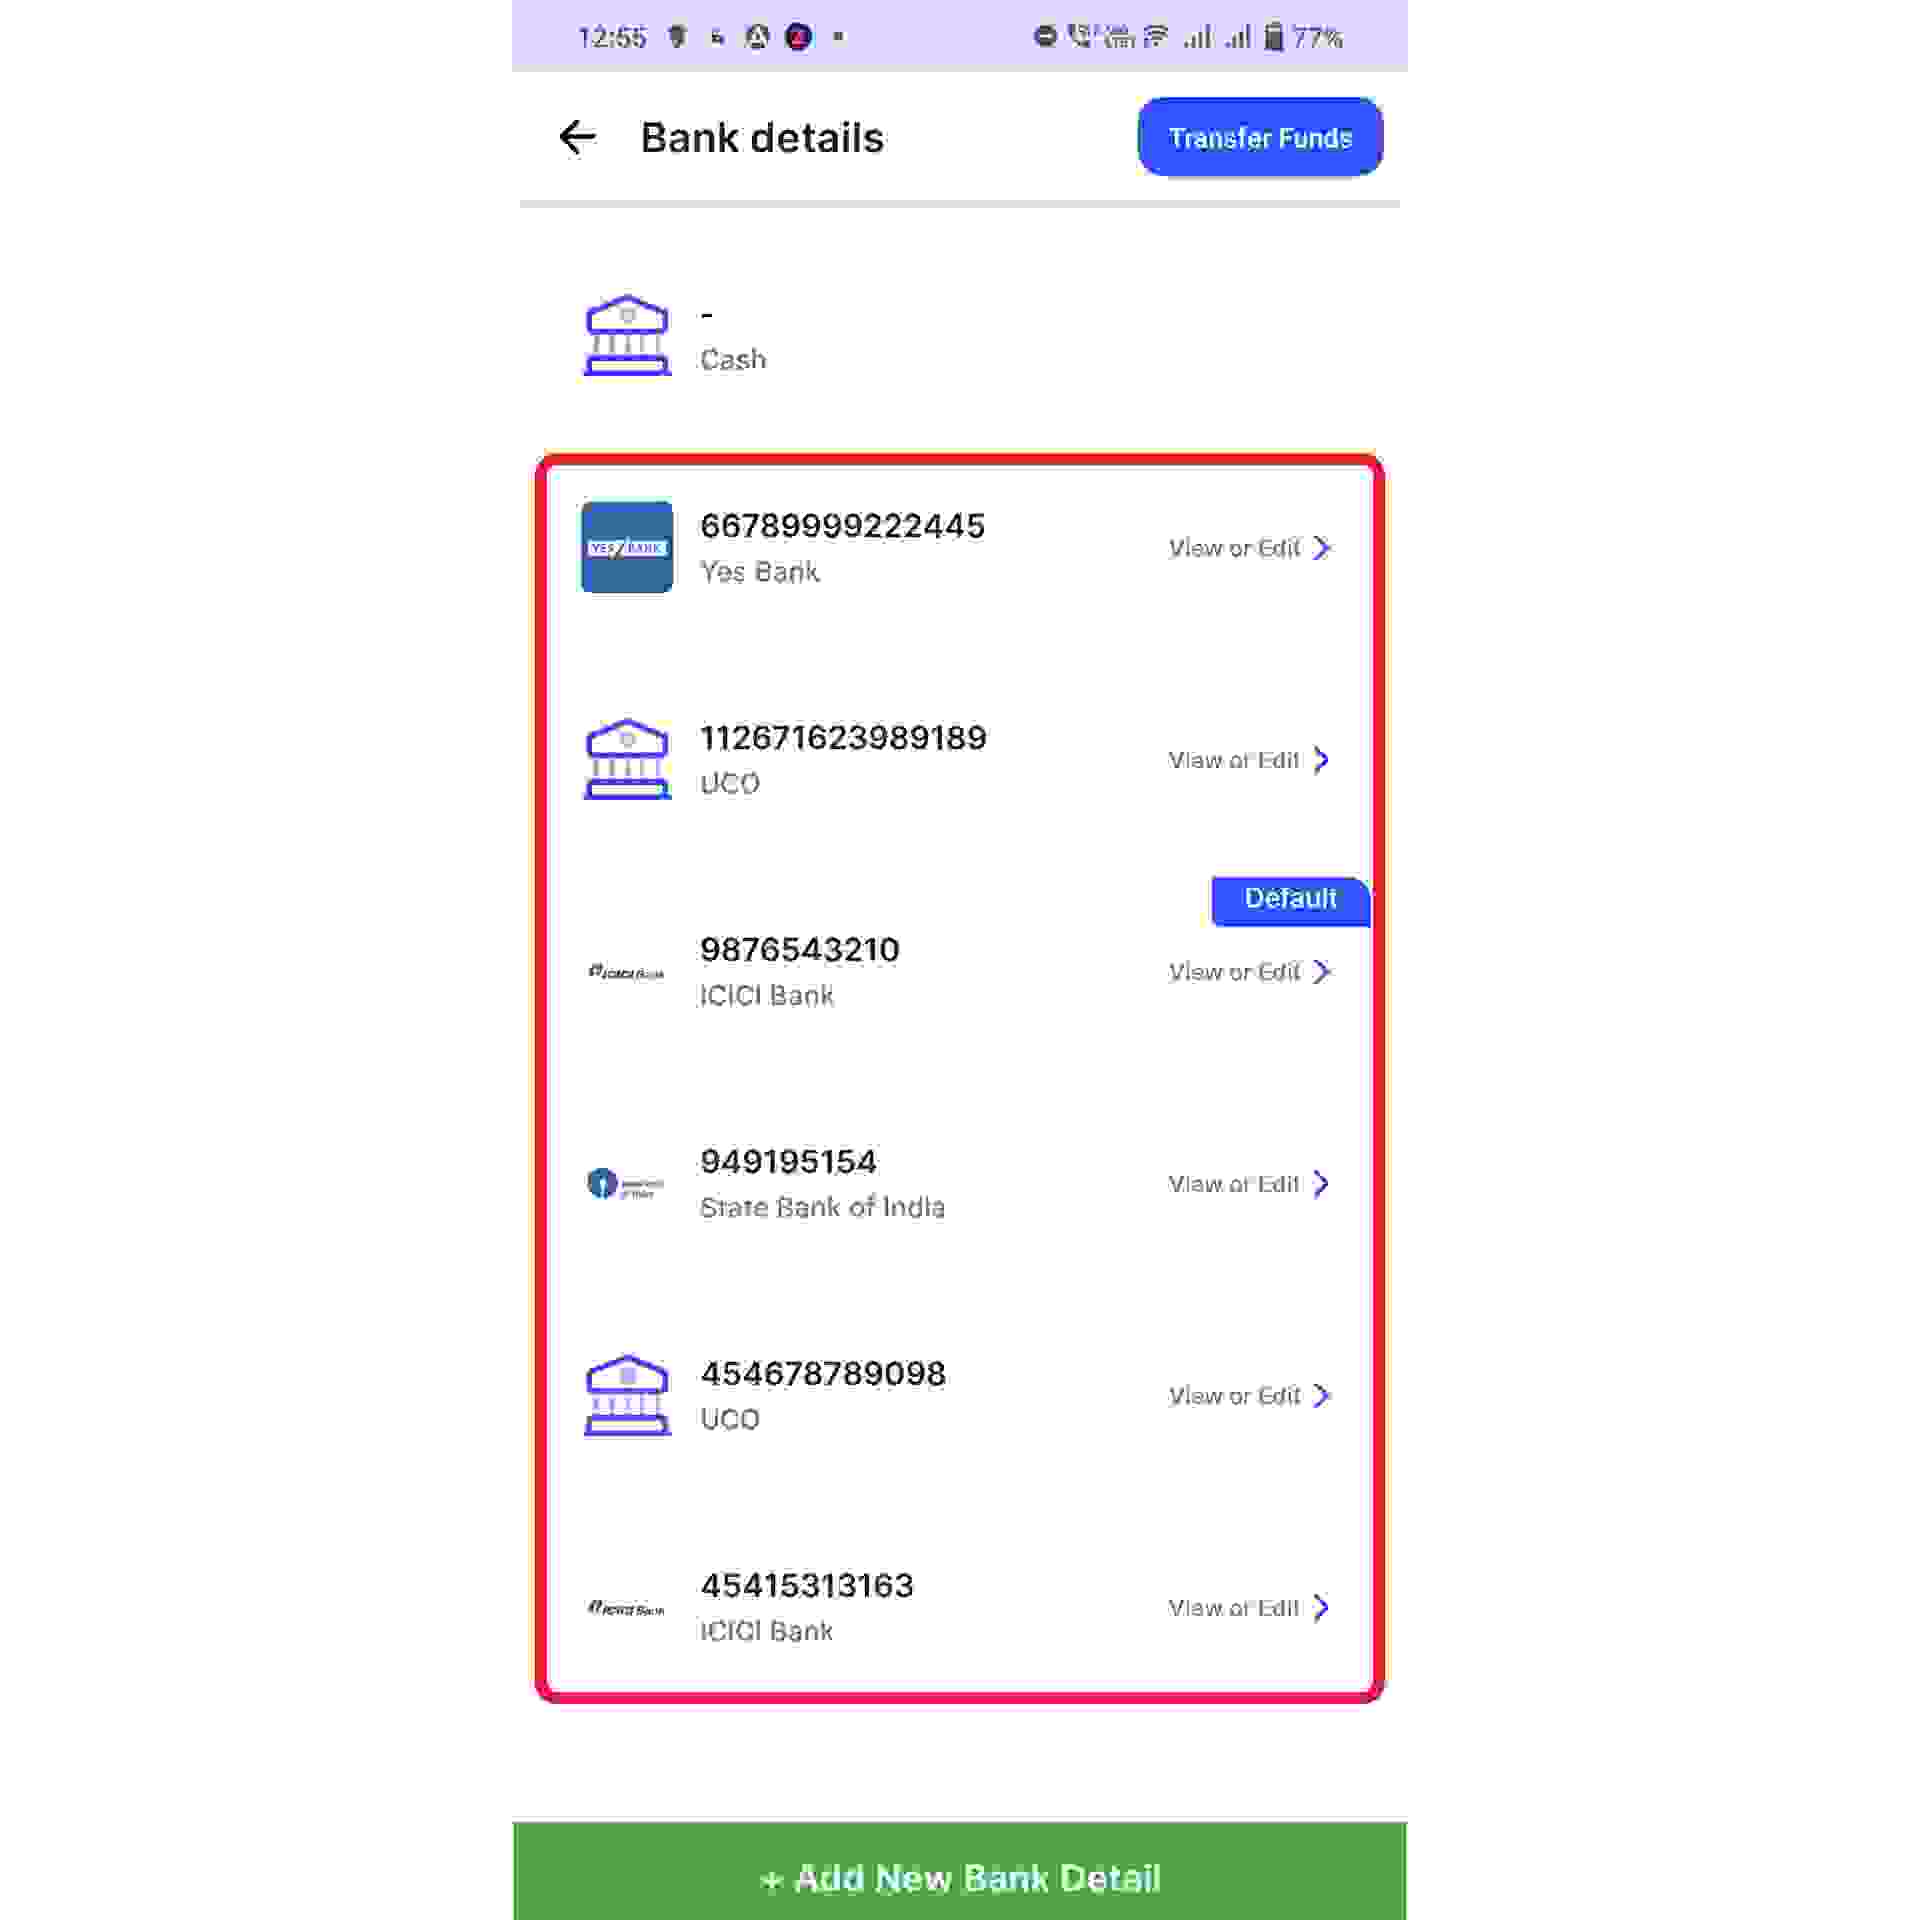
Step 2: Edit the Bank Details.
Select the Bank account to which you would like to add the UPI ID and click on the "edit” Icon under the “Actions” column.
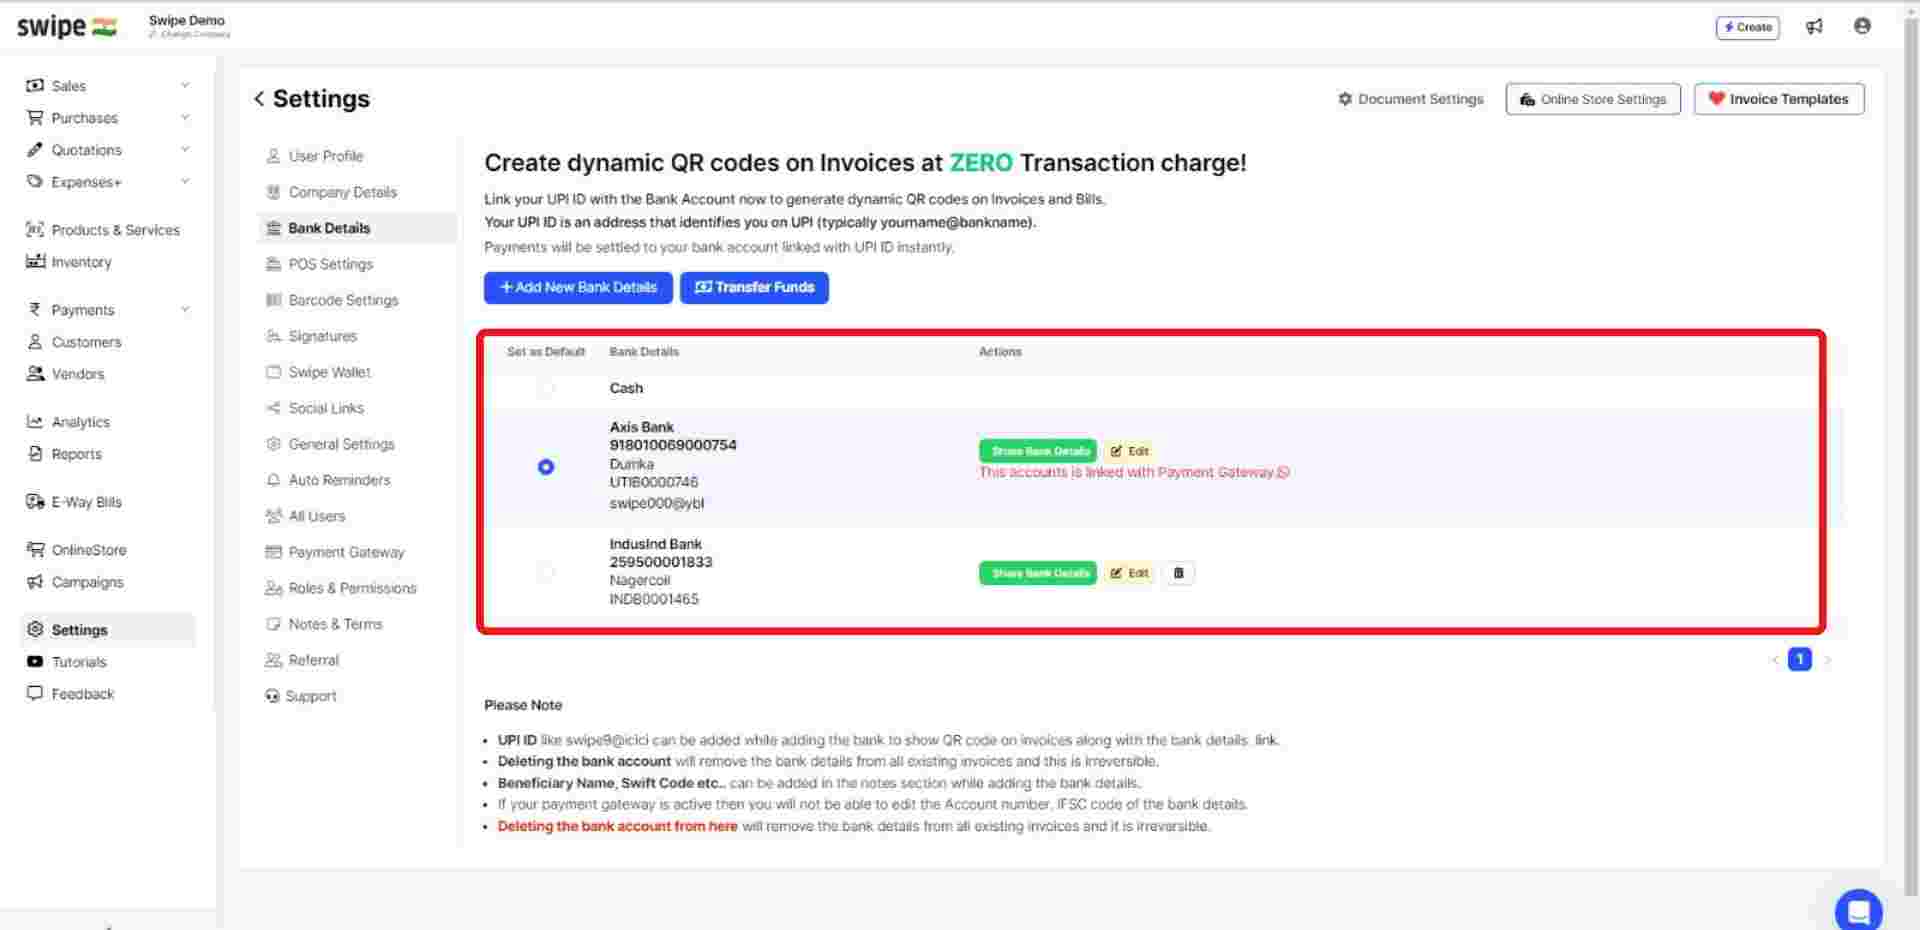
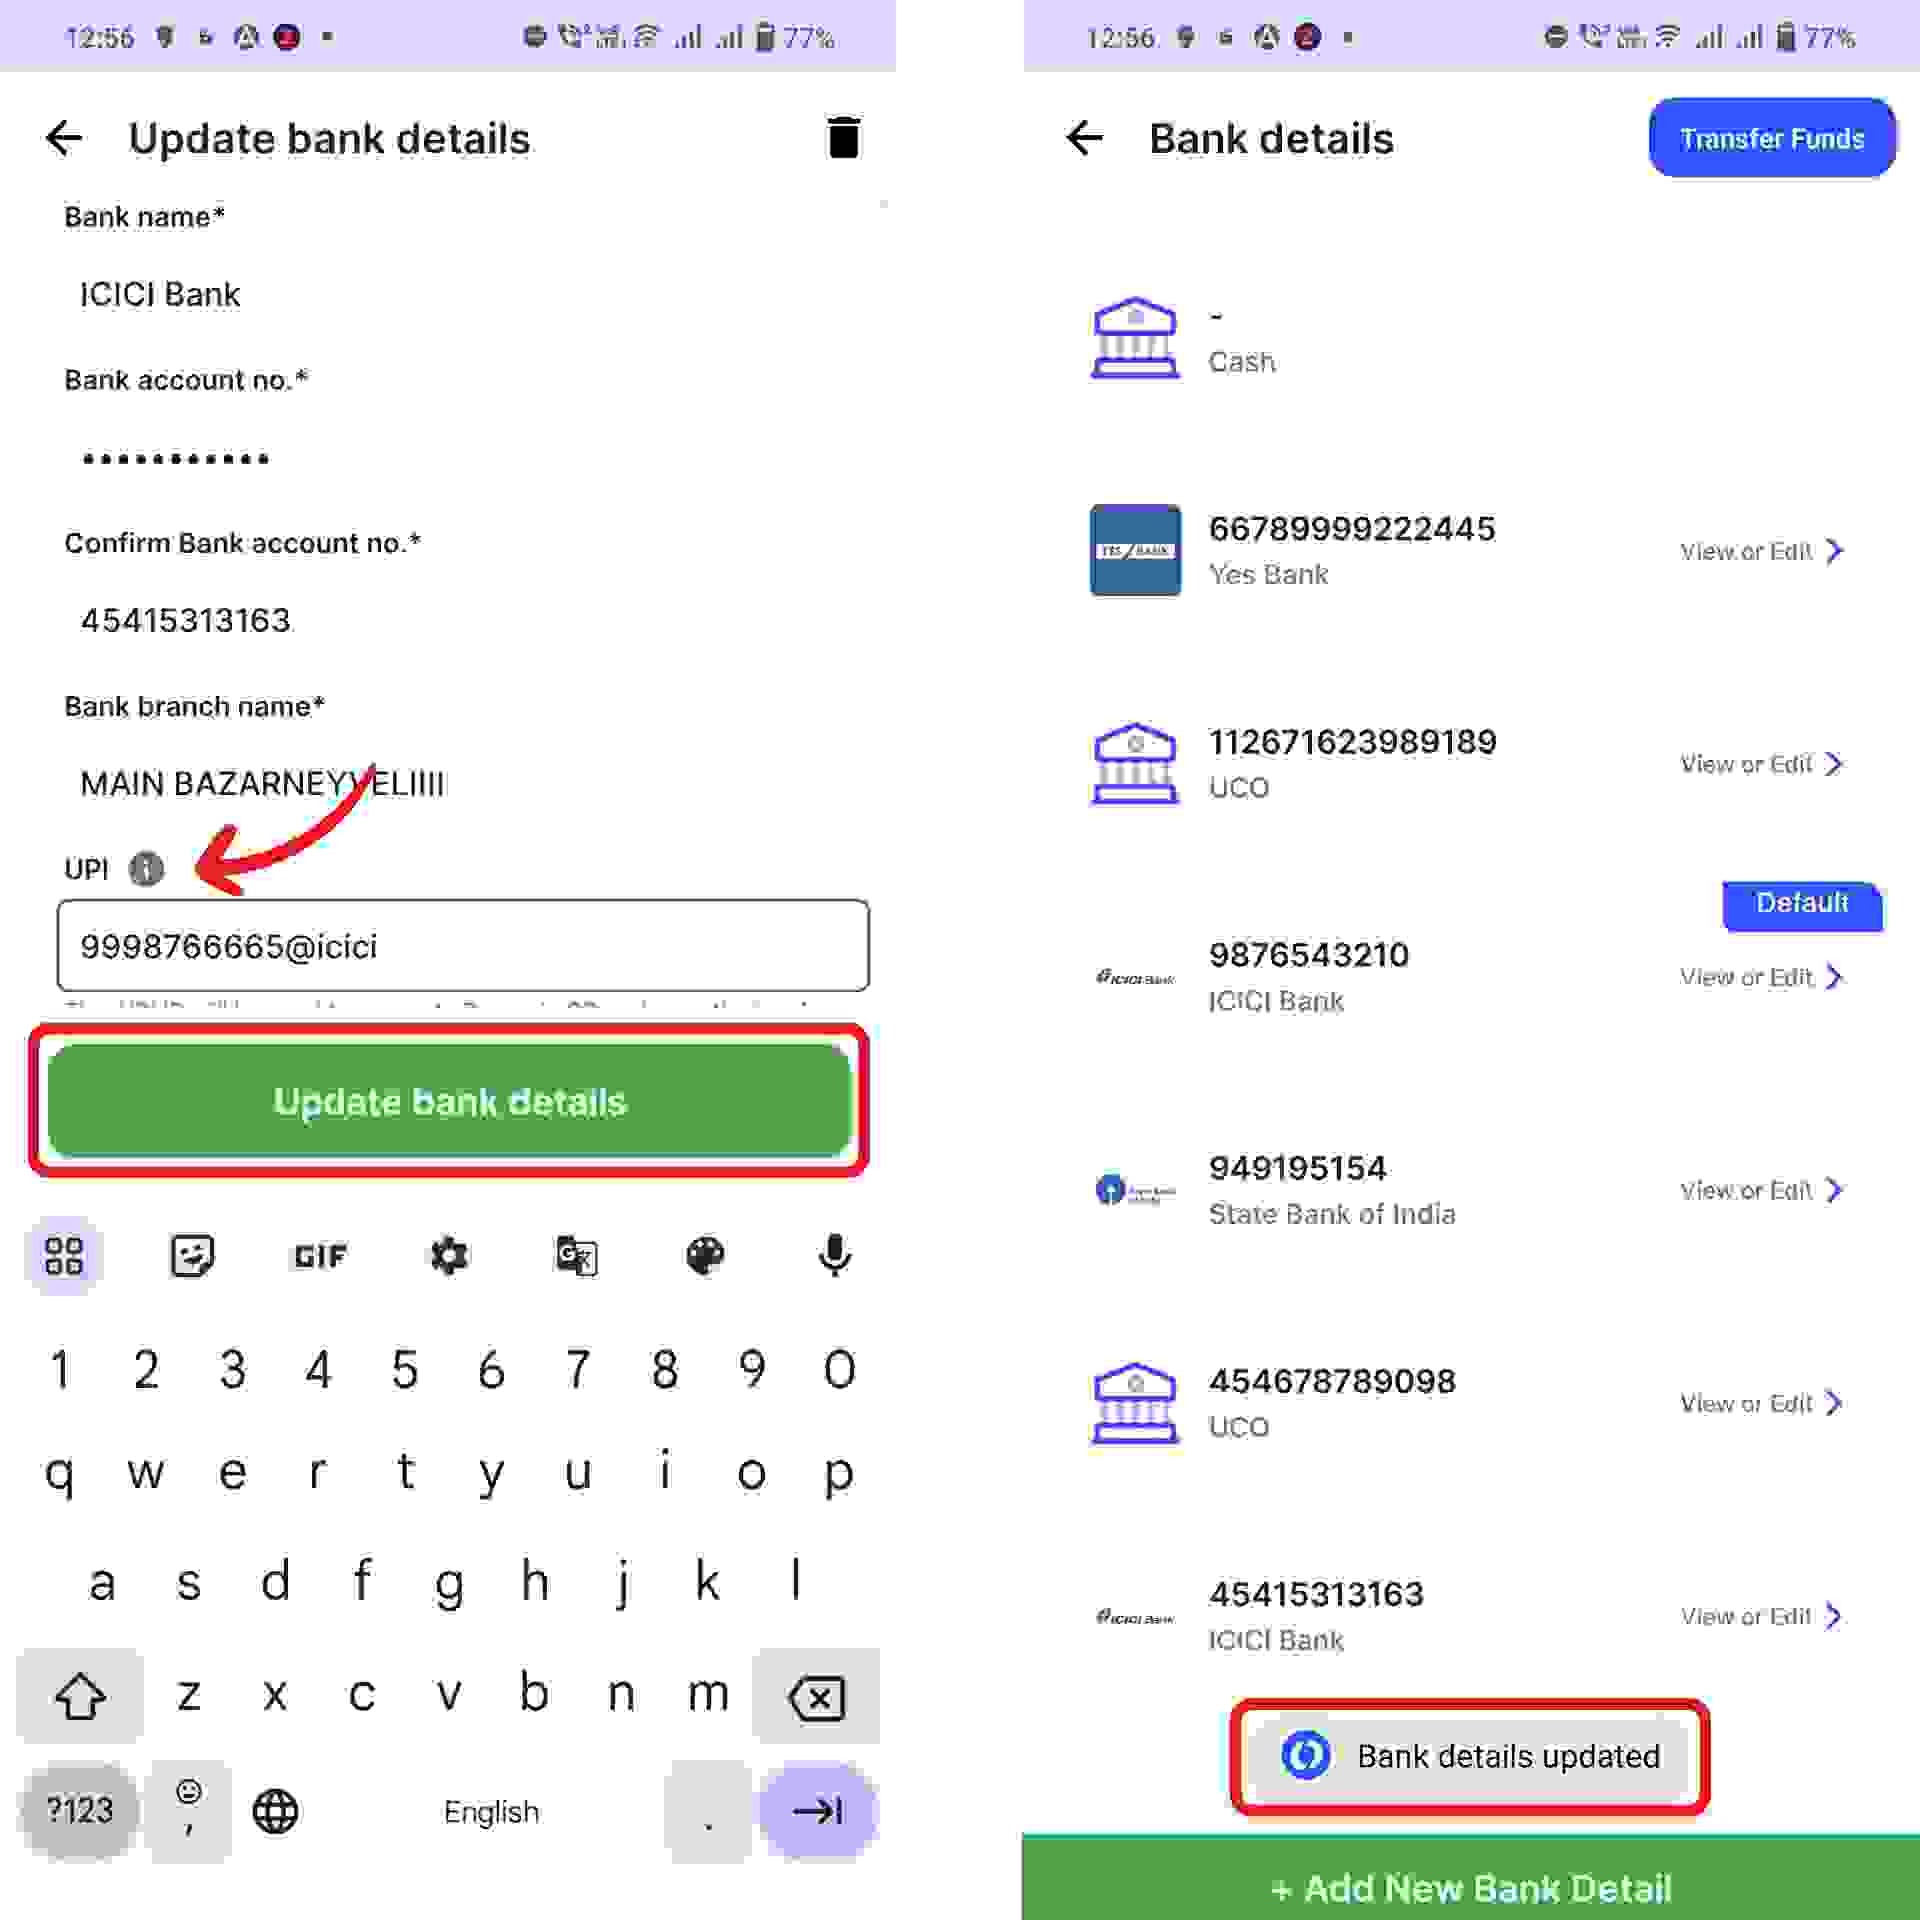
Step 3: Enter the UPI ID.
A new form appears. Here, enter the UPI ID and click on “Save and Update.” present at the top right corner of the screen.
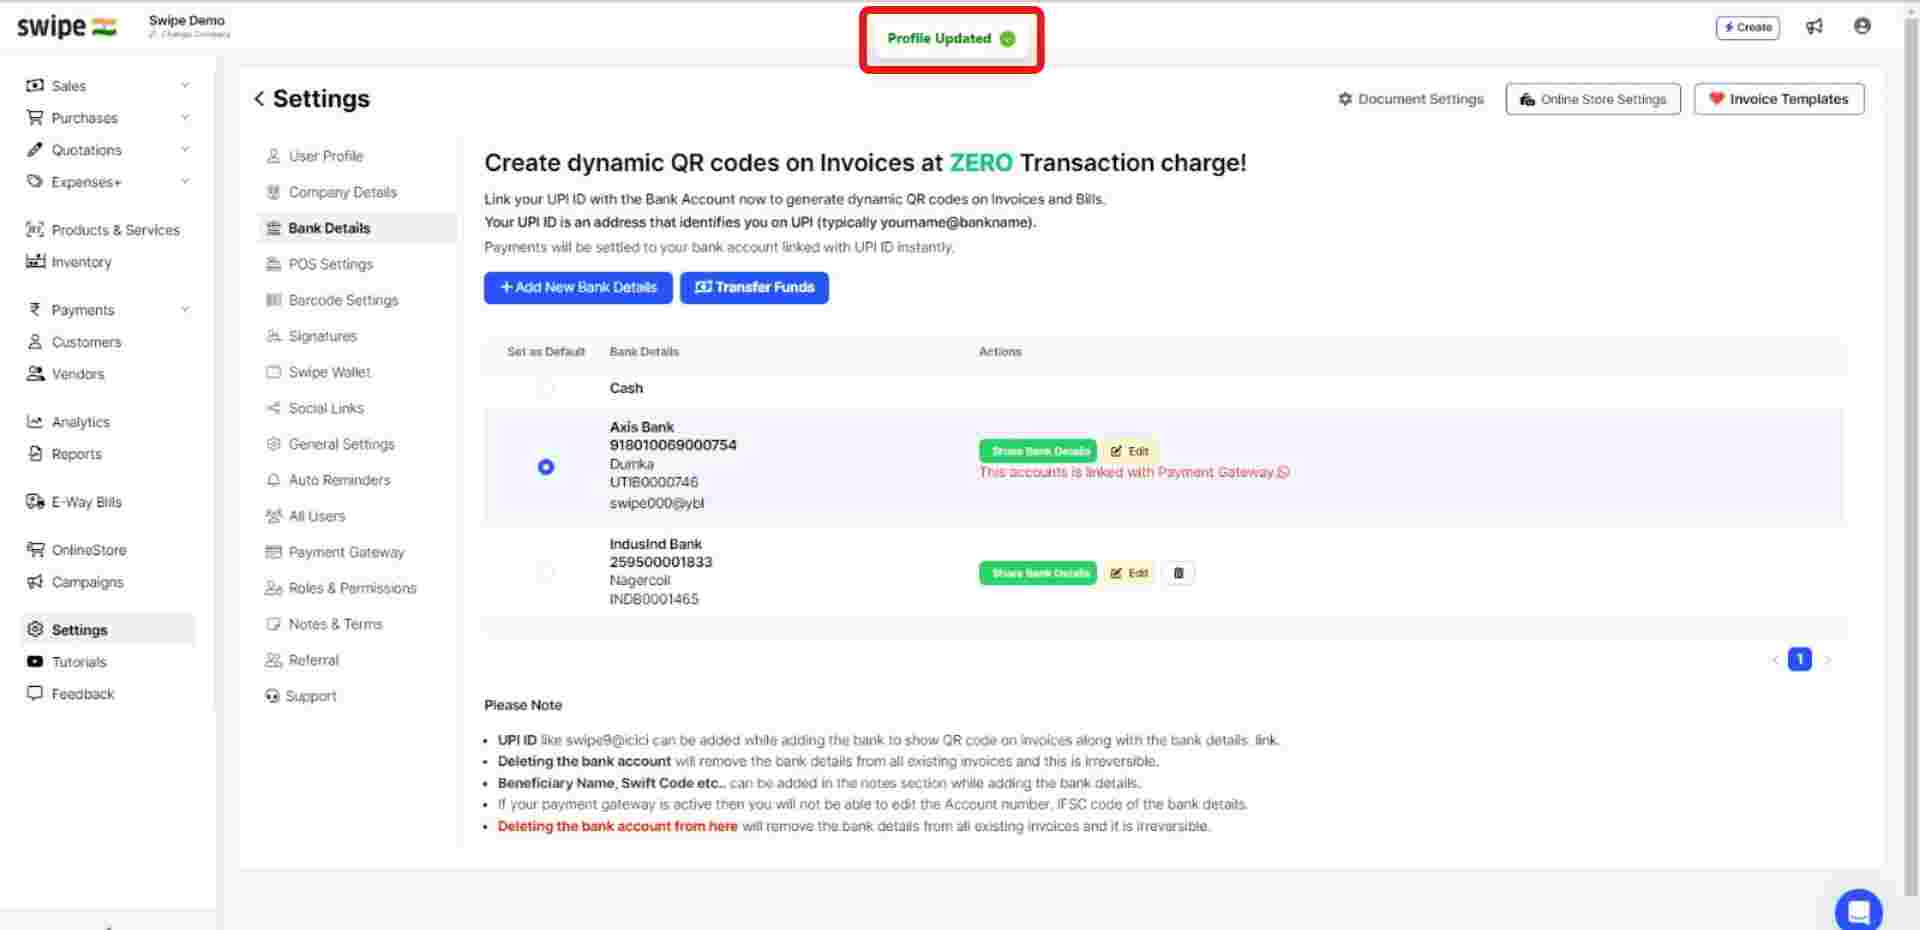
Congratulations! You have successfully added your UPI ID to the Bank account. A pop up will appear on top of the screen informing the same.
From now on, you can use this Bank account and UPI ID whenever you create a new transaction.


%20(1).png)
%20(1).png)