How to create an expense with GST on Android
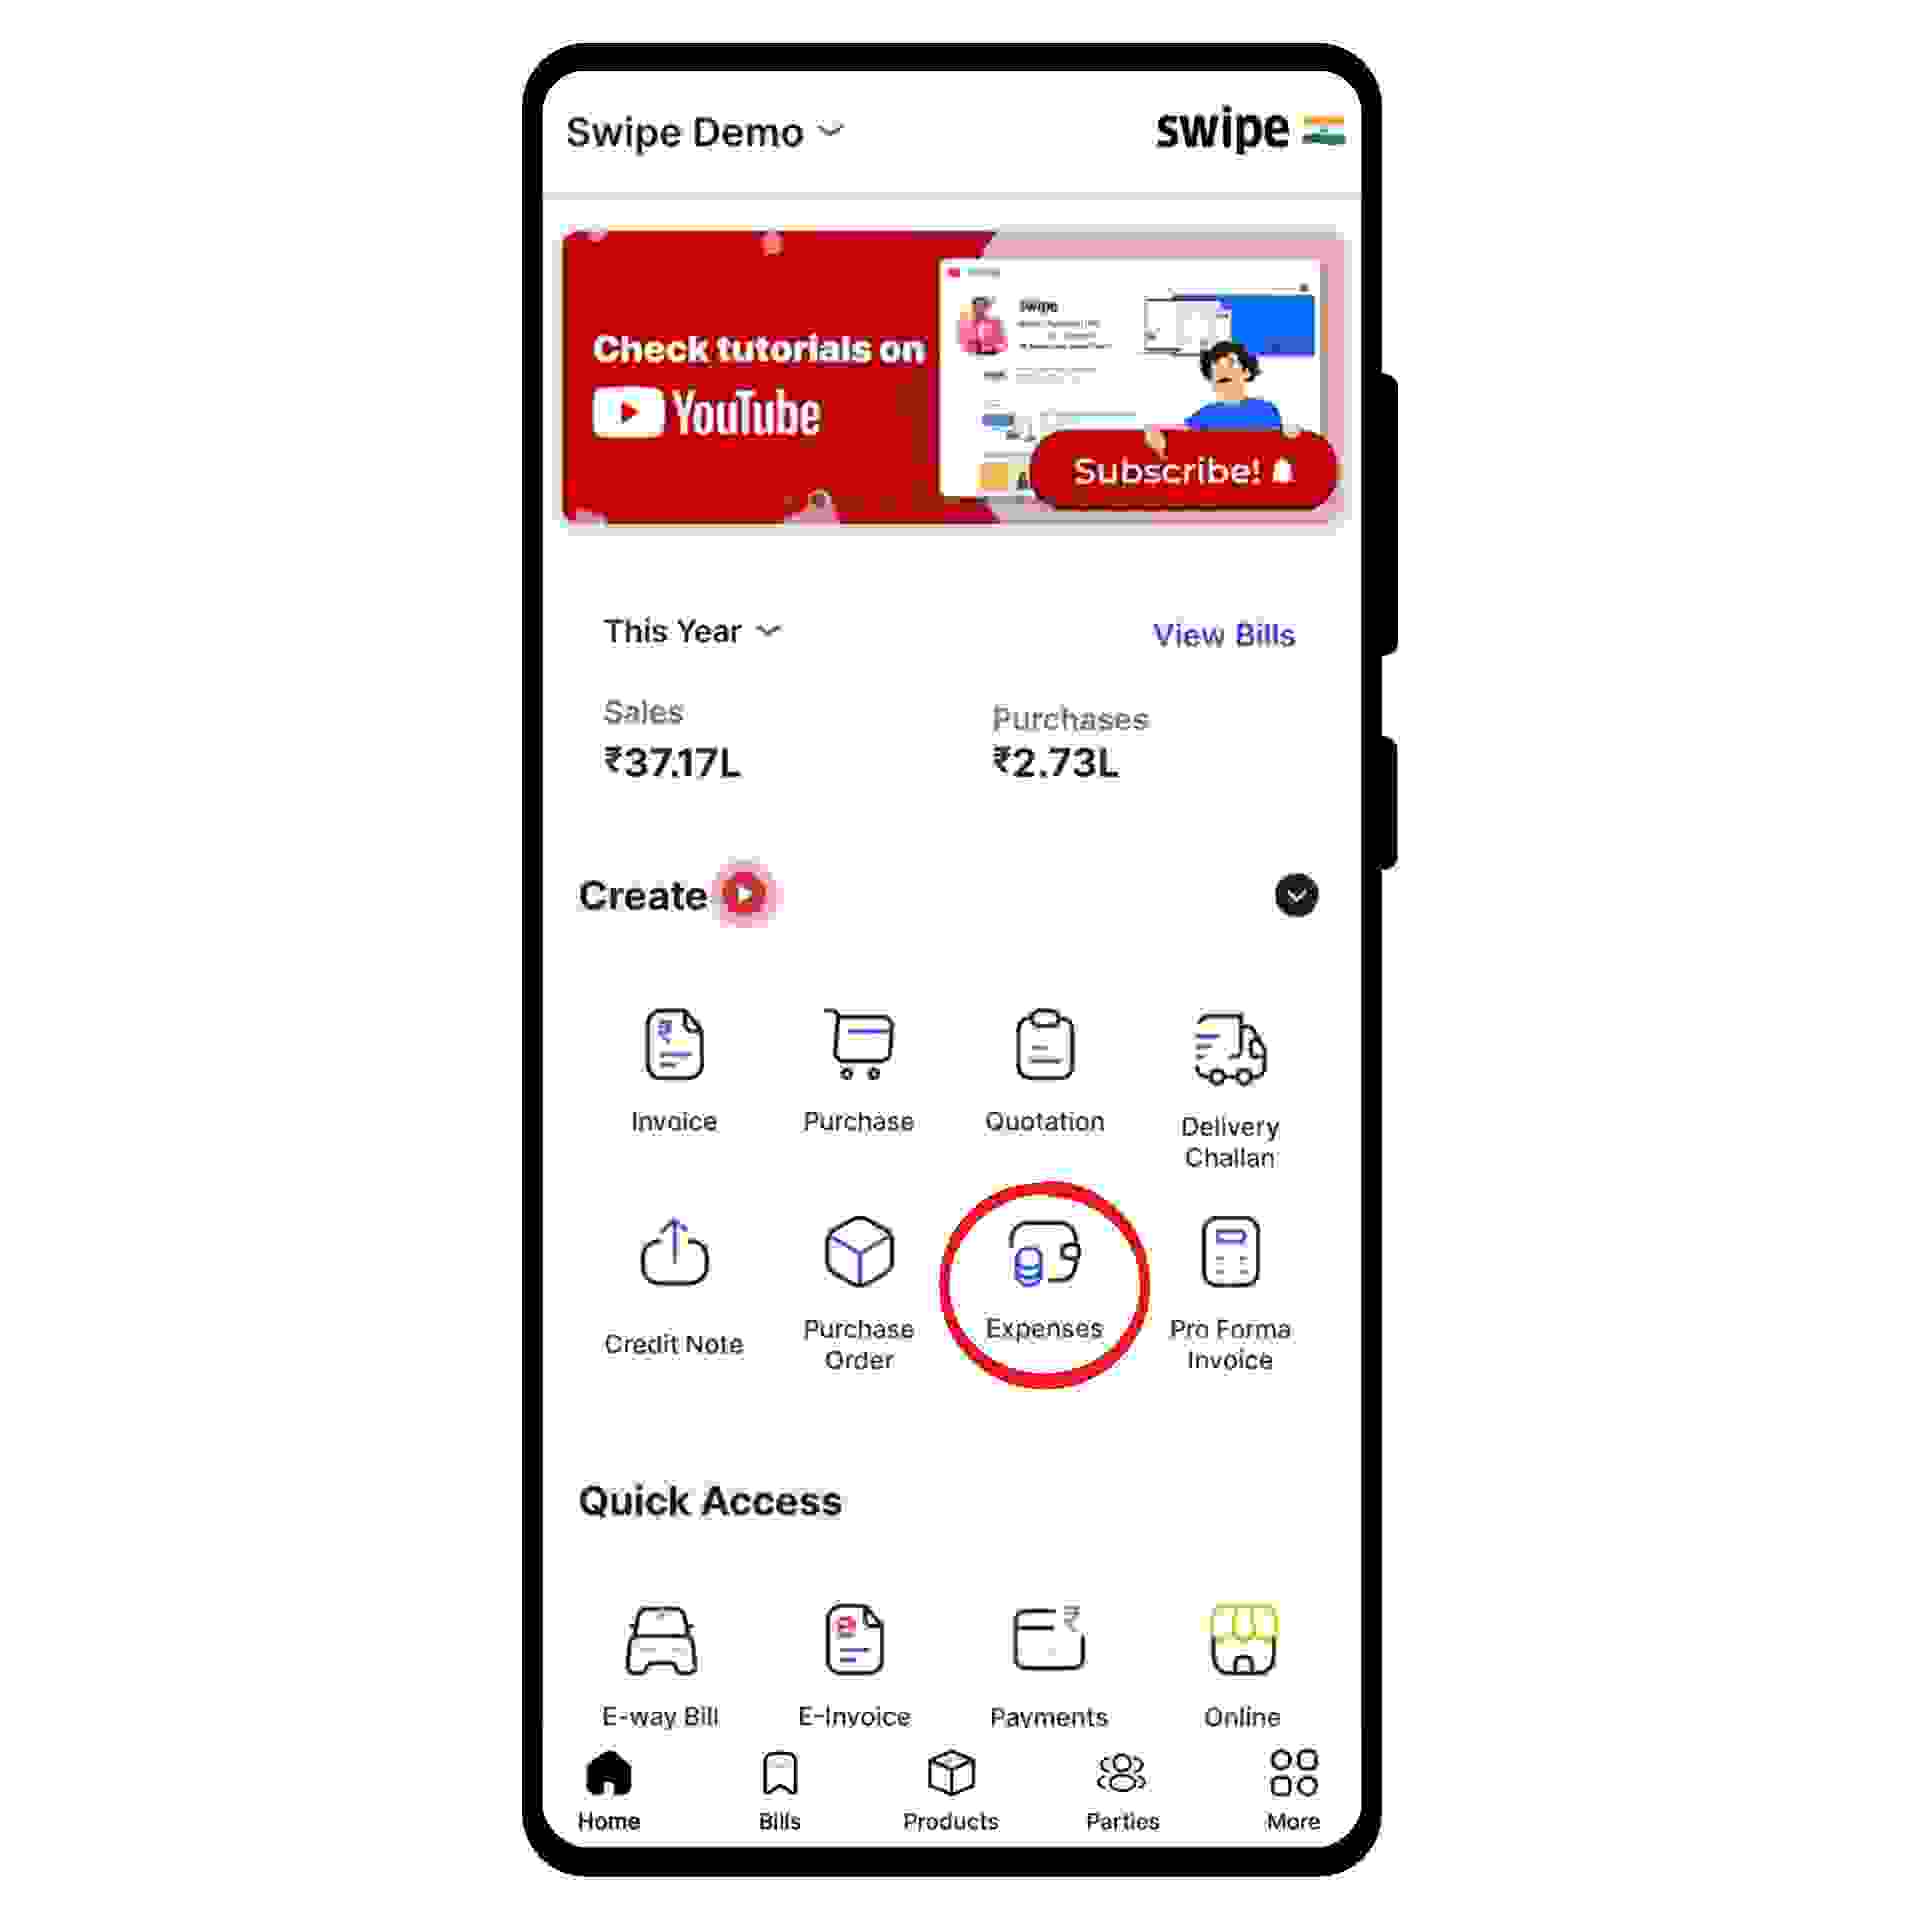
Step 1: Go to the “Create” section.
Click on “Expenses” under the Create section.
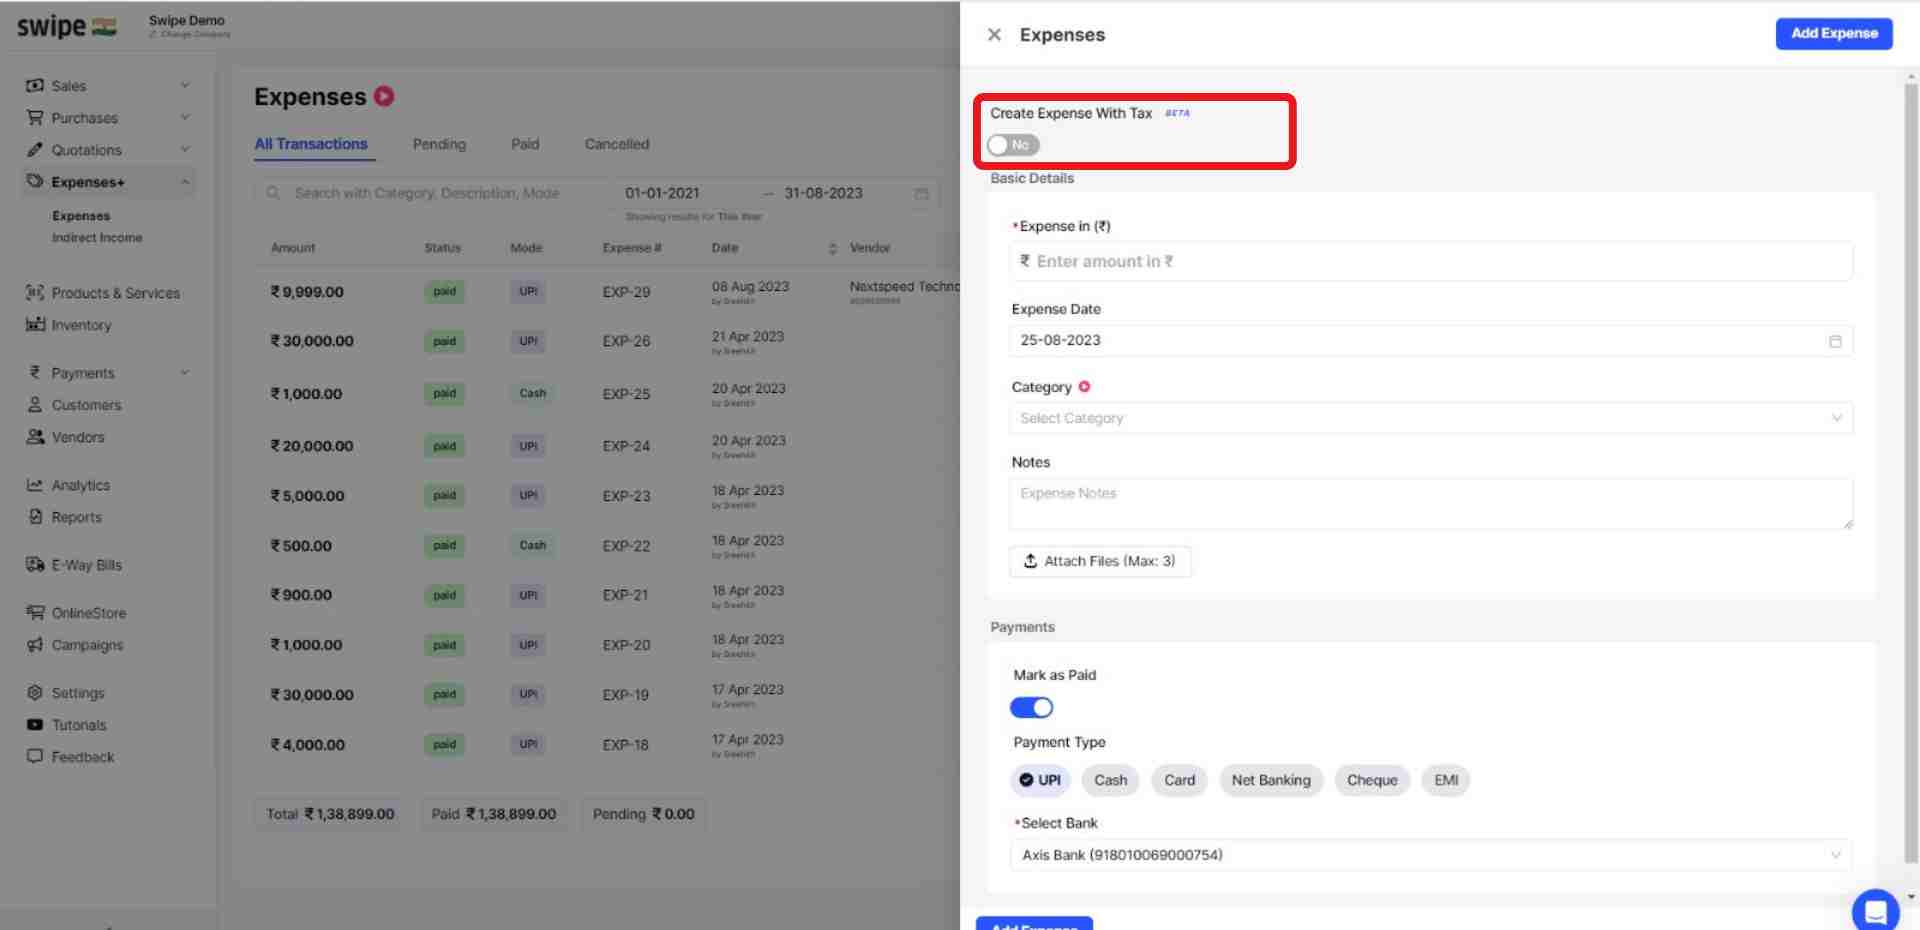
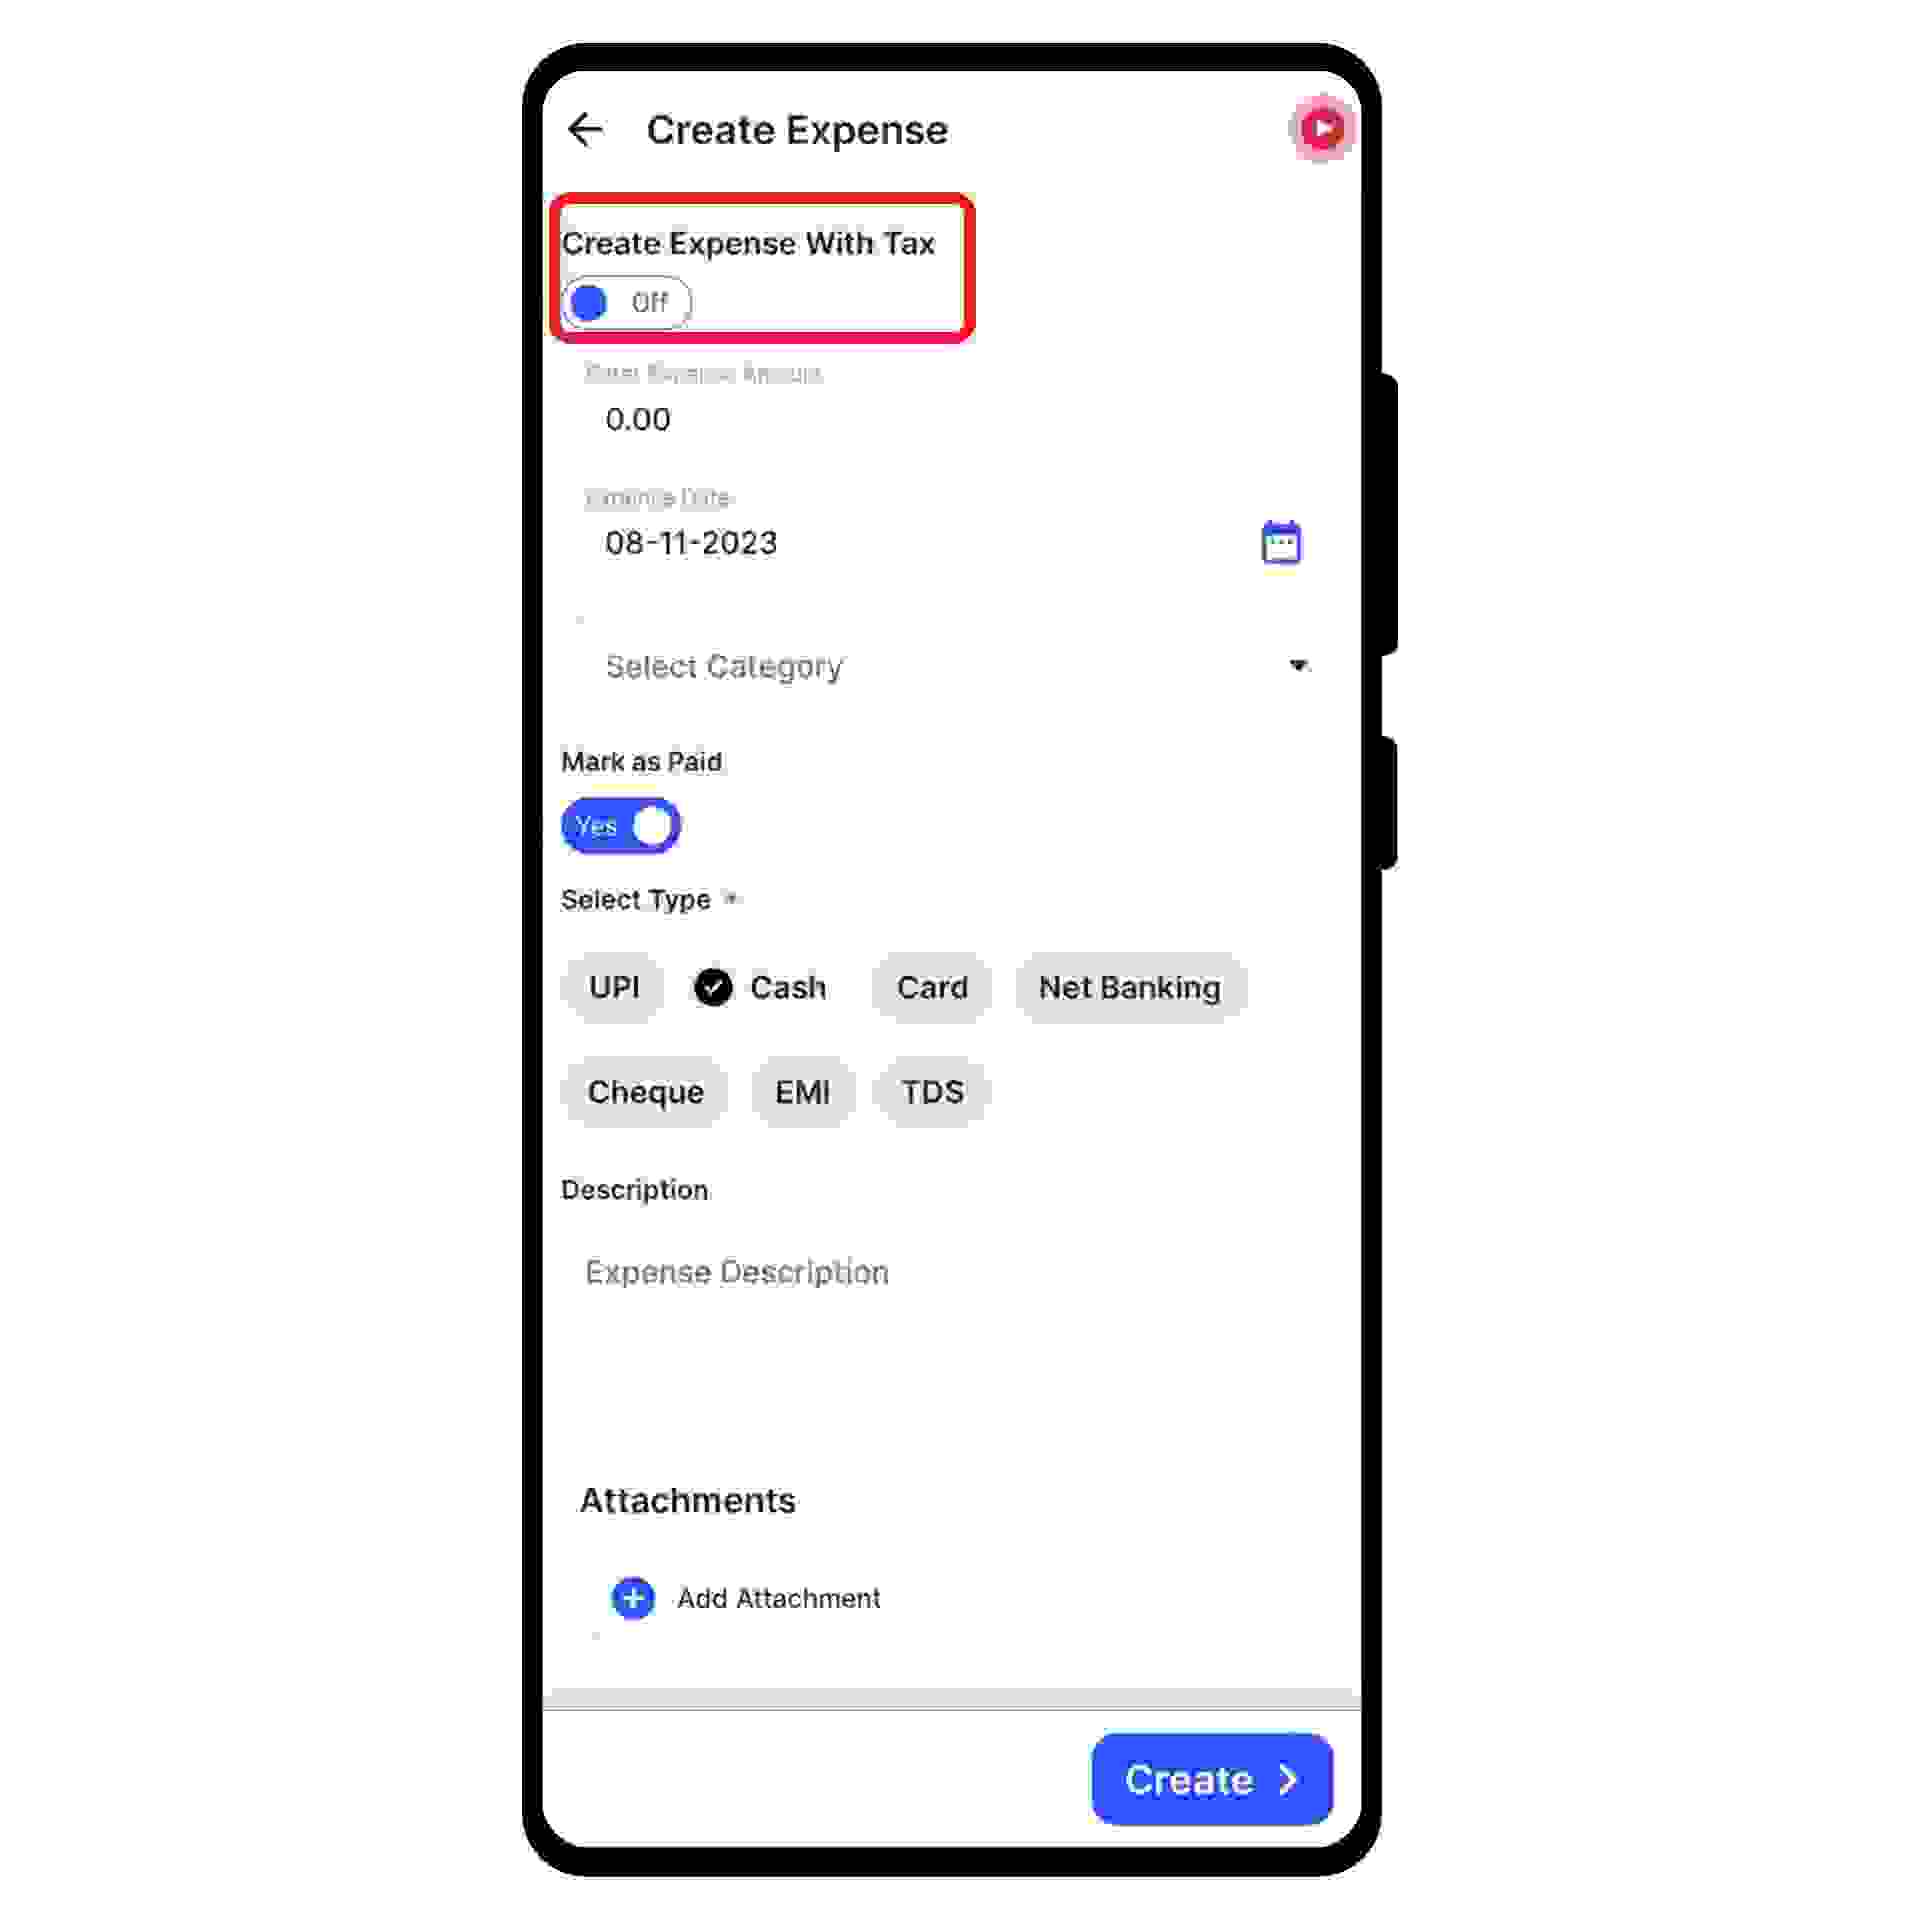
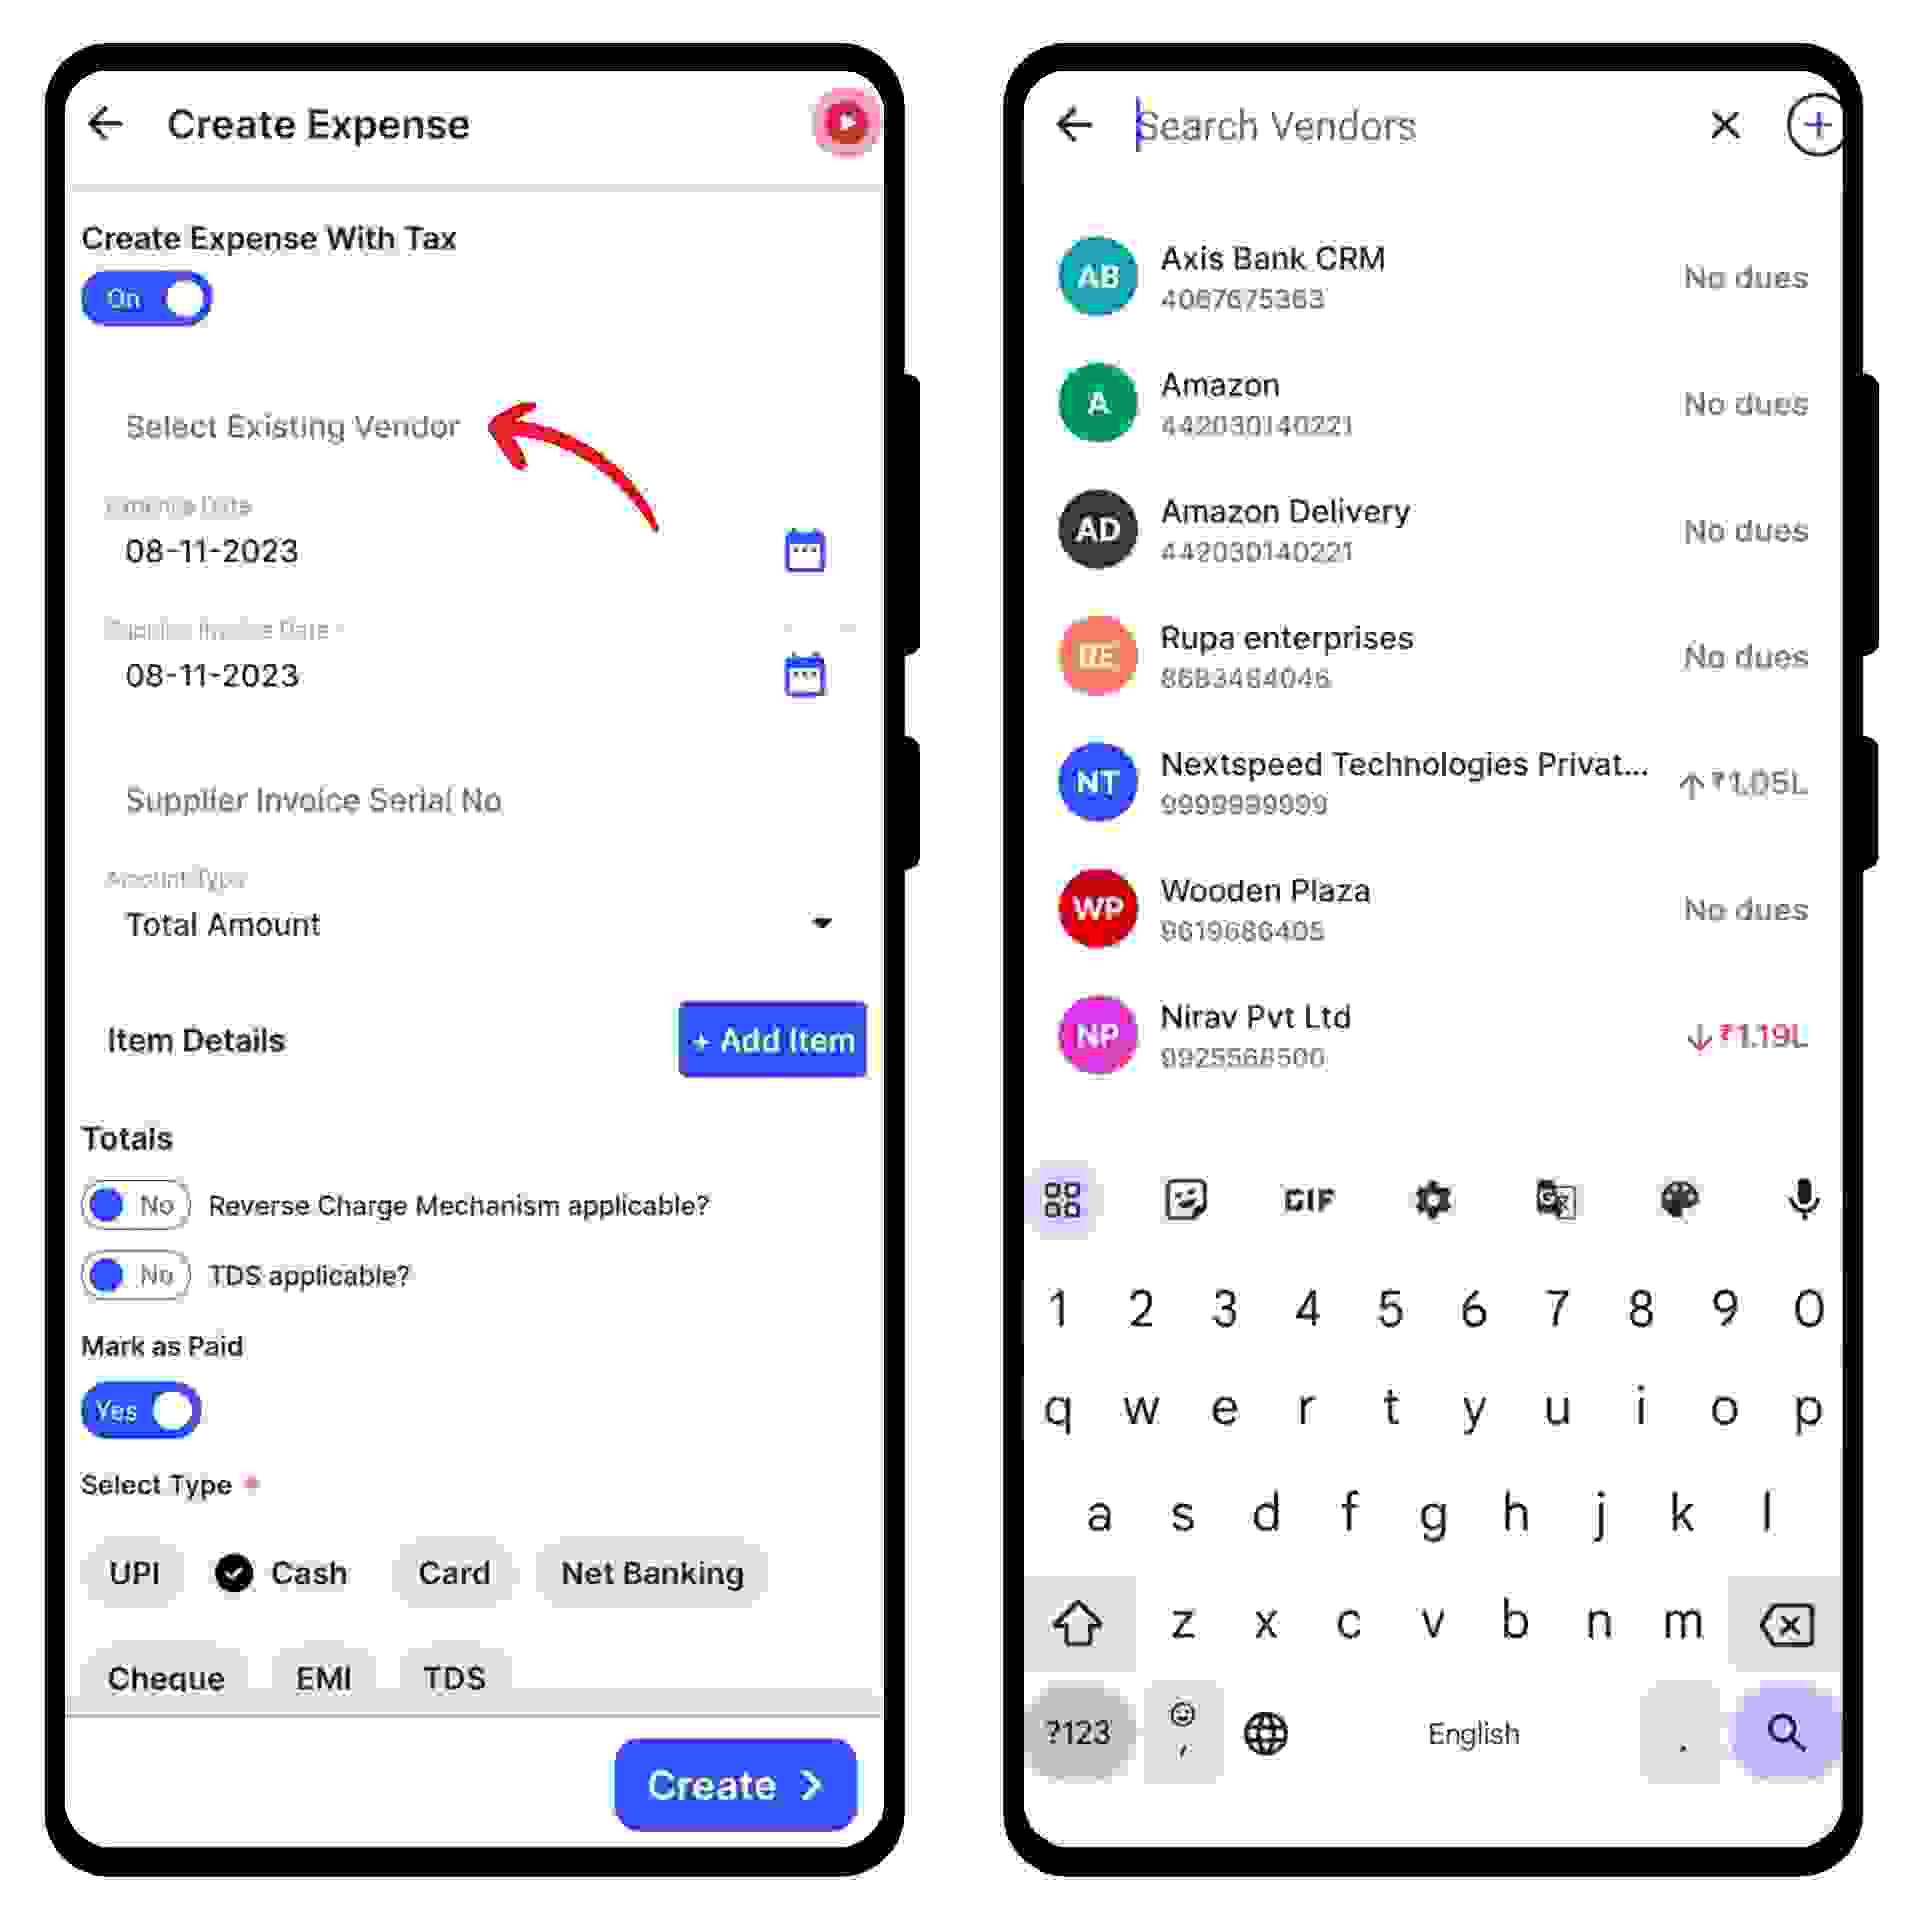
Step 2: Create an expense with tax.
Switch on the toggle bar below “Create Expense With Tax”.
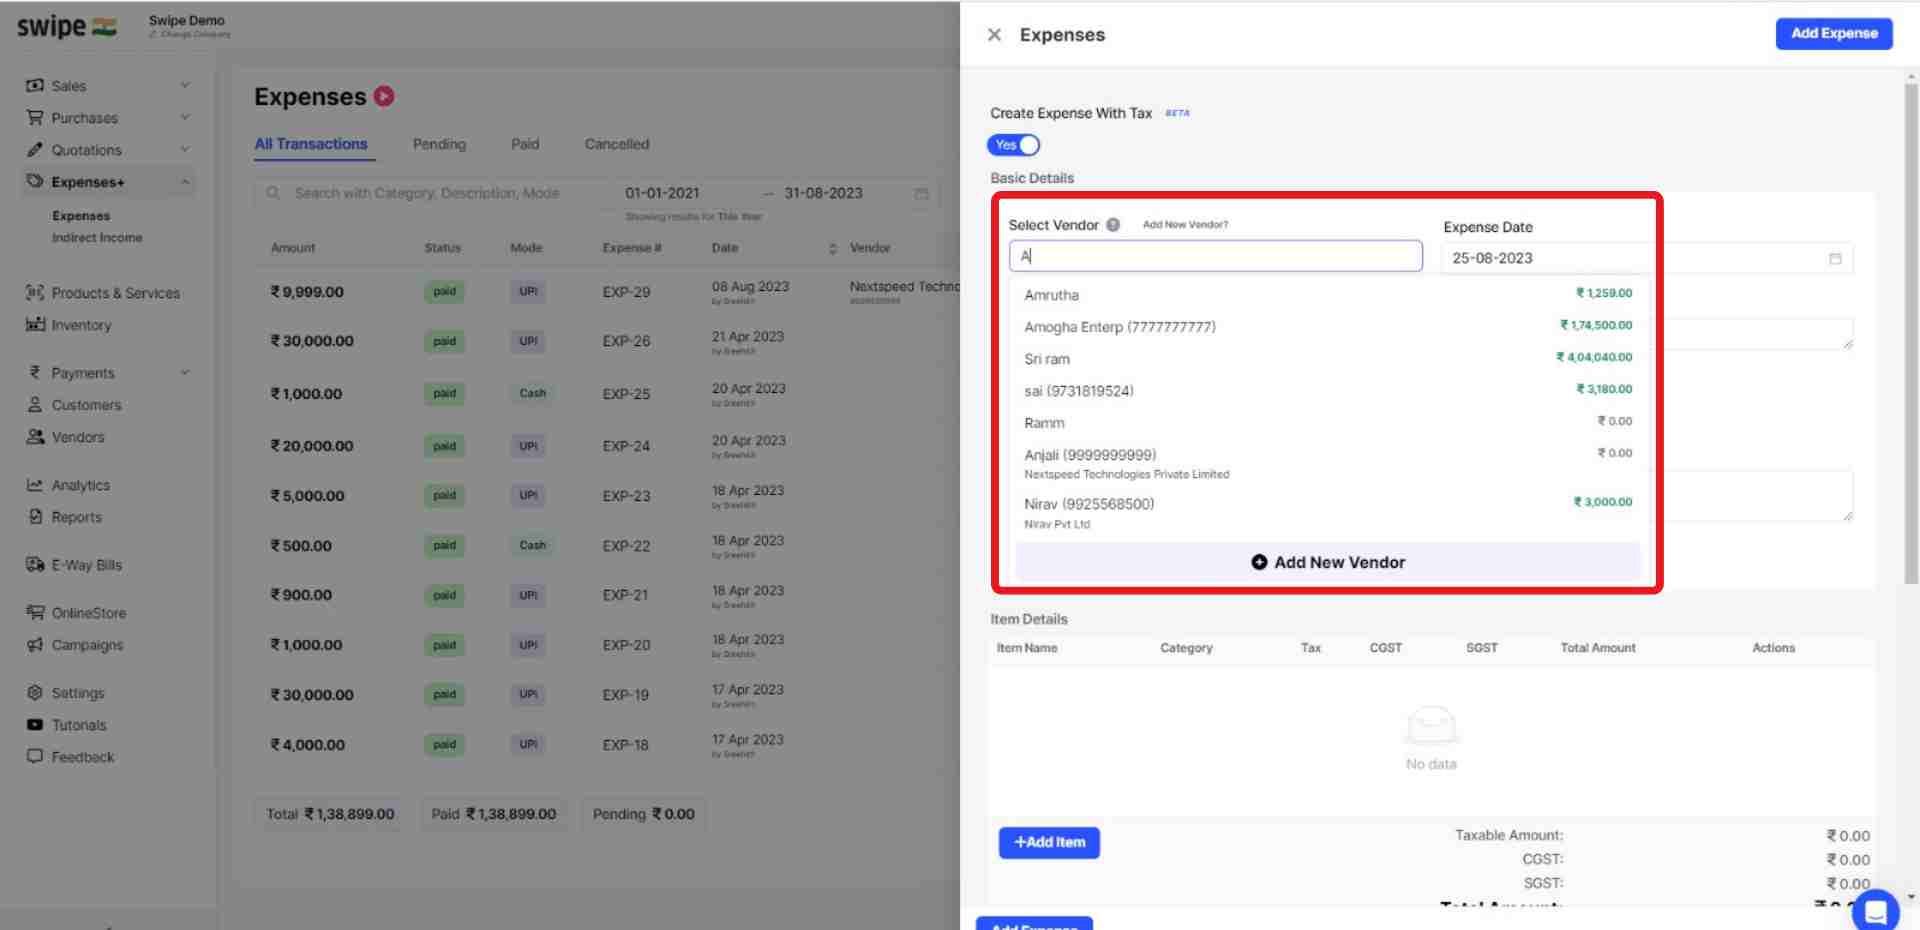
Step 3: Fill in the vendor's details.
You can select existing vendors from the drop-down list or add new vendors by typing in their details manually.
(And fill in the necessary details like expense date, Supplier Invoice date, Amount type, etc. You can also add notes and attach files.)
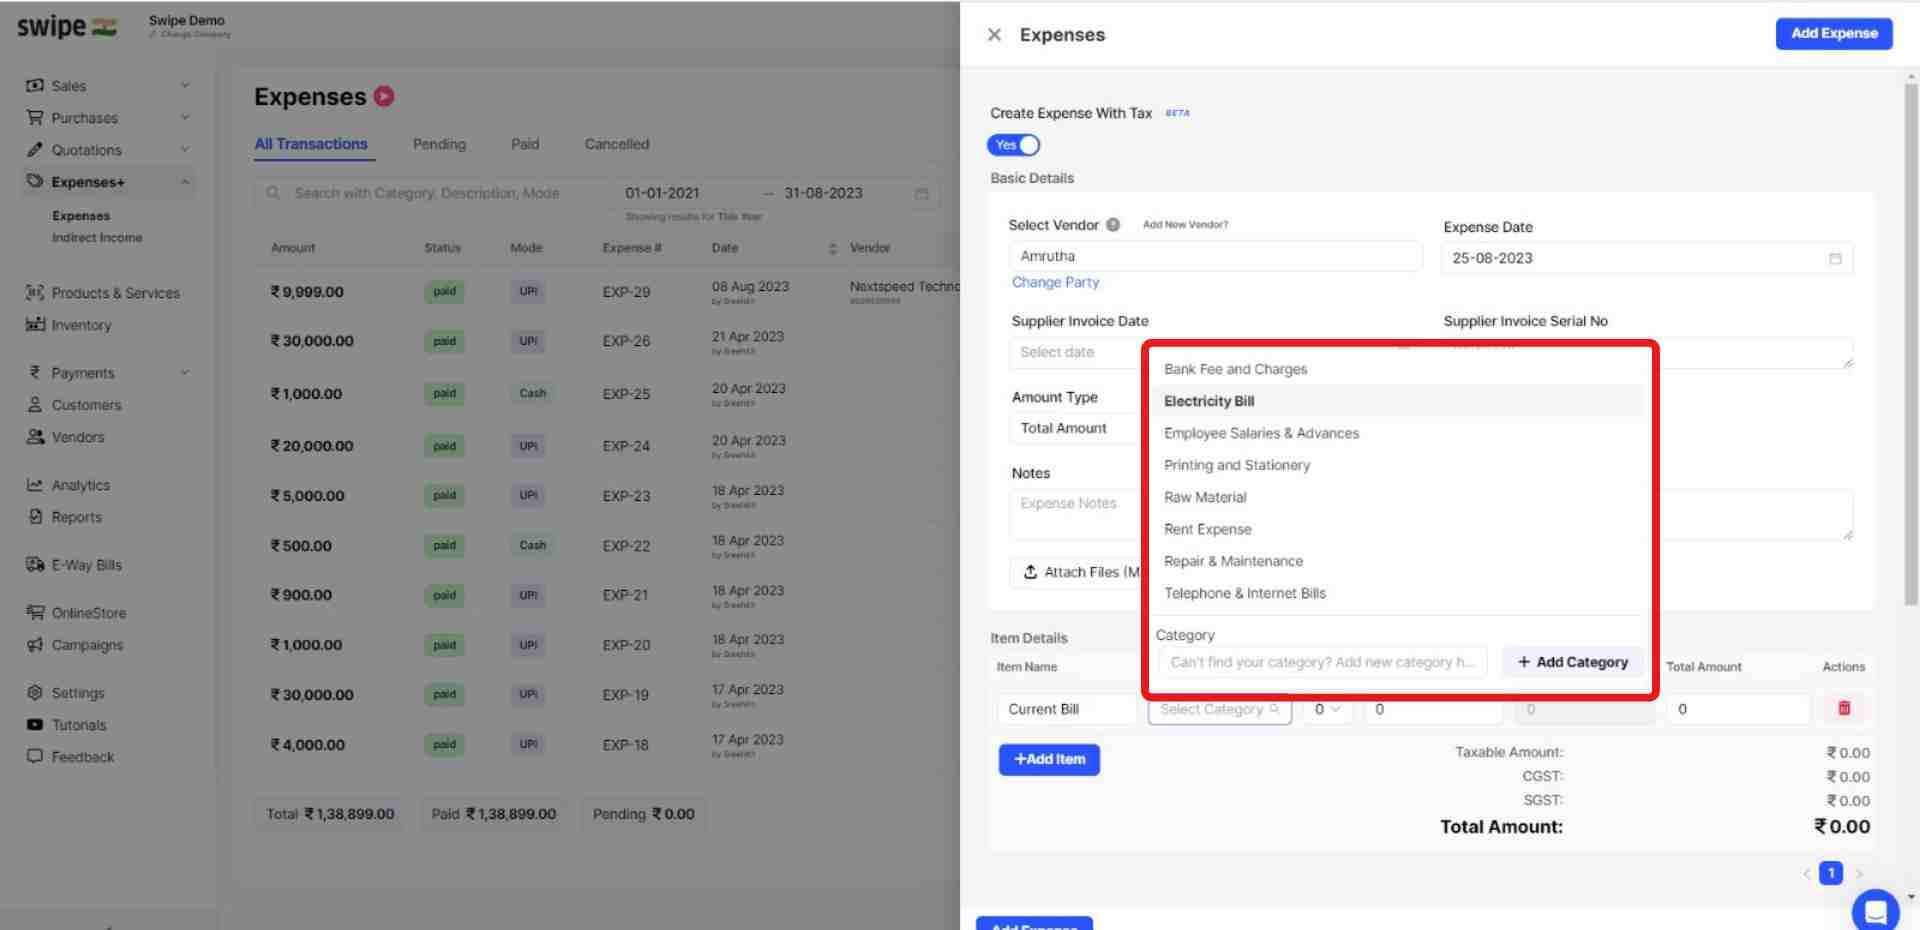
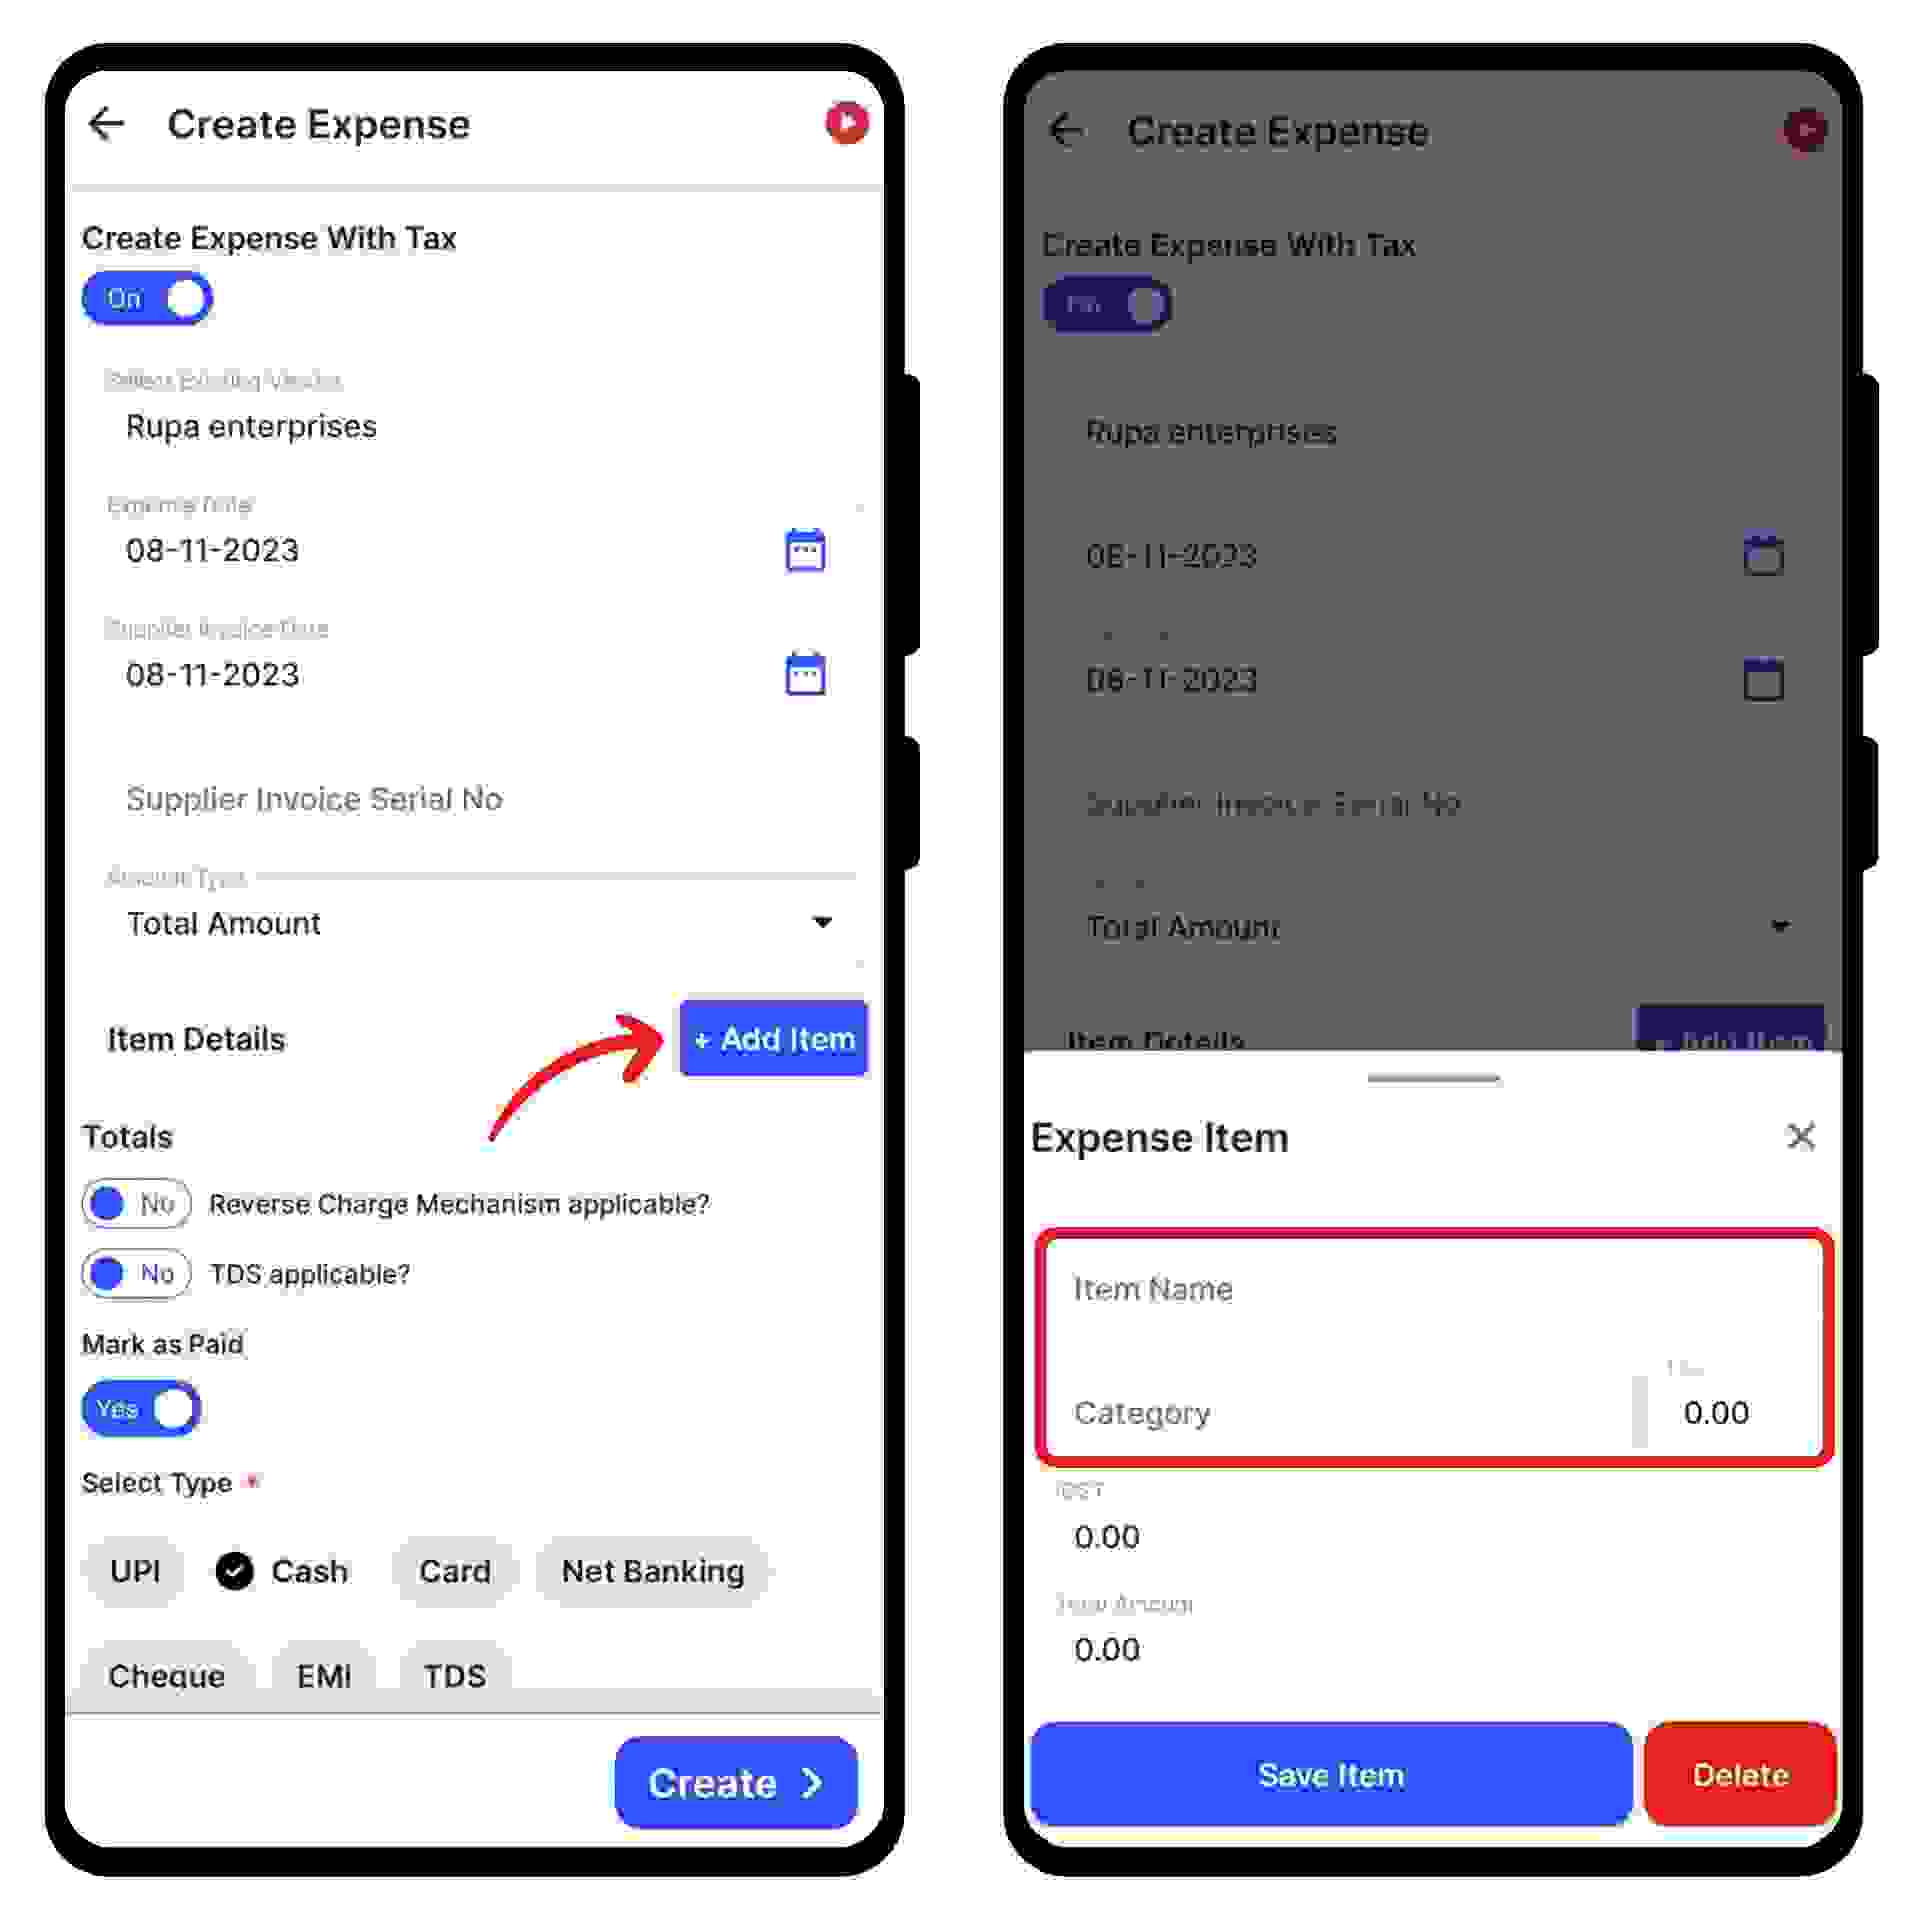
Step 4: Fill in the details of the expense.
Click on “+Add Item”.
A pop-up appears. Here, enter the “Item name” and select the category.
You can select an existing category from the drop-down list or add a new category by typing in its details manually.
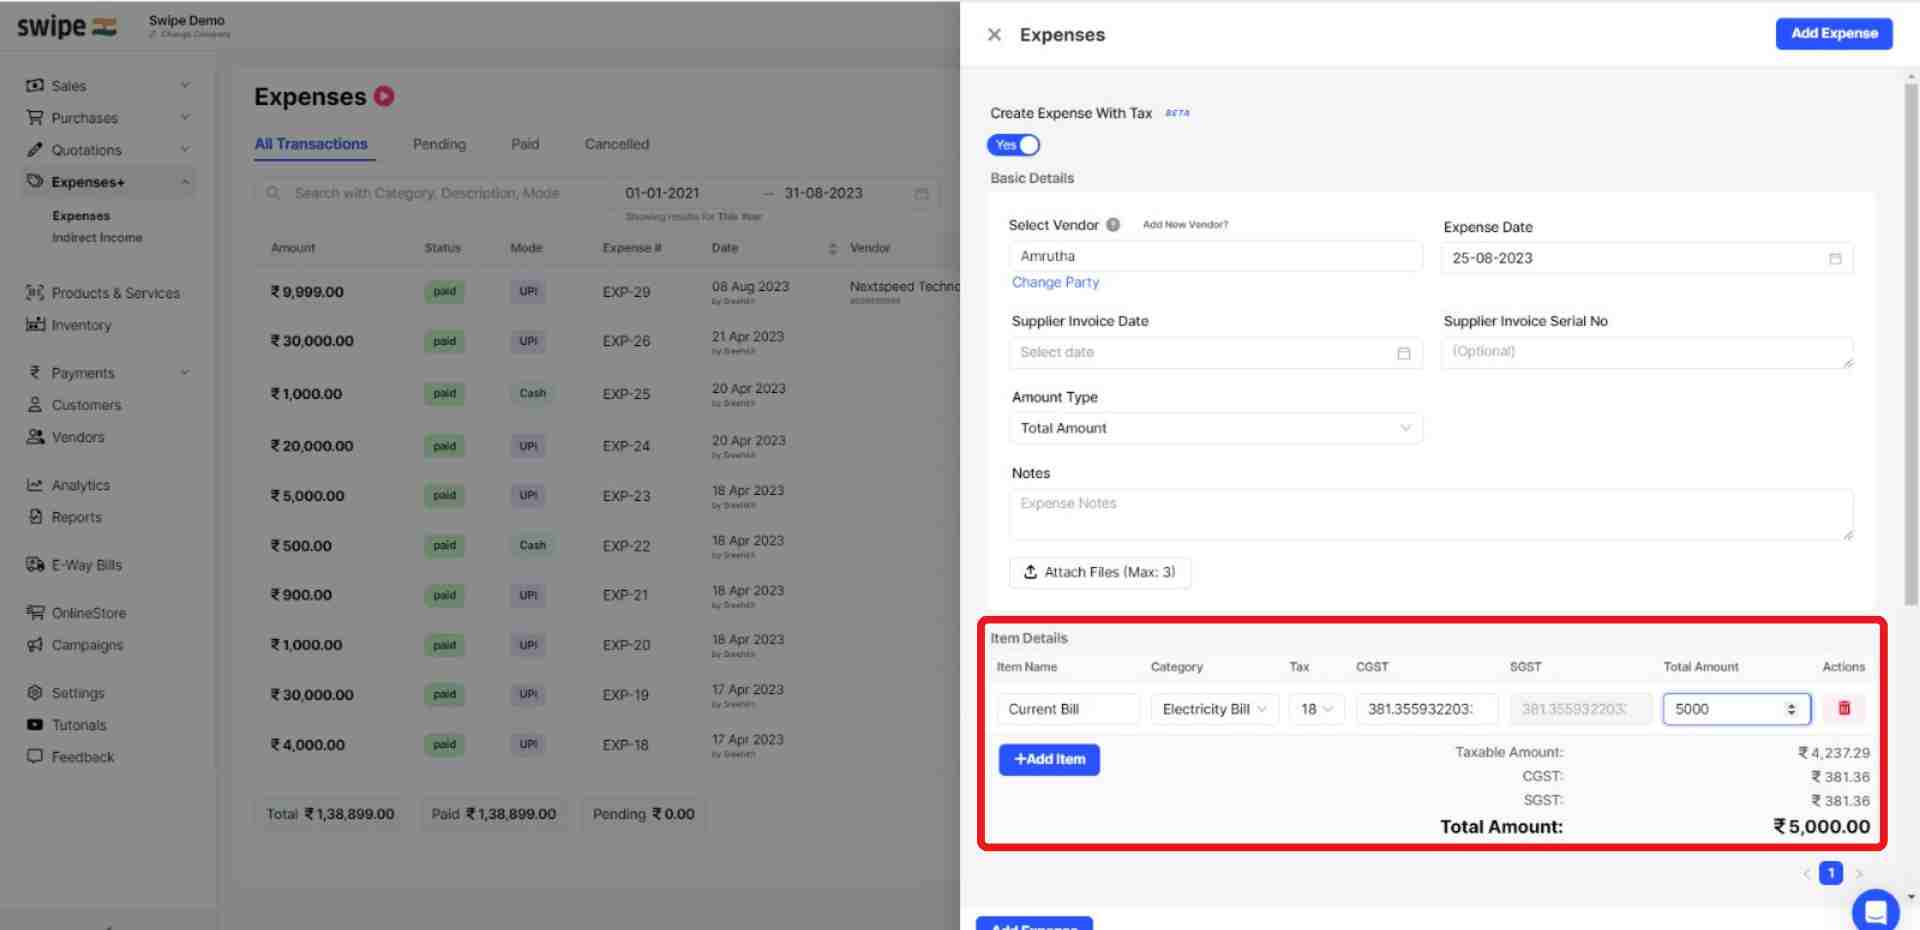
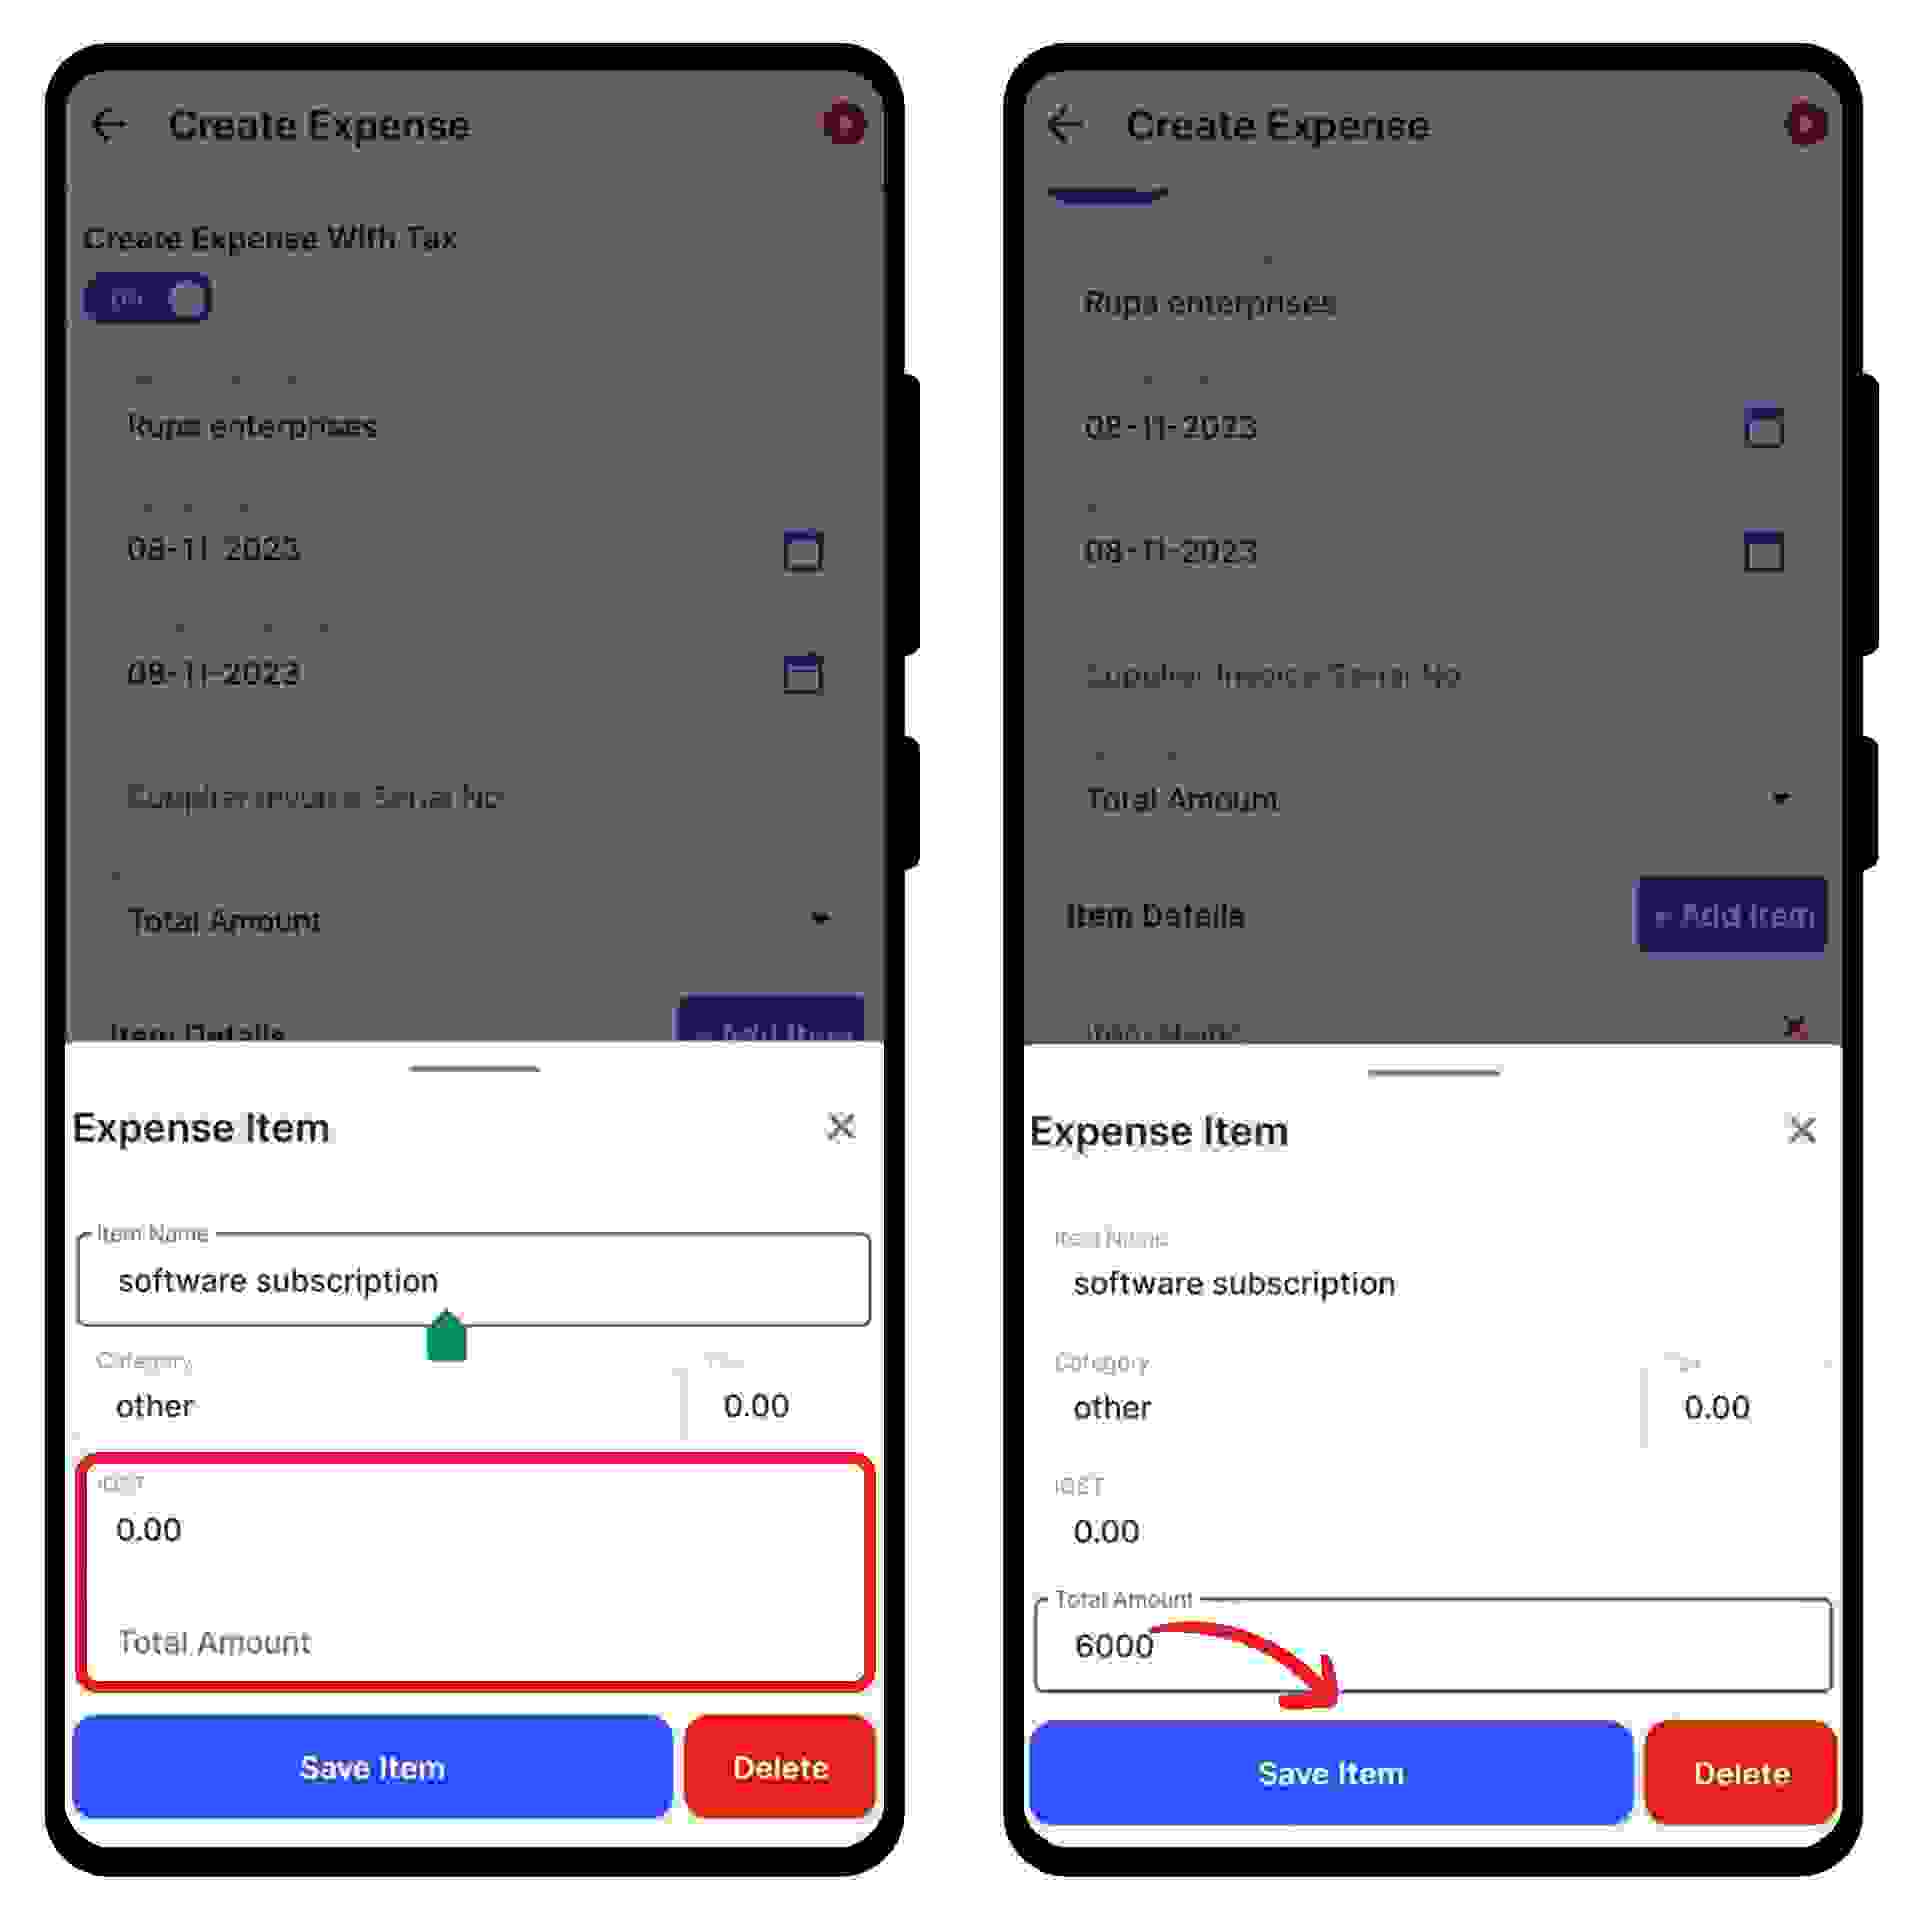
Now, enter the tax amount and the total amount of the expense and click on “Save Item”.
Note: To add more expenses, click on “+ Add Item”, which will add new item rows.
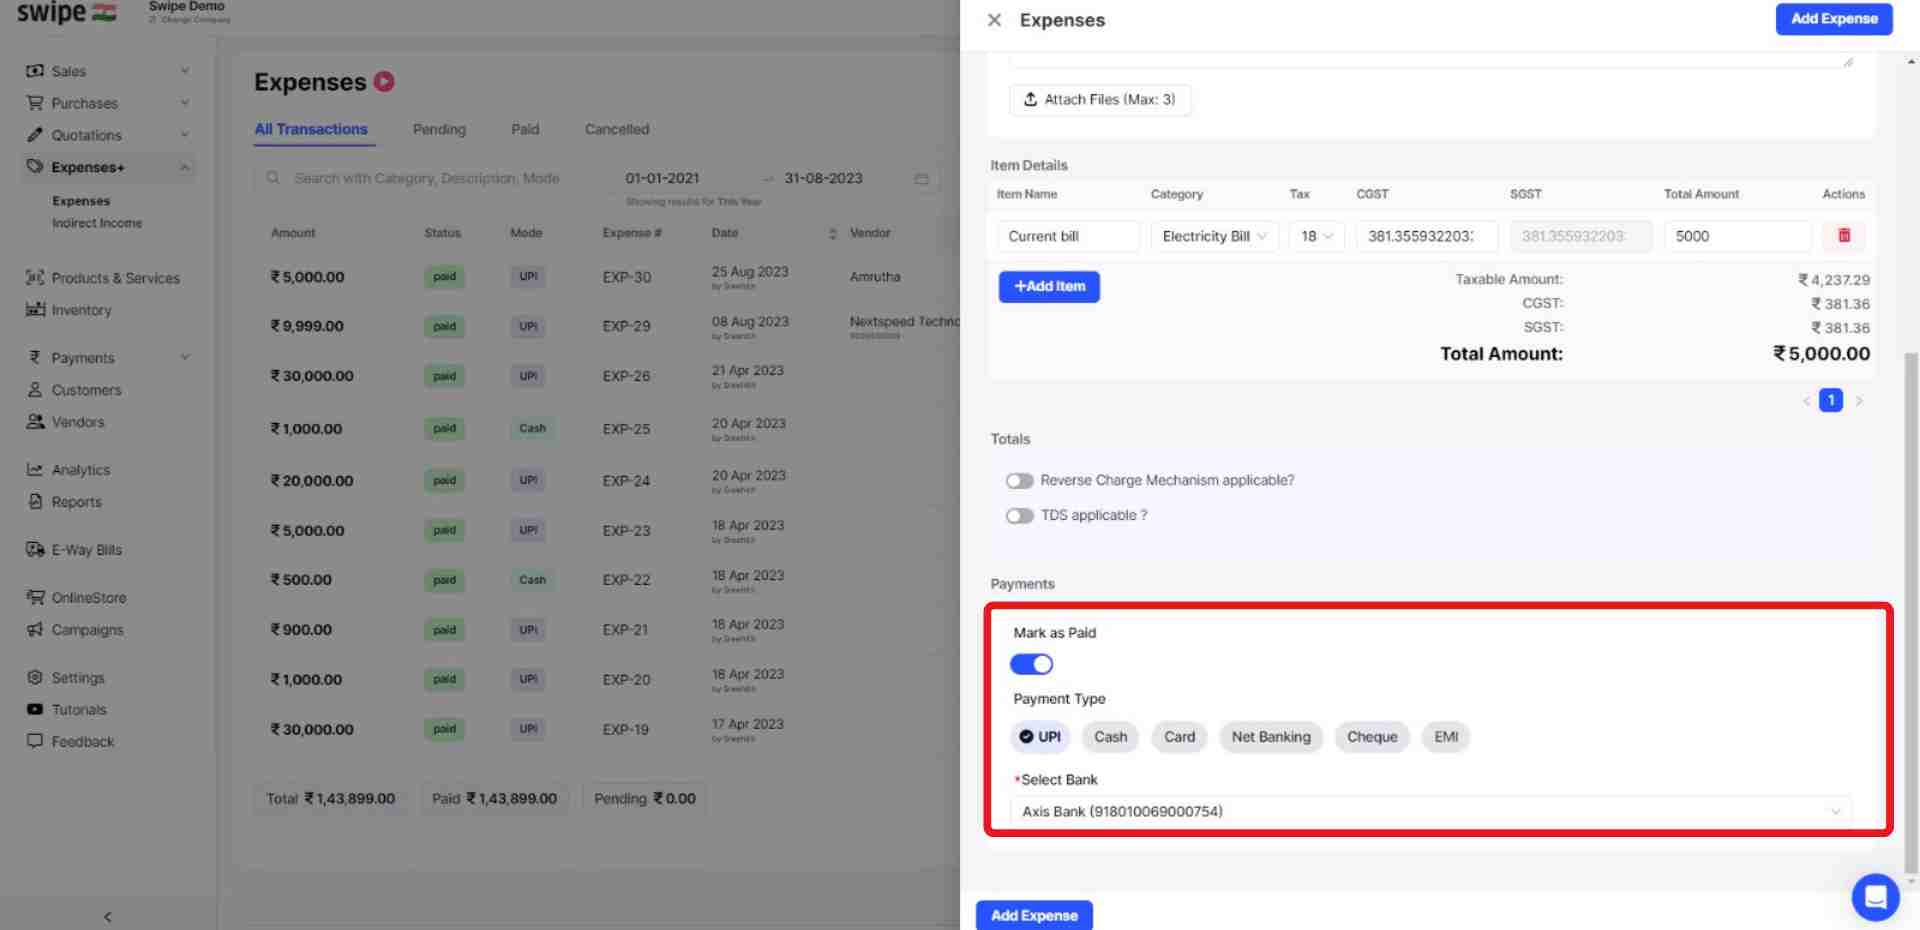
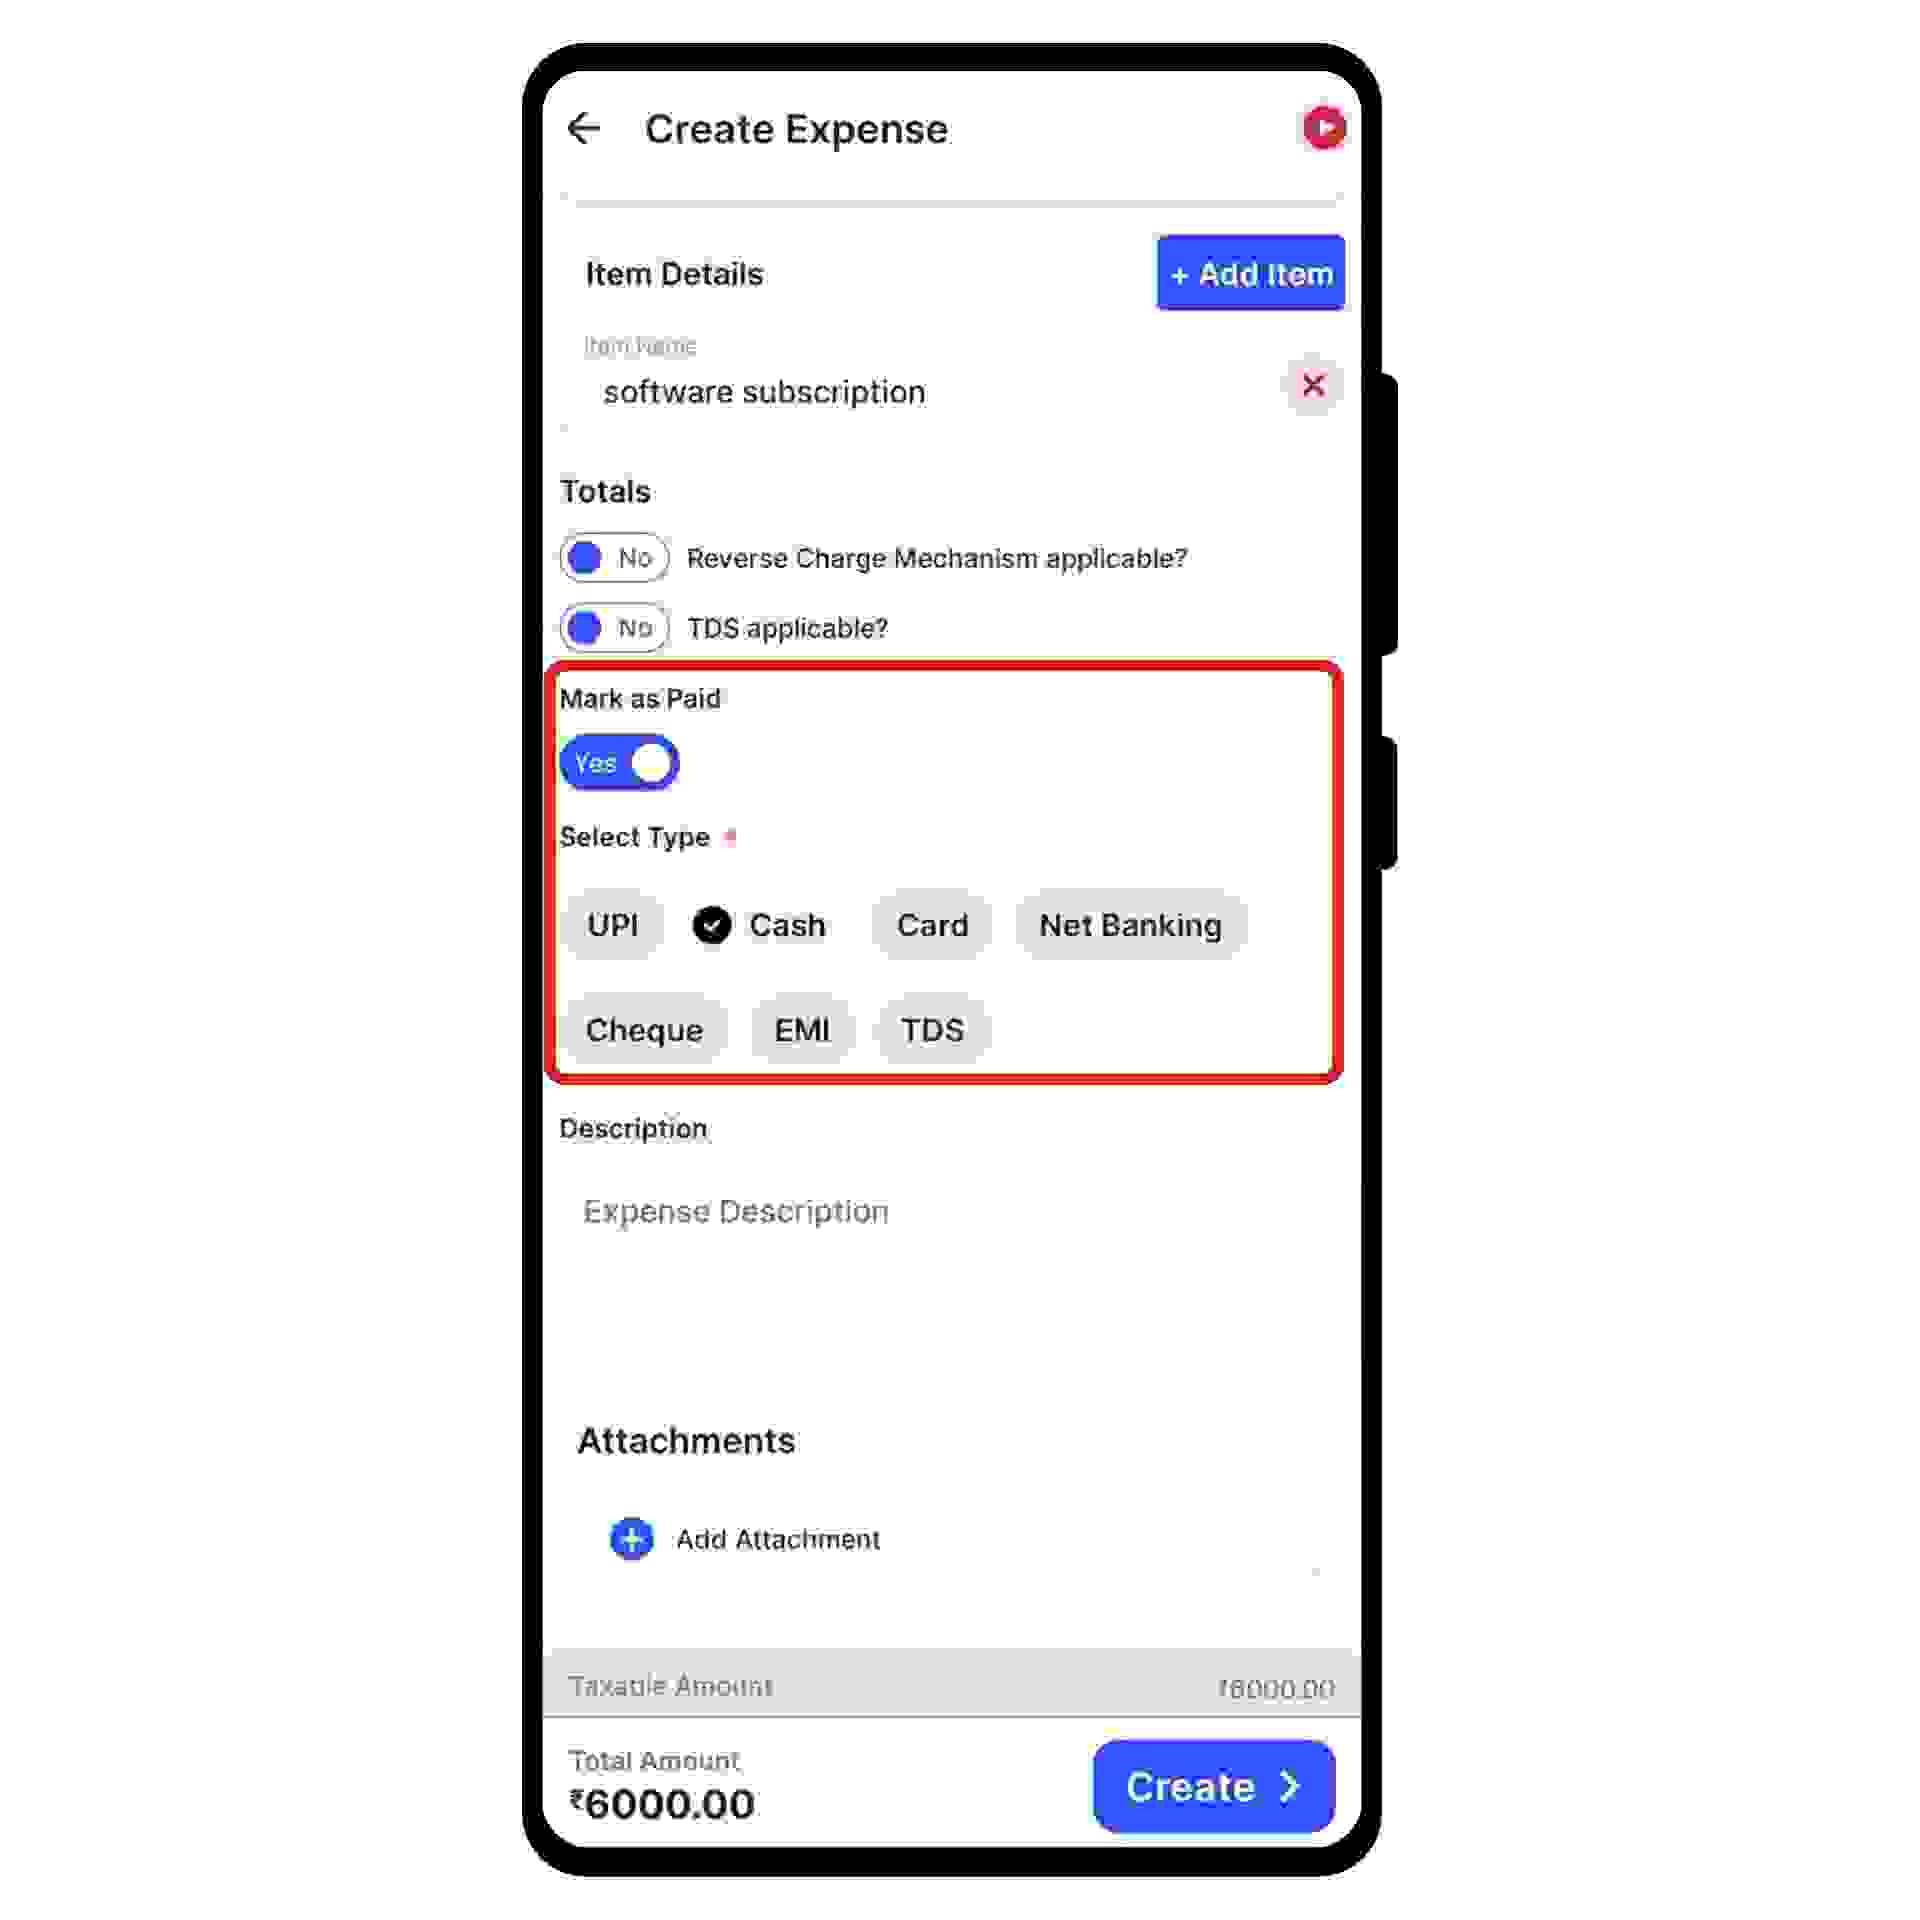
Step 5: Record the payment details.
Go to the payments section and switch on or off the toggle bar to record the payment.
(If paid, you can select the mode of payment and bank account.)
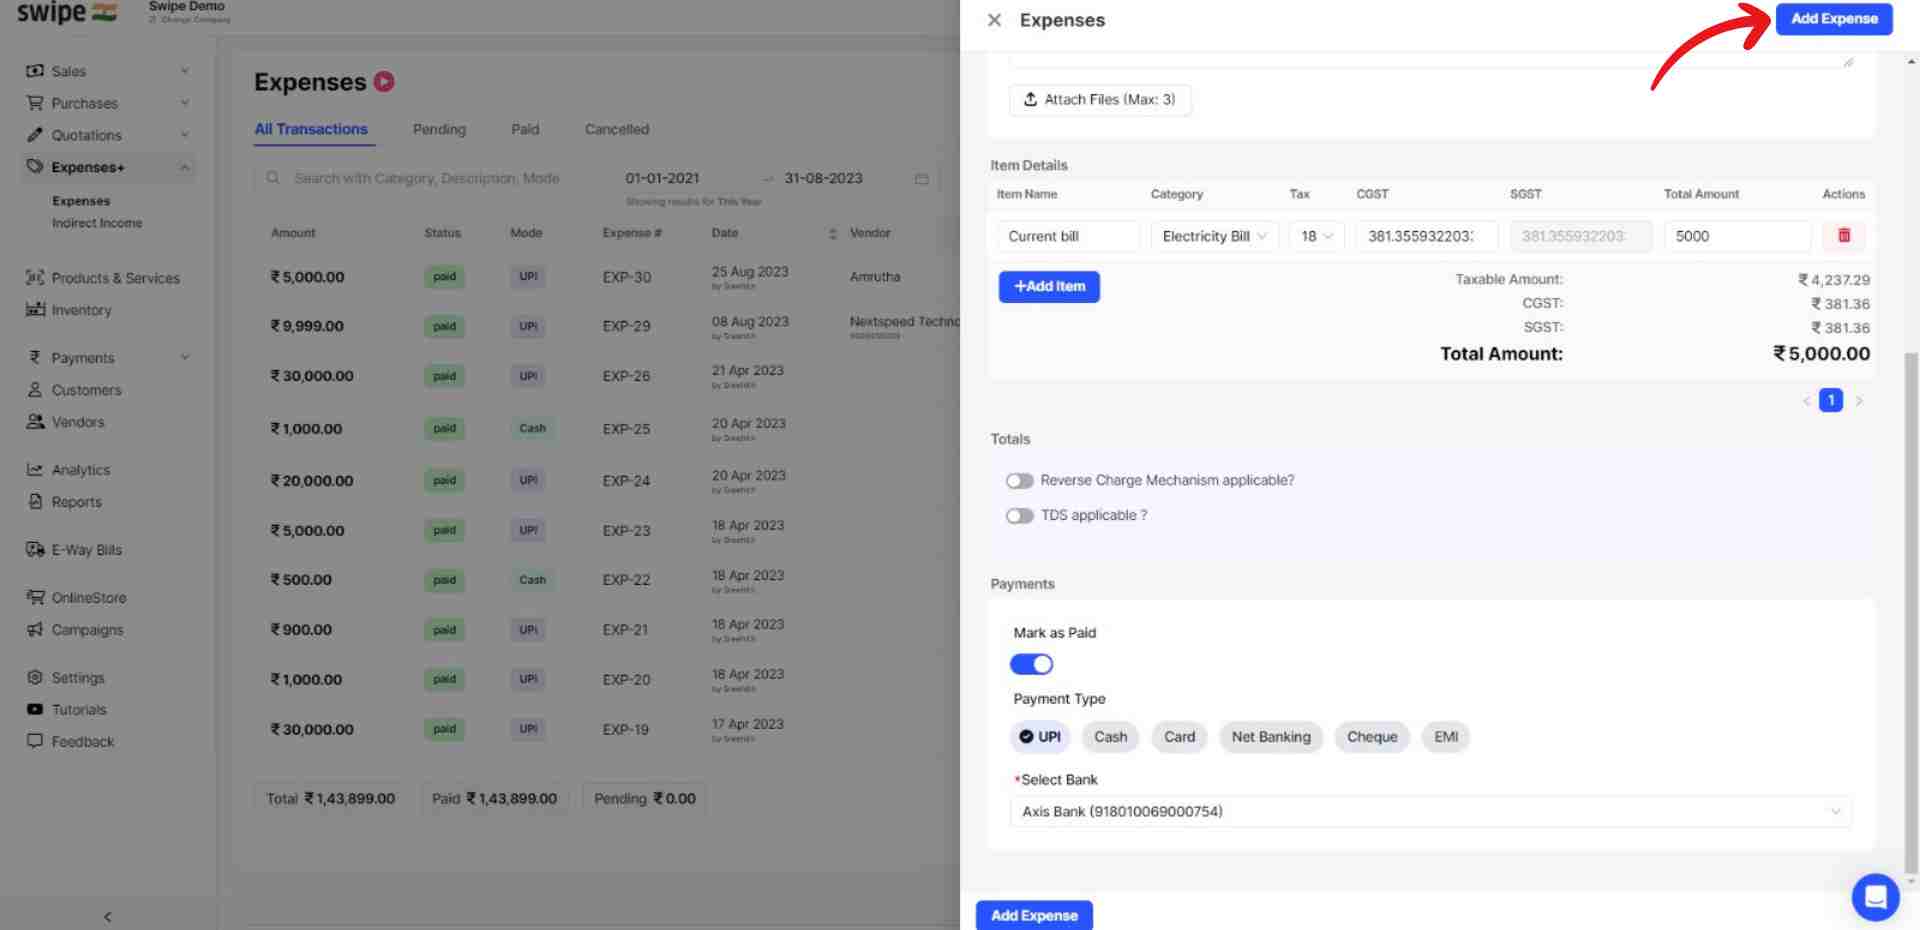
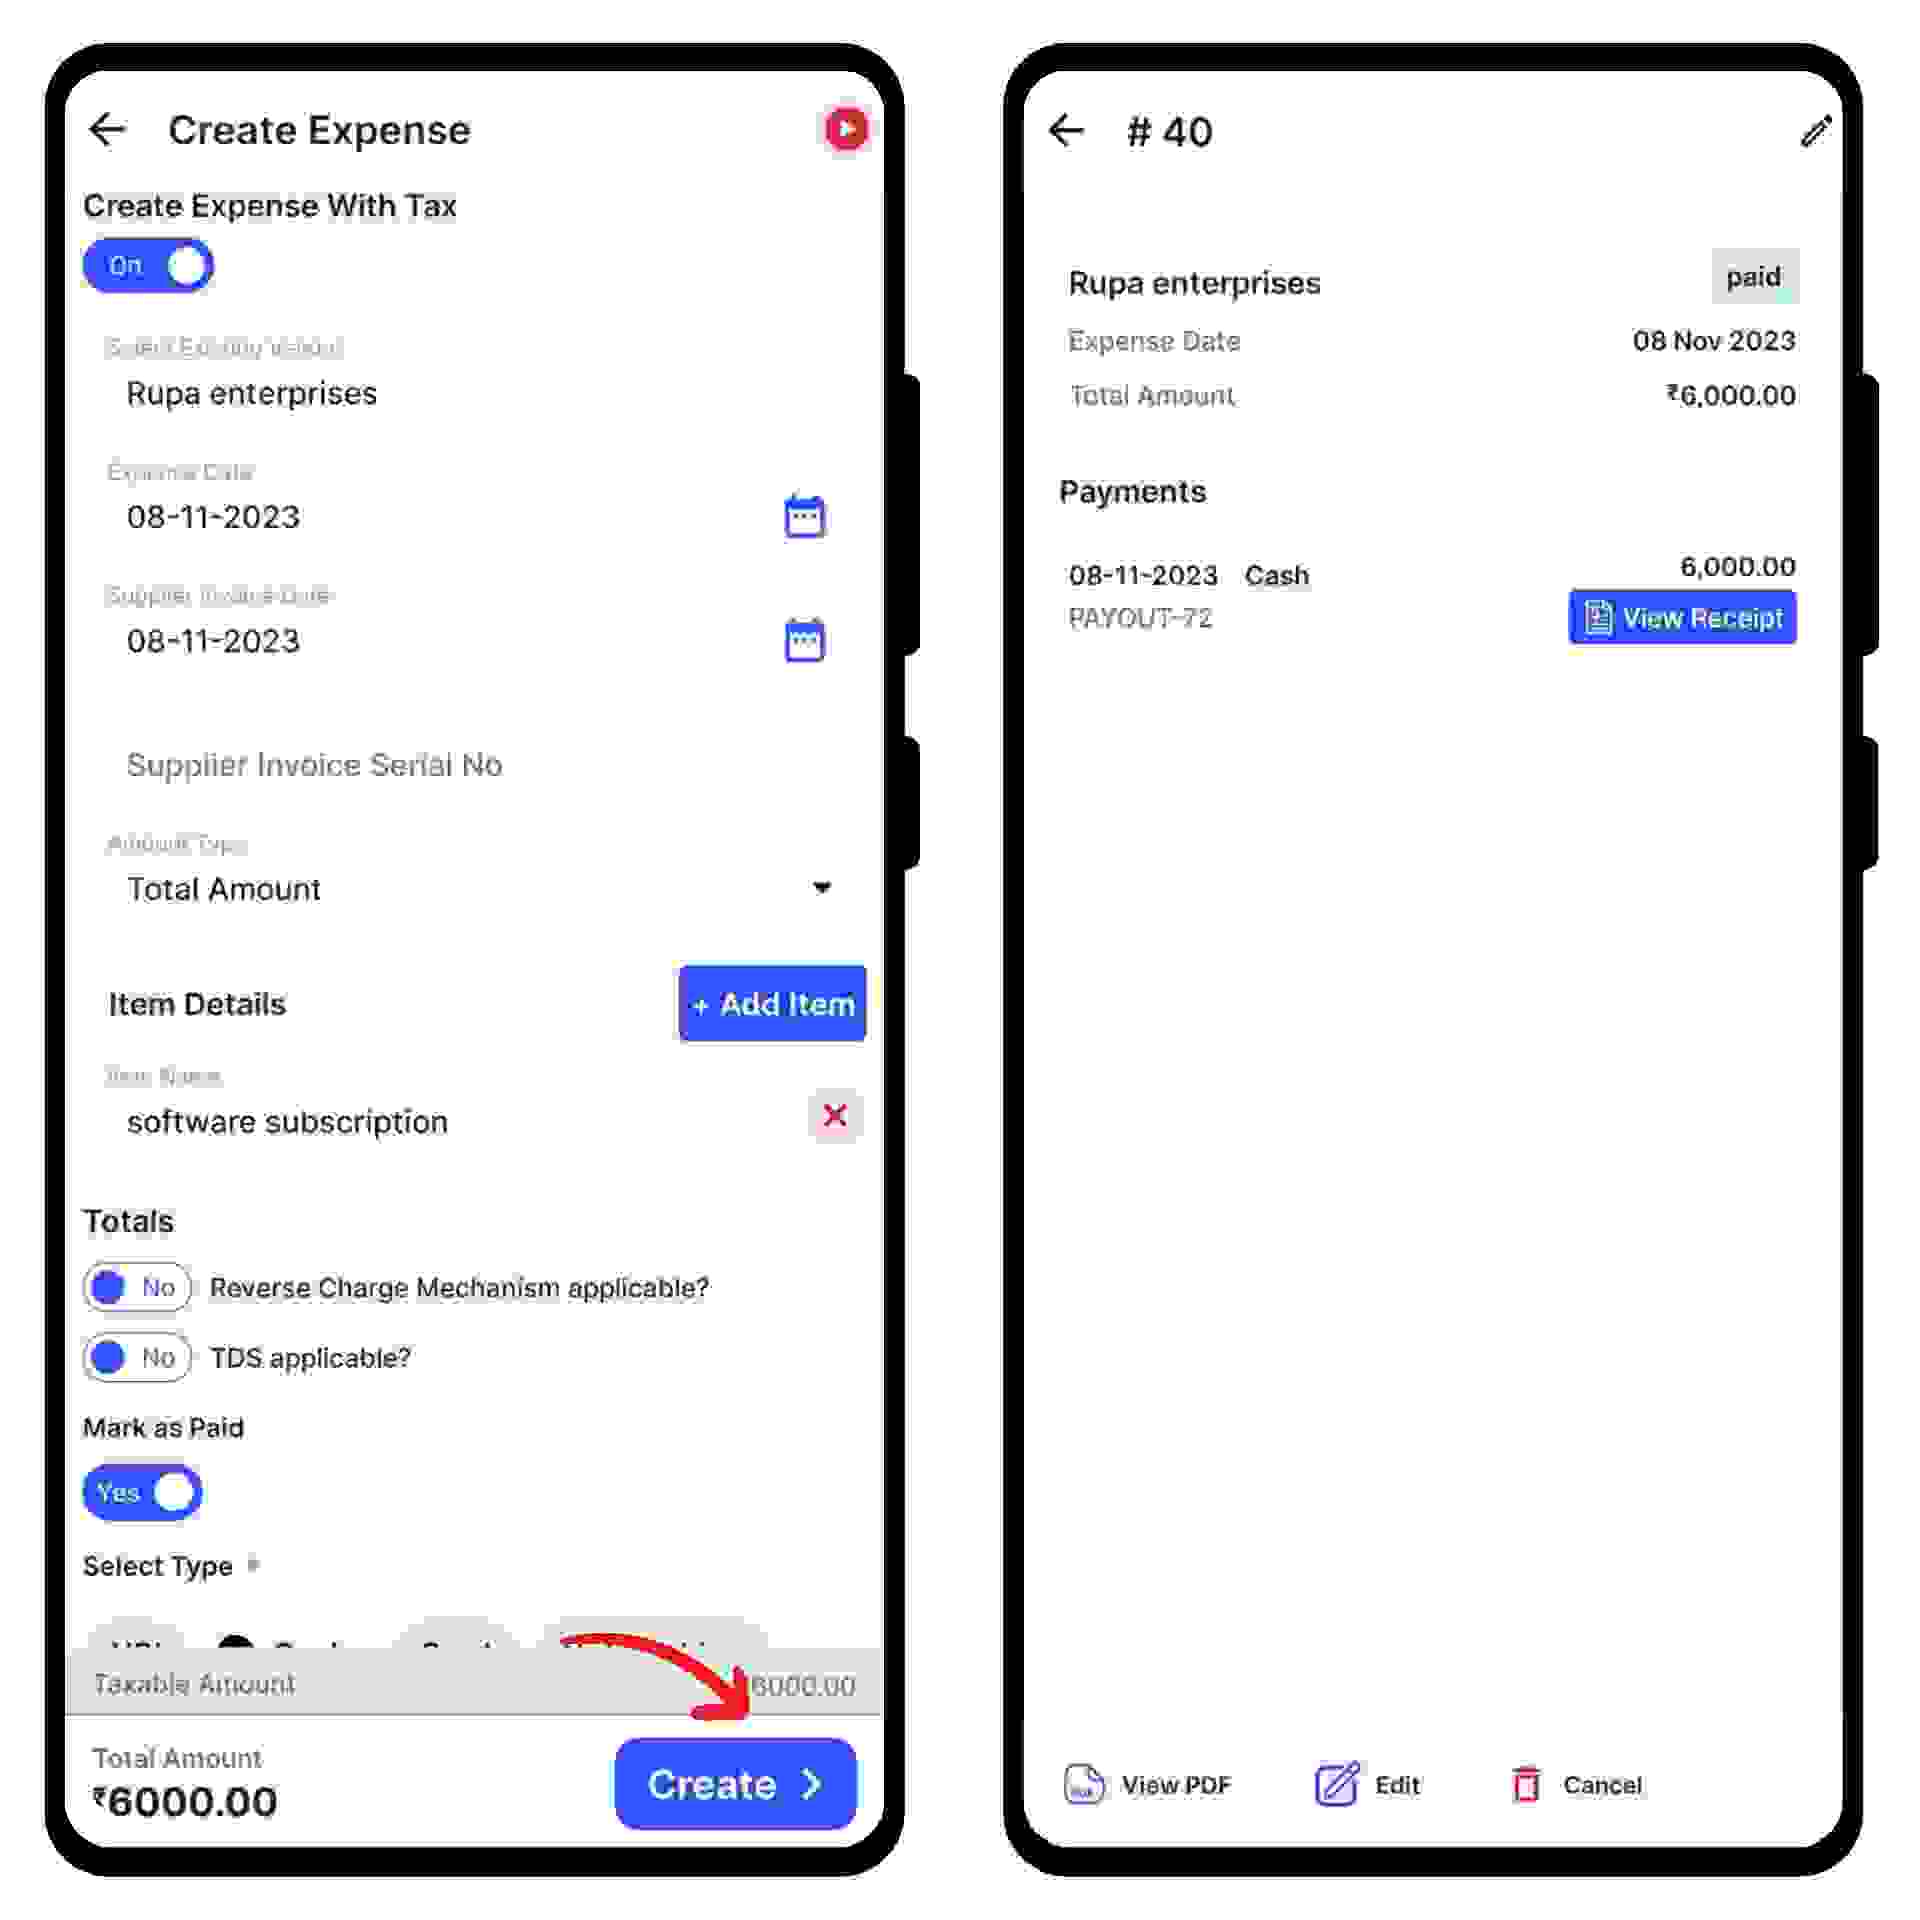
Step 4: Click on “Create”.
Now, click on the “Create” option present at the bottom of the screen.
Congratulations, You have successfully added a new expense.


%20(1).png)
%20(1).png)