Generating electronic invoices for business-to-business transactions has been made obligatory for all enterprises with an annual turnover surpassing 5 crore. As compliant with taxation as it appears, the GST Portal has even stricter regulations for tax adherence and punctual e-invoicing reporting. Any taxpayer is unable to edit an e-invoice once it has been produced. They must abolish the e-invoice with erroneous information and fabricate a novel one but even abolishment of an e-invoice is not feasible after 24 hours of issuance of that specific e-invoice. Furthermore, small businesses struggling with the periodic changes to e-invoicing rules may find relief in a few exemptions, though overall compliance remains crucial for all members of the nationwide market.
If the taxpayer desires to make any adjustments in the e-invoice, the sole possibility accessible to customize/dismiss the invoices is to generate Credit/Debit notes. However, whilst submitting the GSTR-1, taxpayers can leverage the invoice editor to refine the specifics already auto-filled with the support of proper fiscal proof. But in this article, we will explore how one can modify the auto-populated GSTR 1 data of e-invoices with faulty information in greater depth. The e-invoices occasionally contain mistakes, so taxpayers must have a way to correct incorrect information. They can use the invoice editor on GSTR-1 to modify details such as product descriptions, quantities, or prices. However, any changes must be justified with valid documentation. Otherwise, the changes may be denied. It is best to contact the tax authority for guidance if major corrections are needed. Overall, the invoice editor provides a useful way for taxpayers to ensure their tax filings are accurate while maintaining transparency.
Once inside, navigate to the "Returns" section under "Services" from the top bar. Here, click on "Returns Dashboard" to proceed further.
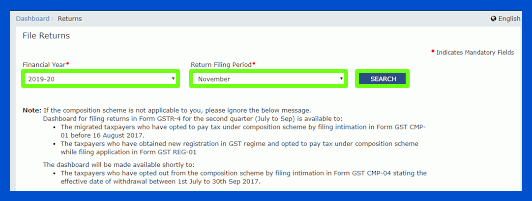
The "File returns" page opens up, requiring you to pick the concerned financial year and filing period from the dropdowns. Click "Search" thereafter.

The auto-filled e-invoice data populates across tables for 4A, 4B, 4C, 6A, 6B, 6C, and 9A and 9B within Form GSTR-1. Feel free to modify the entries in these tables for accuracy before final submission.
Tables 4A, 4B, and 4C contain B2B invoice information while Table 6A lists export invoices. Credit/debit notes for registered entities feature in 9B (CDNR) as does 9B (CDNUR) for unregistered entities.
(In this example, we chose "4A, 4B, 4C, 6B, 6C—B2B Invoices", though any category could demand change.)
Once chosen, redirect to the GST portal. Click the selected tile to access its configurable particulars. The subsequent screen will materialize.
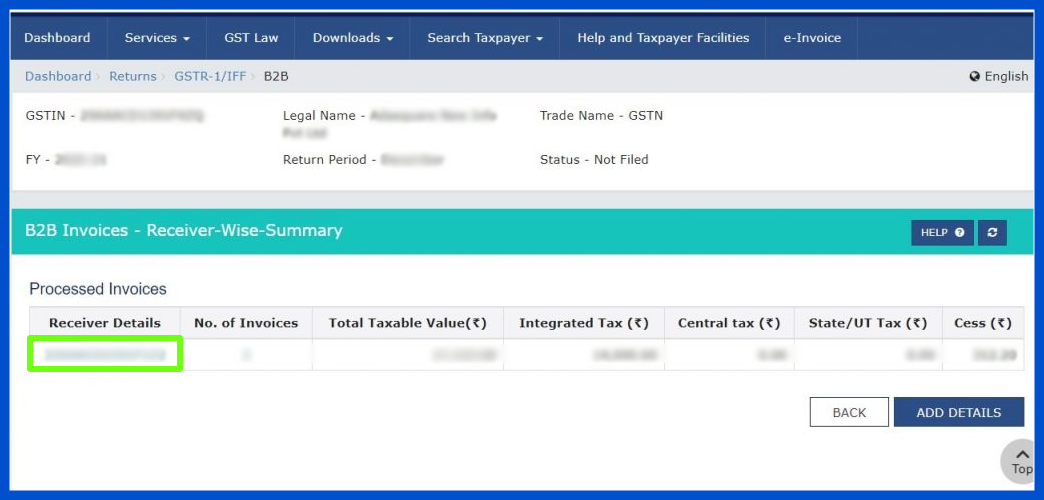
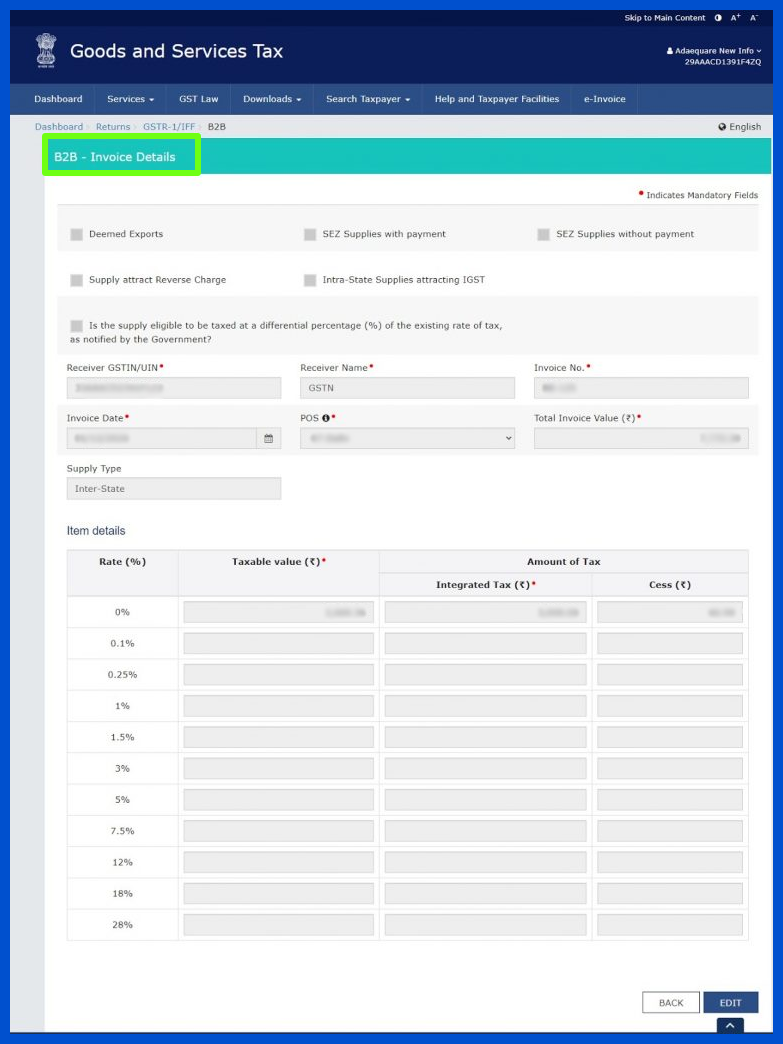
Identify the concerned party by clicking their GSTIN under "Receiver's Details". This brings up invoices involving just that number. Now, scroll through the bills received containing the chosen identification.
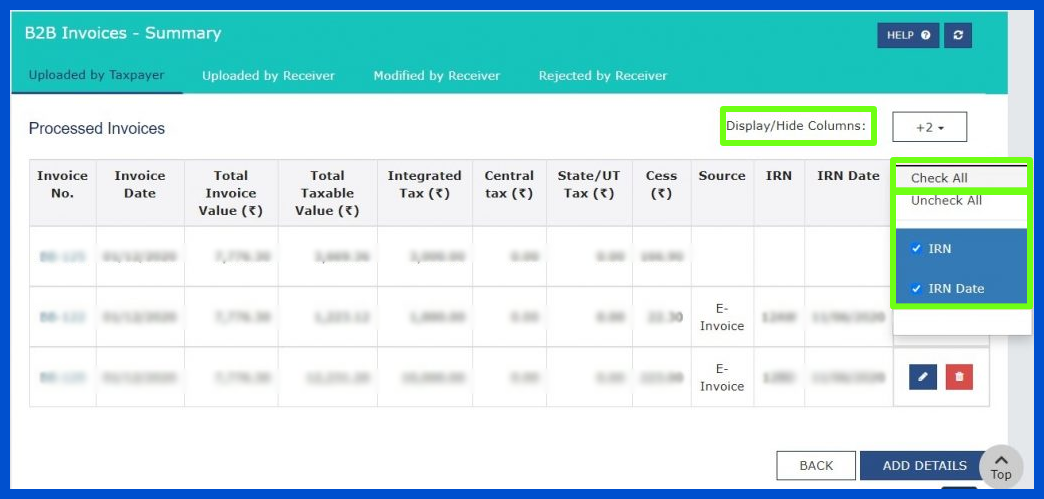
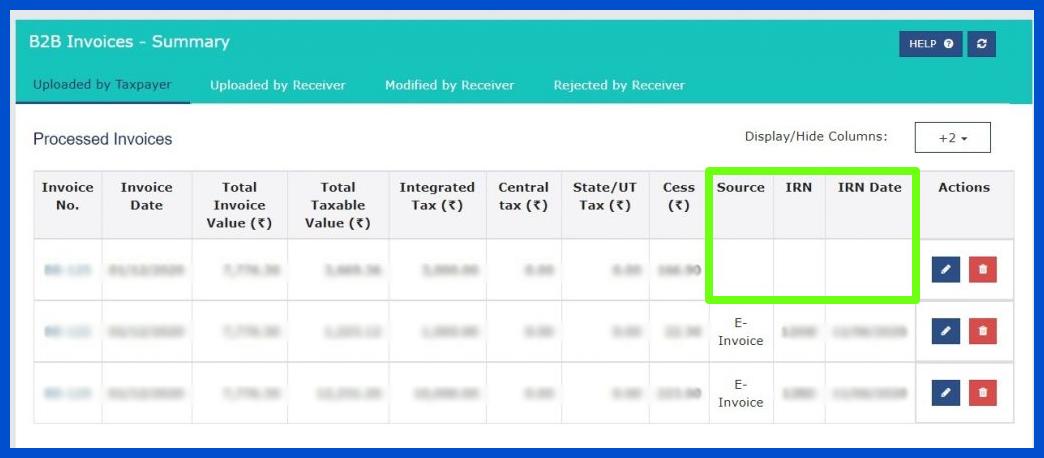
Note: To view all columns, click the drop-down arrows next to "Display/Hide Columns" and select "Check All" from the list. For auto-populated data, certain columns will appear on the "Processed Documents" page if details were uploaded through Form GSTR-1.
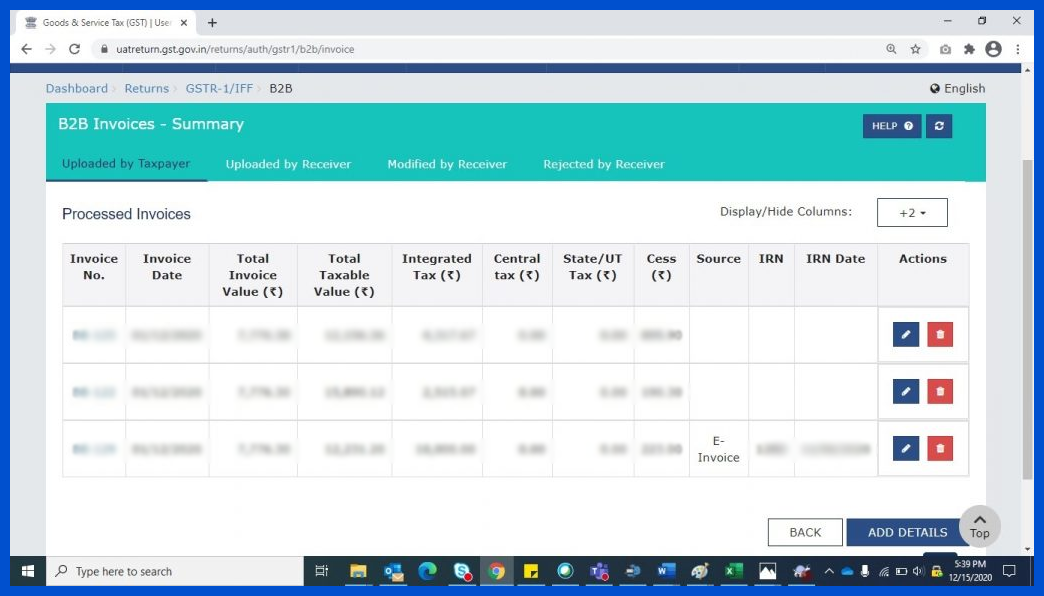
If e-invoice details autofill GSTR-1, you can see the following on "Processed Documents":
1. Source: Indicates where details originated - "E-invoice" means from the e-invoicing system.

2. IRN: The Invoice Reference Number associated with the e-invoice.
3. IRN Date: Date the e-invoice was issued.
By default, the IRN and IRN Date columns remain hidden. Examining uploaded records provides insight into e-invoice origination and links between Form GSTR-1 and the e-invoicing platform. Interactive features help users toggle between columns as needed to extract pertinent information for compliance.
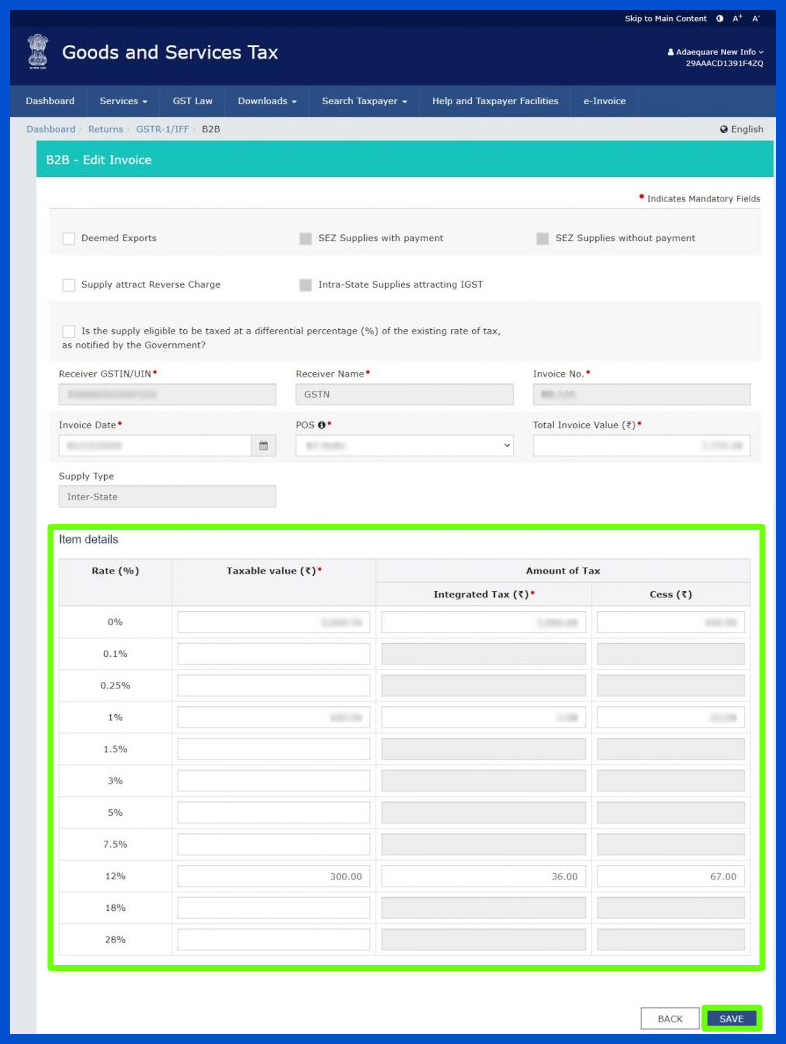
To alter an invoice's particulars, tap the edit icon underneath the 'Actions' column. The invoice data will be shown. Now, click on the 'Edit' button at the bottom of the page. The item details sections will become chargeable.
Produce modifications to the invoice details anyplace required. You can then click on the 'Save' button to store these changes. Take note: The 'Save' button will only be shown on the page after clicking on the 'Edit' button.
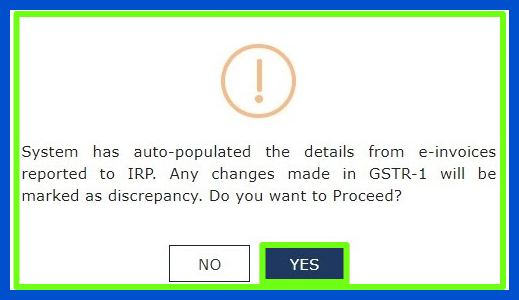
A pop-up will surface on the screen, necessitating confirmation from the user. Click on the 'Yes' button to proceed, which will close the message window. Various duties must be completed to flawlessly edit an existing invoice.
While some amendments are quick and simple, others may require more significant alterations to several invoice particulars. Ensure you have designated enough time to carry out all needed changes successfully before confirming the edit.
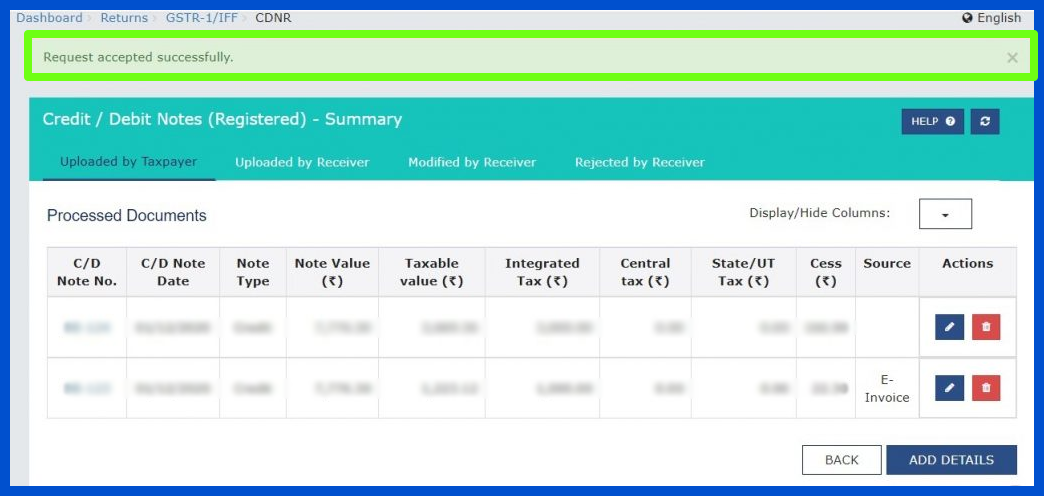
Note: Any edits made to the auto-populated e-invoice details in Form GSTR-1 will result in the removal of the "e-invoice" source marker. Additionally, the Source, IRN, and IRN Date columns will be cleared of their populated data.
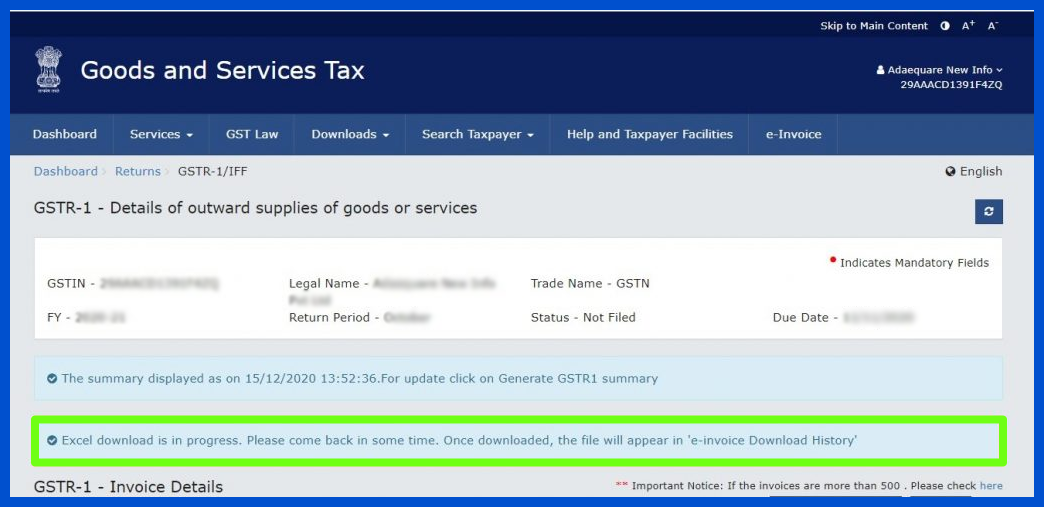
By clicking the "Generate GSTR-1 Summary" button at the bottom of the page, you can update the invoice details with the new totals.

Once edits are applied to previously submitted e-invoice information in GSTR-1 and the changes uploaded to the portal, an alert may be received from the GST department regarding the modified submissions. In this event, verifiable financial records should be promptly supplied via email to corroborate the made alterations.
Once edits are applied to previously submitted e-invoice information in GSTR-1 and the changes uploaded to the portal, an alert may be received from the GST department regarding the modified submissions. In this event, verifiable financial records should be promptly supplied via email to corroborate the made alterations.
Generating a comprehensive GSTR-1 summary requires diligently populating recipient details to accurately capture transactional reports awaiting additional action. Follow these steps to construct an informed summary:
Step 1: Begin by navigating to the base of the webpage, granting visibility into the full scope of recipient information cataloged throughout multiple business quarters. From there, activate the option to "Generate GSTR-1 summary," initializing the compilation process.
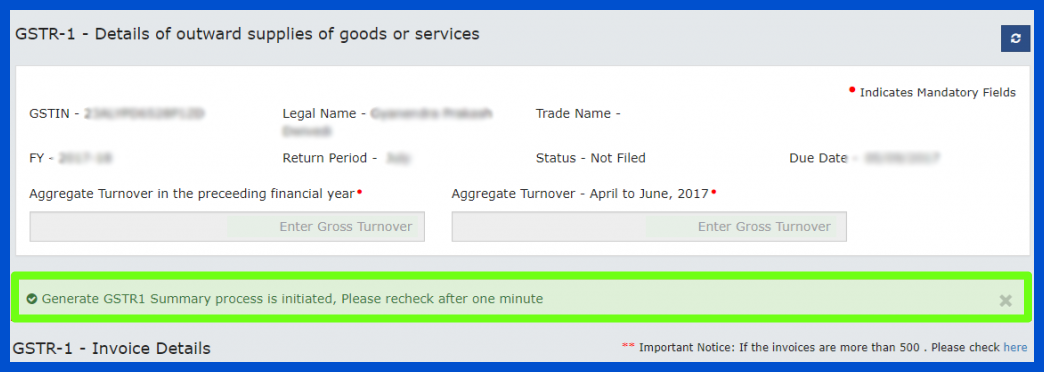
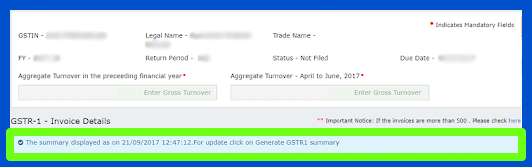
Step 2: The system will then alert you that summary generation is underway, requiring a brief waiting period to cross-reference and condense disparate transaction records into a cohesive report. Once amalgamated, a notification confirms summary completion for thorough review and submission.

Step 3: With a single click, your inputted recipient specifics are deftly compiled into a robust informational summary for expedient tax compliance. An on-screen message guides you to check back momentarily as all requisite data points are pulled together and condensed into a cohesive document portending forthcoming approvals.
Step 4: The streamlined process culminates with a displayed confirmation that the autogenerated summary now awaits designation, closing the loop on thorough reporting obligations.
It's vital to take note that the GST Portal mechanically produces the abstract at intervals of half an hour. Nonetheless, if you need to see the summary promptly after including bills, you can tap the 'Produce GSTR-1 Summary' catch. Bear in mind that this prompt age can just be done at spreads of 10 minutes. On the off chance that you attempt to create the rundown before 10 minutes have passed, you will get a blunder message toward the highest point of the page.

Go to the GST entryway promptly and enter approved subtleties.
Currently, pick “Returns” from the route bar over and tap on “Returns Dashboard”. Here, you can either sit tight for 30 minutes for the subsequent computerized outline age or tap "Produce GSTR-1 Summary" presently to download the current e-invoice information without anyone else rapidly.
Now the "File returns" page appears on the screen. From the drop-down menus, choose the fiscal year and corresponding filing period for which you want to access returns. Then click the "Search" button to continue.
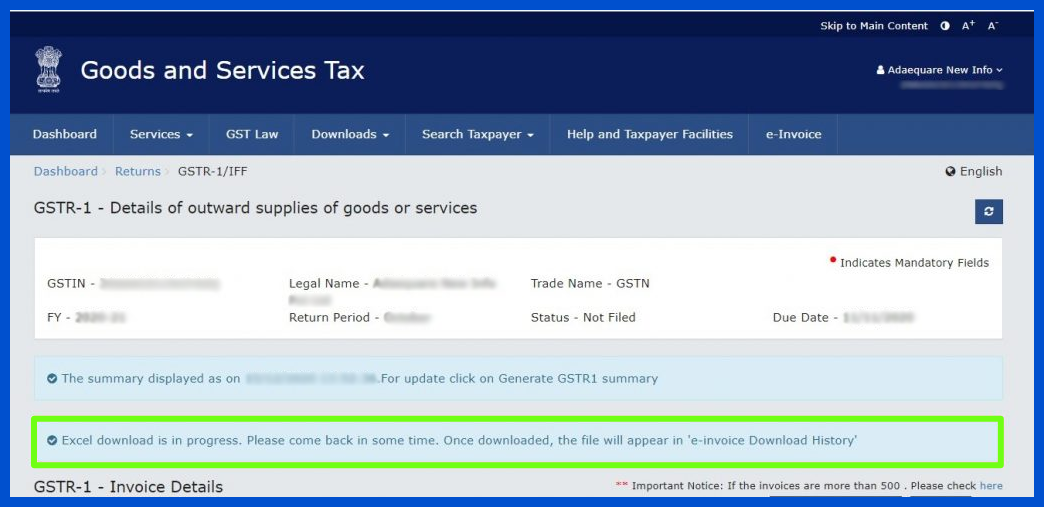
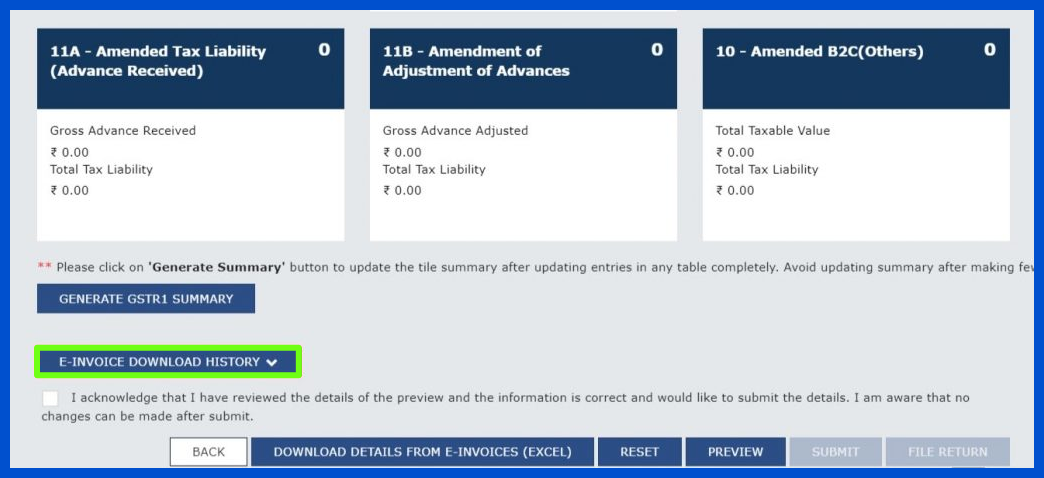
To obtain invoice data in a digital format, press the oversized "Download Details from e-invoices (Excel)" button prominently displayed on the interface.
A brief notification will instantly flash to confirm the action.
From here, tap the compact "E-invoice download history" button to access previously saved invoice files stored on your local device.
The list of the last five invoices acquired through this digital process will automatically populate in the designated "e-invoice details" section for convenient reference.
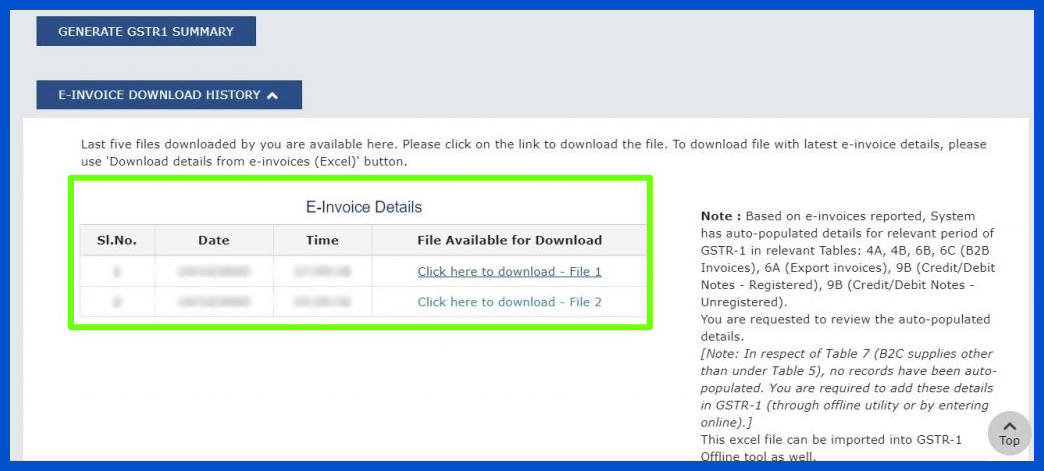
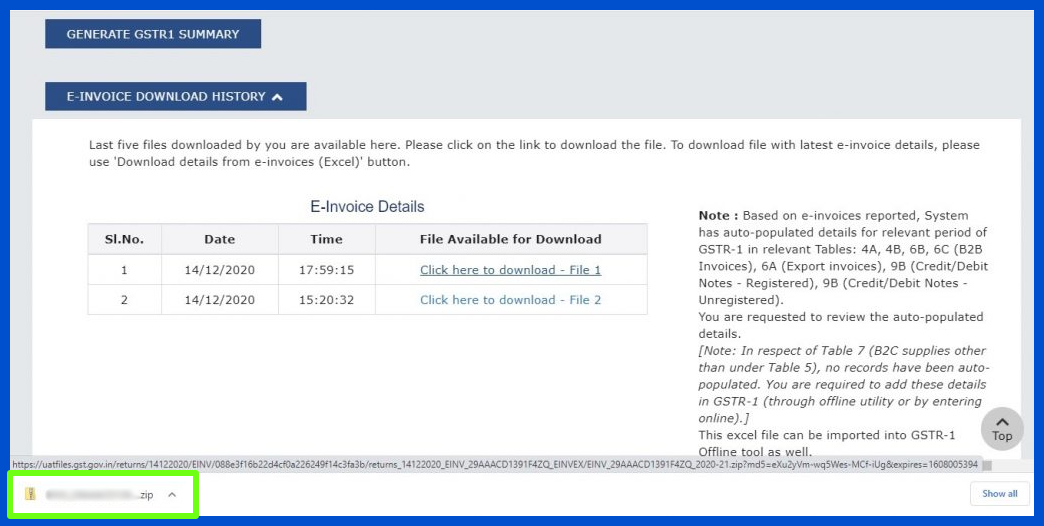
Now, with great interest, click upon the ‘Click here to download File 1’ connection to retrieve the Excel documentation.
The downloaded report will automatically be conserved in the neighborhood drive of your contraption. Additional information connecting to access this analogous file will remain presented at the underside of the page, should you necessary to revisit or reexamine the particulars therein at a after date.
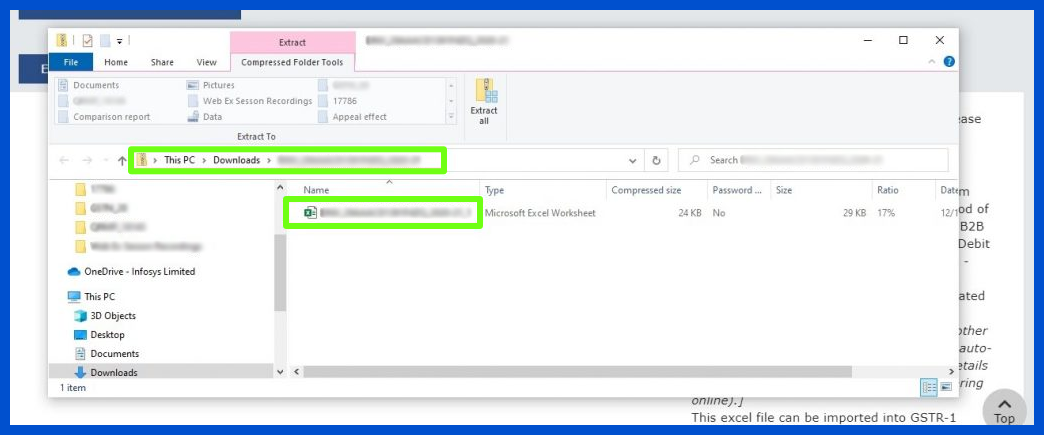
Select the file sign to unseal the catalog on your contraption, then double-click on the Excel report to launch it.
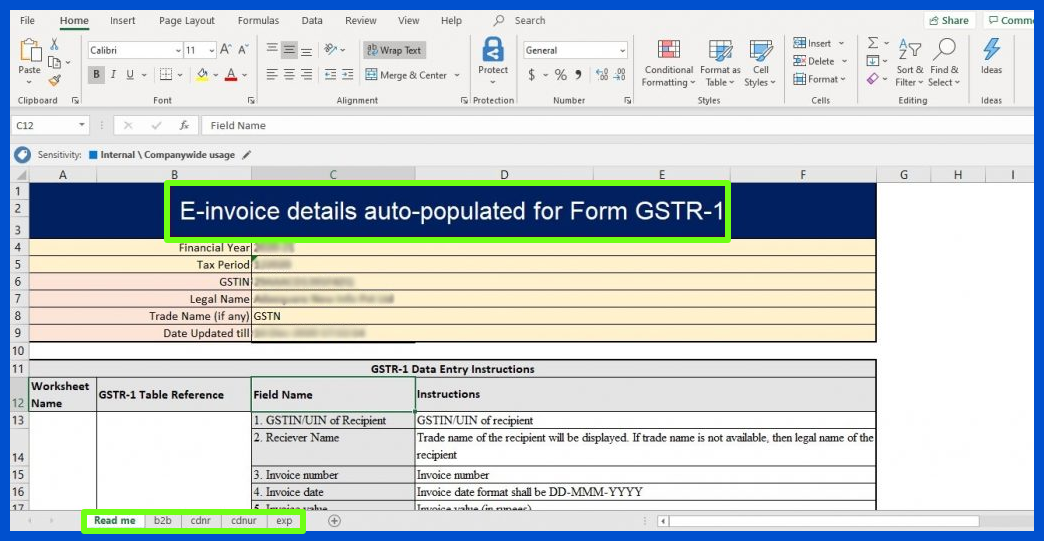
You will be fascinated by the diverse invoice particulars that have been naturally pre-populated in Form GSTR-1 and are exhibited in different spreadsheets inside the file. These spreadsheets cover dissimilar tables and can be approached by clicking on the tabs at the underside to navigate between the dissimilar sheets showing the tax details.


.png)